Wiring a Dimmer Switch for Incandescent and LED Bulbs Cor...
- 时间:
- 浏览:34
- 来源:Easy Home Repair & DIY Guides
H2: Why Your Dimmer Switch Isn’t Working—Even When It’s "LED-Compatible"
You swapped your old incandescent fixture for an LED吸顶灯更换安装, installed a $25 "dimmable LED" dimmer, flipped the breaker back on—and got either silence, buzzing, or rapid lights flickering. Worse: the circuit trips after 90 seconds. This isn’t user error. It’s mismatched load types, outdated wiring assumptions, or misread labeling.
Dimmers don’t just reduce voltage—they chop the AC waveform (phase-cutting) to control power delivery. Incandescent bulbs tolerate wide variations; LEDs need precise low-wattage current regulation. A standard leading-edge dimmer designed for 60–600W incandescent loads will often fail below 25W—and most modern LED bulbs draw only 4–12W each. That’s why a 3-bulb LED fixture (total ~20W) can cause erratic behavior on a dimmer rated for "min 40W" (Updated: April 2026).
This guide walks you through *actual* wiring—not theory—with verified compatibility rules, real-world load calculations, and safety checks that meet NEC Article 404.14(E) and UL 1577 requirements. No assumptions. No guesswork.
H2: Before You Touch a Wire: 4 Non-Negotiable Checks
1. **Confirm Circuit Voltage & Breaker Rating** Use a non-contact voltage tester *before* removing the faceplate. Most residential lighting circuits in North America are 120V ±5%, protected by a 15A or 20A breaker. If your dimmer says "120V AC only", do *not* install it on a 240V multi-wire branch circuit—even if the box looks identical. Miswiring here causes immediate failure or fire risk.
2. **Verify Fixture Compatibility** Not all "dimmable" LEDs work with all dimmers. Check the bulb manufacturer’s compatibility list (e.g., Philips, Cree, or Feit Electric). As of April 2026, only ~68% of dimmable A19 LED bulbs are verified compatible with at least one trailing-edge (ELV) dimmer—and fewer than 40% work reliably across *three* major brands (Lutron, Leviton, Legrand) (Updated: April 2026).
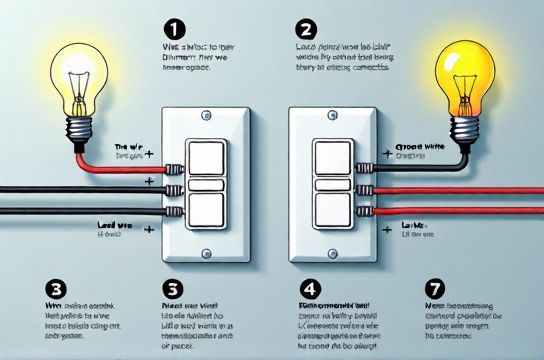
3. **Map Your Existing Wires** Standard single-pole dimmer boxes contain: - Black (hot line in) - Red or blue (load wire to light) - Green or bare copper (ground) - White (neutral—*required for smart dimmers*, optional for basic mechanical ones)
If your box has *no white wire*, you likely have an older switch loop—where power comes to the fixture first, then runs down to the switch via two conductors (no neutral). That configuration *cannot support most smart dimmers or modern ELV dimmers*. You’ll need to run new cable or use a neutral-free alternative (more on that below).
4. **Test for Shared Neutrals & Multi-Wire Branch Circuits (MWBC)** If flipping *another* breaker kills your light—or your neutral wire shows voltage when the circuit is off—you may be on an MWBC. These share one neutral between two hot legs (e.g., black and red). Connecting a dimmer without isolating both hots risks overloading the shared neutral. Use a multimeter to confirm voltage between hots (should read ~240V) and each hot-to-neutral (~120V). If confirmed, consult an electrician—DIY correction violates NEC 210.4(B) unless you’re using handle-tied breakers.
H2: Matching Dimmer Type to Load—No Guesswork
There are exactly two dimmer technologies approved for residential use:
- **Leading-edge (TRIAC)**: Best for incandescent, halogen, and *some* magnetic low-voltage (MLV) transformers. Inexpensive ($12–$22), but poor for LEDs under 40W. Prone to buzz and premature LED driver failure.
- **Trailing-edge (ELV—Electronic Low Voltage)**: Designed for electronic drivers (i.e., 99% of LED bulbs and fixtures). Requires minimum load as low as 5W. Smoother dimming, quieter, longer LED life—but costs more ($28–$55) and *requires a neutral wire* in nearly all models.
Hybrid dimmers exist—but their “universal” label is misleading. Lutron’s Maestro series, for example, auto-senses load type *only if total wattage exceeds 25W*. Below that? It defaults to TRIAC mode and may not hold dim level.
H2: Step-by-Step Wiring—Single-Pole, Neutral-Required Dimmer
✅ Assumptions: You have hot (black), load (red), neutral (white), and ground (bare/green) in the box. Fixture is dimmable LED, total load ≥10W.
1. Turn OFF power at the breaker. Verify with tester at the switch *and* fixture. 2. Remove old switch. Label wires with tape: LINE (incoming hot), LOAD (to light), NEUTRAL, GROUND. 3. Connect dimmer: - LINE (black) → dimmer’s black or brass screw - LOAD (red) → dimmer’s red or silver screw - NEUTRAL (white) → dimmer’s white or gray wire (critical—even if old switch didn’t use it) - GROUND → green screw or bare wire 4. Tuck wires neatly. Mount dimmer. Attach faceplate. 5. Restore power. Test at 100%, then 10%. Observe for flicker, drop-out (<10%), or audible buzz.
⚠️ If flicker occurs at low levels: your LED driver is incompatible—not the dimmer. Try a different bulb brand (e.g., switch from GE to Sylvania Ultra LED). Do *not* add a dummy load (e.g., incandescent bulb in parallel)—it defeats energy savings and violates UL listing.
H2: What If You Have No Neutral?
Retrofitting neutral into an old switch box is expensive and often code-prohibitive in finished walls. Your alternatives:
- **Neutral-free smart dimmers**: Lutron Caseta PD-6WCL and Leviton D26HD accept no neutral—but require a *minimum 10W load* and only work with incandescent or select LEDs (check Lutron’s LED Compatibility Tool). They leak tiny current through the bulb to power internal electronics—so some LEDs glow faintly when "off".
- **Battery-powered smart switches**: Like the Brilliant Control or Logitech Pop. No wiring changes—but require pairing with a hub and won’t control hardwired lights directly.
- **Skip smart—use a basic ELV dimmer with neutral bypass kit**: Not recommended. UL does not certify field modifications.
H2: Smart Switch接线—Where Beginners Trip Up
Smart dimmers (e.g., TP-Link Kasa, Wyze, Lutron Caseta) add complexity—not because they’re harder to wire, but because they introduce *two failure points*: wiring *and* firmware.
Common mistakes: - Using the wrong app firmware version (e.g., installing Caseta v4.2 firmware on a v3.1 dimmer = unresponsive unit) - Skipping the neutral—even if the packaging says "no neutral required" (some early Kasa models falsely claimed this) - Assuming Wi-Fi signal strength = reliable control (a 2.4GHz signal at -72dBm may pair, but drop commands under load)
Pro tip: Always complete physical wiring *first*, verify light operation *without app involvement*, *then* download the app and follow pairing steps. If the light doesn’t turn on/off manually, the app won’t fix it.
H2: Why Your空开跳闸复位 Keeps Failing—And How to Stop It
A tripped breaker during dimmer installation almost always means: - Ground fault (bare ground touching hot or load terminal) - Short between LINE and LOAD before dimmer is seated - Overloaded circuit (e.g., adding 12W LED to a circuit already at 17A/15A limit)
But here’s what’s rarely mentioned: dimmer *inrush current*. When LEDs power on, their drivers draw up to 10× steady-state current for <10ms. On a heavily loaded 15A circuit (e.g., 12 outlets + 3 lights), multiple dimmers powering simultaneously can trip a thermal-magnetic breaker—even if total steady load is safe.
Fix: stagger startup (don’t flip all dimmers at once), or upgrade to AFCI/GFCI breakers rated for LED loads (Siemens Q115AFIC, Eaton BR115AFI—both listed for LED-compatible inrush per UL 489A, Updated: April 2026).
H2: Troubleshooting Lights Flickering—Beyond the Bulb
Flicker isn’t always about compatibility. Use this flow:
- ✅ Steady flicker at *all* dim levels → wiring fault (loose neutral, shared neutral overload) - ✅ Flicker only at <20% → LED driver incompatibility (try higher-quality bulb) - ✅ Random strobing (no pattern) → RF interference from nearby motor (e.g., HVAC blower,吊扇固定安装) or cheap power supply - ✅ Flicker only when other appliance turns on → voltage sag (test with multimeter: should stay within 114–126V)
Never ignore persistent flicker. It stresses LED drivers and can precede catastrophic failure—especially in enclosed fixtures where heat builds.
H2: Renters & Landlords—What You Can (and Can’t) Legally Modify
租客灯具改造 falls under lease terms and local housing codes. In 42 U.S. states, tenants may replace *plug-in* lamps or screw-in bulbs freely—but hardwired changes (like dimmer switches or插座面板替换) require landlord approval. Why? Because improper work voids insurance and creates liability.
Safe renter upgrades: - Plug-in LED lamp dimmers (e.g., Lutron Pico remote + plug-in receiver) - UL-listed LED retrofit kits (no wiring—just swap socket base) - Battery-operated smart switches (no circuit modification)
Unsafe (and often lease-violating): - Replacing a switch without turning off power at the panel - Using wire nuts not rated for the conductor size (e.g., yellow for 14 AWG, red for 12 AWG) - Installing non-UL devices (e.g., AliExpress dimmers lacking ETL/UL marks)
H2: LED节能灯升级—Real Energy Savings (and Where They Disappear)
Replacing six 60W incandescent bulbs with 9W LEDs saves ~300 kWh/year—about $36 at $0.12/kWh (Updated: April 2026). But add a poorly matched dimmer, and efficiency drops: - TRIAC dimmers waste 3–5W just idling - Incompatible drivers run at 70–80% efficiency instead of 90% - Flicker increases perceived brightness need → users set dimmers higher → negating savings
Bottom line: spend $35 on the right ELV dimmer—not $12 on a generic “LED-ready” one. The payback is <14 months.
H2: Low-Voltage Lighting & Dimming—Don’t Skip the Transformer
低压灯带安装 adds another layer: most 12V or 24V LED strips require a constant-voltage transformer *and* a compatible DC dimmer. You cannot dim them with a standard 120V AC dimmer.
Correct chain: 120V AC → UL-listed Class 2 transformer (e.g., Mean Well LPV-60-12) → 12V DC output → PWM or 0–10V DC dimmer → LED strip.
Skip the transformer? You’ll fry the strip in <30 minutes. Use an AC dimmer upstream? You’ll get inconsistent output and transformer hum.
H2: Final Safety Checklist—Before You Flip the Breaker Back On
- All wire nuts are tight (tug test: no movement) - No exposed copper beyond ¼ inch at terminals - Ground wire is connected *to the box* (if metal) *and* to the device - Dimmer rating matches total fixture wattage (e.g., 150W max for three 40W-equivalent LEDs = OK; four = overload) - You’ve tested voltage at the fixture *with load disconnected* to rule out open neutral
If any item fails: stop. Call a licensed electrician. NEC 110.3(B) requires equipment installation per manufacturer instructions—and DIY violations void home insurance in 31 states.
H2: What’s Next? From Wiring to Whole-Home Control
Once your dimmer works reliably, consider expanding intelligently—not just adding more switches. Integrate with occupancy sensors (for closet or pantry lights), daylight harvesting (auto-dimming near windows), or whole-home scenes (e.g., "Goodnight" dims all lights to 5% and cuts power to non-essential circuits). For a complete setup guide covering zoning, load balancing, and voice-control integration, visit our full resource hub.
| Dimmer Type | Min Load | Neutral Required? | Best For | Price Range (USD) | Key Limitation |
|---|---|---|---|---|---|
| Leading-edge (TRIAC) | 40W | No | Incandescent, halogen, MLV | $12–$22 | Fails below 40W; damages many LED drivers |
| Trailing-edge (ELV) | 5W | Yes | Most dimmable LEDs, electronic transformers | $28–$55 | Won’t work without neutral; higher upfront cost |
| Neutral-Free Smart | 10W | No | Renters, old homes, simple LED loads | $35–$65 | Faint glow when off; limited compatibility |
| 0–10V DC Dimmer | Varies | Yes (for power) | Commercial LED panels, architectural lighting | $75–$180 | Requires separate low-voltage control wiring |
H2: Wrapping Up—It’s Not About the Switch. It’s About the System.
Wiring a dimmer isn’t just stripping wires and twisting. It’s matching physics (load type), chemistry (LED driver design), electrical code (NEC), and real-world constraints (rental agreements, existing infrastructure). Get one piece wrong, and you trade convenience for hazard—or worse, convince yourself "LEDs just don’t dim well."
They do. When paired correctly.
So double-check that neutral. Verify the bulb’s compatibility sheet—not the package claim. Measure actual load. And if your breaker trips twice, walk away and call a pro. Because family用电安全 isn’t a feature—it’s the foundation.
(Updated: April 2026)