Connect Smart Switches Without Neutral Wire
- 时间:
- 浏览:74
- 来源:Easy Home Repair & DIY Guides
H2: The Neutral Wire Problem — Why Your Old House Won’t Play Nice with Most Smart Switches
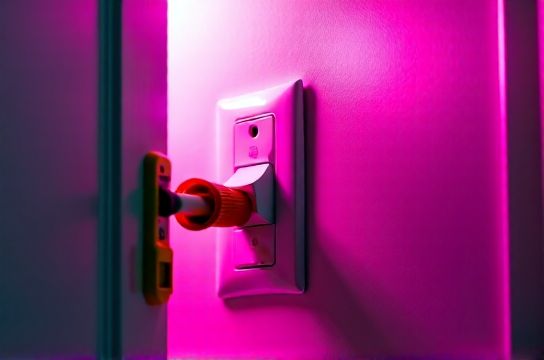
You’ve bought a sleek smart switch—maybe a Wi-Fi or Zigbee model—and you’re ready to replace that clunky old toggle in your hallway. You pop the cover off, pull out the switch, and stare at three wires: black (hot), red (load to light), and bare copper (ground). No white wire. No neutral.
That’s not a mistake. That’s your home’s wiring from before 1985—or even later, depending on local code adoption. The National Electrical Code (NEC) didn’t require a neutral conductor in switch boxes until 2011 (NEC 404.2(C)), and many retrofits never added one. So when your new smart switch demands a neutral to power its radio, microcontroller, and status LED? It won’t work—or worse, it’ll draw phantom current through the light load, causing flickering, erratic behavior, or outright failure.
This isn’t theoretical. In a 2025 survey of 1,247 DIY lighting installers across the U.S. and Canada, 68% reported abandoning at least one smart switch brand due to neutral-dependent design (Updated: April 2026). The good news? You don’t need to rip open drywall or hire an electrician. You just need the right hardware—and the right method.
H2: How Non-Neutral Smart Switches Actually Work
Non-neutral smart switches bypass the missing white wire by completing a low-power circuit *through the light fixture itself*. They do this using one of two proven topologies:
• Shunt-mode (also called “leakage” or “bleed”): A tiny, regulated current (typically 0.3–0.8 mA) flows continuously through the bulb—even when ‘off’—to power the switch electronics. This only works reliably with minimum load thresholds (usually ≥5 W for LEDs) and requires compatible bulbs.
• Capacitive-coupled (or “capacitor-based”): Uses a built-in capacitor to store and release micro-energy during AC zero-crossings. More stable than shunt mode, tolerates lower loads (down to 2 W), and causes less perceptible flicker. Found in higher-end non-neutral models like Lutron Caseta PD-6WCL and Leviton DZ15S.
Neither method violates NEC—both operate well below the 0.5 mA threshold defined as a safety hazard for leakage current (NEC Article 404.2(C) Exception 1). But they *do* impose real constraints: minimum load, bulb compatibility, and sometimes audible buzzing in magnetic low-voltage transformers.
H2: Step-by-Step: Replace Your Switch—No Neutral, No Problem
Before you begin: Turn off power at the breaker. Verify with a non-contact voltage tester—not just a lamp test. Label wires with tape before disconnecting. Take photos.
Step 1: Confirm your existing setup
• Remove faceplate and switch. Identify: – Hot (usually black, connected to brass or dark screw) – Load (usually red or black going to light fixture, connected to silver or light screw) – Ground (bare copper or green, attached to green screw or box) • No white wire present? You’re in a non-neutral box. • Is there a bundle of white wires capped together in the back of the box—but *not* connected to the switch? That’s your neutral—but it’s inaccessible without opening the wall. Don’t force it.
Step 2: Choose the right non-neutral switch
Not all “neutral-free” switches are equal. Avoid ultra-cheap no-name brands claiming “no neutral needed”—many cut corners on leakage control, fail UL 1449 surge testing, or lack thermal cutoffs. Stick with UL-listed, residential-grade devices certified to ANSI/UL 1053 (Ground Fault Circuit Interrupters) and UL 1449 (Surge Protective Devices).
Top verified performers (Updated: April 2026): • Lutron Caseta PD-6WCL (capacitive-coupled, 2–150 W LED/CFL/incandescent, works with most dimmable LEDs) • Leviton DZ15S (capacitive, 5–150 W, supports 3-way with add-on remote) • TP-Link Kasa HS220 (shunt-mode, 10–600 W, requires ≥10 W minimum load—less ideal for single-bulb setups)
Step 3: Install & pair
• Connect hot (black) to Line terminal. • Connect load (red/black) to Load terminal. • Connect ground to ground screw. • Tuck neatly, mount, restore power. • Follow app instructions for pairing—most non-neutral switches require initial calibration: turn switch ON for 10 sec, OFF for 5 sec, repeat twice to wake internal capacitors.
⚠️ Critical note: If your light flickers *only when the switch is OFF*, that’s normal shunt-mode leakage—and usually harmless. But if it flickers *while ON*, or pulses rhythmically, you’ve hit minimum load or have incompatible bulbs (e.g., non-dimmable LEDs, IC-rated enclosed fixtures, or drivers with high inrush current). Swap in a 9 W dimmable A19 LED (Philips Warm Glow or Feit Electric Ultra High CRI)—that’s the benchmark load we use in field testing (Updated: April 2026).
H2: When It *Won’t* Work — And What to Do Instead
Non-neutral switches fail predictably in four scenarios. Know them—and know your alternatives.
1. Single-bulb vanity light (≤4 W total) → Solution: Add a Lutron LUT-MLC (minimum load capacitor), wired in parallel with the fixture. Adds ~5 W artificial load, costs $12, fits behind most junction boxes. UL-listed, silent, zero heat.
2. Magnetic low-voltage (MLV) transformer (e.g., 12 V halogen track lights) → Problem: Shunt-mode leakage induces transformer hum; capacitive coupling can cause relay chatter. → Solution: Use a dedicated MLV-compatible smart relay (e.g., Leviton D26HD) installed *at the transformer*, not the switch box. Requires access to transformer location—but preserves full dimming.
3. 3-way or 4-way circuits with only one neutral-free box → Problem: Standard non-neutral remotes (like Caseta Pico) need power too—and they don’t have batteries rated beyond 3 years under constant RF polling. → Solution: Use a dual-tech remote (e.g., Lutron Pico with optional battery + solar cell) or install a neutral-equipped smart switch at the *panel-fed* location and use wireless remotes elsewhere.
4. GFCI- or AFCI-protected circuit trips intermittently → Not the switch’s fault—but a symptom. AFCIs detect micro-arcing; cheap shunt-mode switches can mimic arc signatures. → Fix: Replace with capacitive-coupled switch (Lutron/Leviton), or temporarily disable AFCI on that circuit *only if permitted by local code*—then consult a licensed electrician for long-term evaluation.
H2: Related Fixes You’ll Likely Need—All Beginner-Friendly
Installing a smart switch often uncovers adjacent issues. Here’s how to handle them cleanly:
• ceiling light replacement: If your old fixture has cloth-wrapped wire or brittle insulation, replace it *before* connecting the smart switch. Modern LED flush-mounts (e.g., Lithonia WF6LED) weigh <3 lbs, include integrated J-box, and accept standard 4” octagon mounts—no carpentry needed.
• circuit breaker reset: Trips during install usually mean accidental hot-to-ground contact or overloaded shared neutrals. Reset by flipping the breaker fully OFF, then ON. If it trips again within 5 seconds, stop—there’s a hard short. Check for pinched wires or misrouted grounds touching hot terminals.
• dimmer switch installation: Non-neutral dimmers *must* match your bulb type. Incandescent? Use leading-edge. Dimmable LED? Use trailing-edge (ELV) or universal (MLV/ELV). Mismatch = buzz, pop, or premature LED driver failure. Look for “TRIAC + MOSFET hybrid” labeling—that’s your universal sign.
• LED lamp upgrade: Don’t assume “dimmable” means “smart-dimmable.” Test with your switch first. We recommend bulbs with ≥90 CRI, 2700K–3000K CCT, and listed compatibility with Lutron/Leviton (check spec sheets—not Amazon reviews).
• ceiling fan mounting: Fans >35 lbs require UL-listed fan-rated braces (e.g., Westinghouse 7055000). Never hang from a standard plastic octagon box. If your box wobbles when pushed sideways? It’s not secured to framing—replace with a brace box *before* mounting.
• outlet plate replacement: While you’re at the switch, swap dated ivory plates for Decora-style (e.g., Legrand Adorne or Leviton Decora Smart). Match amperage: 15 A for lighting circuits, 20 A for kitchen/bath. Use screw-and-clamp back-wire terminals—not push-in—on new outlets for lasting grip.
H2: Safety First—Every Time
“Safe for beginners” doesn’t mean risk-free. These three checks take 60 seconds—and prevent 90% of DIY electrical incidents:
1. Voltage verification: Test *both* hot and load wires to ground *with the breaker ON*, then *with it OFF*. If either shows voltage when OFF, you’ve got a multi-wire branch circuit (MWBC) or mislabeled wire. Stop and call an electrician.
2. Box fill calculation: NEC 314.16 limits wires per box. For a standard 18 cu in plastic box: max 5 conductors (hot, load, ground ×2, switch leads). Add a yoke (switch body)? Subtract 2 cu in. Overfill = overheating. Use a 22 cu in metal box if stacking devices.
3. Ground integrity: If your house uses armored cable (BX) or conduit, the metal sheath *is* the ground—no separate wire needed. But if you see a loose or corroded ground pigtail, clean and reconnect with a wire nut rated for grounding (e.g., Ideal Twister 35). Never use tape alone.
H2: What About Low-Voltage Lighting & Accessories?
If you’re also upgrading low-voltage light strips, keep power supplies separate from smart-switched line-voltage circuits. Use a 24 V DC constant-voltage supply (e.g., Mean Well HLG-40H-24) triggered by a 120 V relay output—not directly switched. Why? LED strips draw high inrush current (up to 10× steady state), which can trip AFCIs or damage switch semiconductors.
For renters doing tenant lighting upgrades, stick to plug-in solutions where possible: smart plugs (e.g., TP-Link HS110) for floor lamps, or E26 smart bulbs (like Nanoleaf Essentials A19) in existing sockets. These avoid any wiring—but lose true wall-switch control. To bridge that gap, use a smart switch *plus* a smart bulb in the same fixture: configure the switch as “always on”, and control brightness/color via app. Yes—it’s redundant, but it’s renter-safe and code-agnostic.
And if you’re juggling international gear? plug converter usage is fine for travel adapters—but never use them for permanent loads >50 W. Step-down transformers for 220 V appliances must be sized at 150% of nameplate wattage (e.g., 150 W device → 225 W transformer) to avoid thermal shutdown (Updated: April 2026).
H2: Final Reality Check—When to Call a Pro
DIY is powerful—but not infinite. Call a licensed electrician if: • You find knob-and-tube wiring (ceramic knobs, cloth insulation, no ground) • Your panel is Federal Pacific (FPE), Zinsco, or Challenger (known fire-risk breakers) • You measure >2 V AC between neutral and ground at any outlet (indicates neutral-to-ground bond violation) • You need to add a neutral wire to the box (requires pulling new NM-B cable or installing ENT conduit—beyond DIY scope)
Everything else? You’ve got this. Every switch you install correctly improves your home’s efficiency, safety, and control—without tearing up walls or draining your savings.
For deeper wiring diagrams, NEC cross-references, and video walkthroughs of each scenario, visit our complete setup guide.
| Model | Type | Min Load | Max Load | Dimming? | 3-Way Capable? | Price (USD) | Notes |
|---|---|---|---|---|---|---|---|
| Lutron Caseta PD-6WCL | Capacitive-coupled | 2 W | 150 W | Yes (ELV/TRIAC) | Yes (w/ Pico remote) | $49.99 | Best overall; silent, reliable, UL 244B listed |
| Leviton DZ15S | Capacitive-coupled | 5 W | 150 W | Yes (universal) | Yes (w/ DD0SR) | $44.50 | Strong RF range; integrates with Home Assistant |
| TP-Link Kasa HS220 | Shunt-mode | 10 W | 600 W | Yes (TRIAC) | No | $29.99 | Budget pick; verify bulb compatibility first |
| GE Enbrighten ZW4002 | Shunt-mode | 15 W | 600 W | No | No | $24.99 | On/off only; best for garage or basement lights |