Remove Old Ceiling Light and Install New One
- 时间:
- 浏览:34
- 来源:Easy Home Repair & DIY Guides
H2: Stop Before You Unscrew Anything — Safety Isn’t Optional
If your old ceiling light flickers, hums, or won’t turn on—even after changing the bulb—it’s likely time for a full fixture swap. But don’t rush to yank it down. Over 40% of residential electrical injuries occur during DIY lighting work (NFPA Electrical Injury Report, Updated: April 2026). Most aren’t from high voltage—they’re from assuming the circuit is dead when it’s not.
First: Turn OFF the correct circuit breaker—not just the wall switch. Wall switches only break the hot leg; they don’t de-energize the box. Go to your main panel, locate the breaker labeled “Living Room Lights” or “Master Bedroom.” If labels are missing or vague, use a non-contact voltage tester *before* touching any wires. Test both the black (hot) and white (neutral) wires inside the ceiling box—even after flipping the breaker. If the tester beeps, you’ve got the wrong breaker or a shared neutral (more common in homes built before 2000).
Then: Verify the breaker is truly off by toggling it fully to OFF and back ON once—this resets internal latches that sometimes stick. If the light still comes on when you flip the wall switch, you’ve either misidentified the circuit or there’s a wiring error upstream (e.g., a switched outlet feeding the fixture). Don’t proceed until the box reads zero volts.
H2: What You’ll Actually Need (No ‘Professional Kit’ Required)
Skip the $89 ‘electrician starter bundle’ sold online. Here’s what works—and why:
• Non-contact voltage tester (Klein Tools NCVT-1, ~$22): Reliable down to 12V, self-calibrating, no batteries needed for basic AC detection. • Wire strippers with auto-gauge adjustment (Irwin Vise-Grip 2078300, ~$18): Strips 10–22 AWG cleanly without nicking copper. • UL-listed wire nuts (Ideal Twister 65, red, pack of 50, ~$12): Rated for 2–3 14 AWG wires—standard for residential lighting circuits. • 6-in. needle-nose pliers with insulated grips (Channellock 5N, ~$16): Lets you twist wires tightly *before* applying the nut—critical for long-term reliability. • Ladder rated for at least 300 lbs (Werner AP1710, Type IA, ~$139): Never stand on chairs or stools. Your ceiling box is often mounted to a joist or brace—reaching it awkwardly increases fall risk more than shock risk.
Skip: Multimeters (overkill for basic continuity checks), conduit benders, fish tapes, or plug-in circuit finders. Those belong in the next phase—not your first fixture swap.
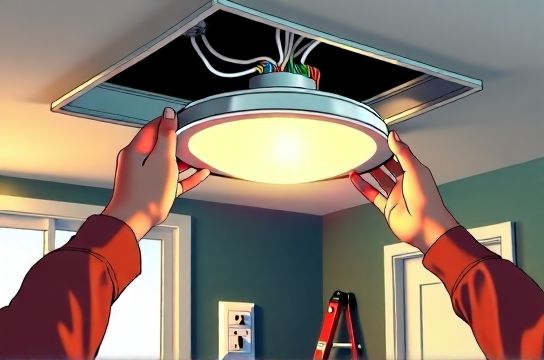
H2: Removing the Old Fixture — The 4-Minute Process
Step 1: Remove the shade/globe and bulbs. Set them aside—don’t force cracked glass.
Step 2: Loosen the mounting screws or nuts holding the fixture base to the ceiling box. Most modern fixtures use two 8-32 machine screws; older ones may have a threaded nipple and locknut. Support the fixture with one hand while loosening—the last thing you want is a 12-lb metal fixture dropping onto your head.
Step 3: Gently lower the fixture—but *don’t pull*. Let the wires hang loose. Now inspect the wire connections inside the box.
Here’s where most beginners panic: “Why are there *three* black wires?” or “What’s that bare copper wrapped around the box?”
• Black wires = always hot (when live). In a standard switch loop, one black comes from the panel (always-hot), one goes to the switch (switched-hot), and one feeds downstream outlets or lights (load-hot). They’re usually joined with a wire nut—don’t separate them yet.
• White wires = neutrals. Should all be joined together. If one is taped black or has black marker on it, that’s a re-tasked neutral—and a code violation (NEC 2023 200.7(C)(1)). Note it. You’ll need to correct it before installing a smart switch.
• Bare copper or green = grounding. Must connect to the new fixture’s ground wire *and* to the metal ceiling box if present. If your box is plastic, grounding relies solely on the fixture’s ground wire.
Step 4: Unscrew the old wire nuts. Twist each pair gently with pliers to break corrosion (common in humid climates or dusty attics). Then disconnect.
Important: Take a photo *before* disconnecting. Not a blurry phone snap—use grid mode and get all wires, labels, and box stamps in frame. That photo is your fallback if something doesn’t match the new fixture’s diagram.
H2: Installing the New Fixture — Match Wires, Not Colors
New fixtures rarely match old wire counts. A 2024 LED flush mount may have only three leads: black (load), white (neutral), green (ground). Your ceiling box may have five wires. So forget ‘black-to-black.’ Focus on *function*:
• Fixture black → Switched-hot (the black wire that goes to your wall switch—not the always-hot one) • Fixture white → All whites joined together (neutral bundle) • Fixture green → Grounding screw in metal box *or* pigtail to existing ground wires
How to identify switched-hot? With power OFF, separate all blacks. Turn power back ON *only at the breaker*, then use your voltage tester: the black that shows voltage *only when the wall switch is ON* is your switched-hot. Mark it with black tape. Turn power OFF again before proceeding.
If your new fixture includes a mounting bracket (most do), attach it to the ceiling box *first*, using the provided screws—not drywall anchors. Ceiling boxes are rated for 50 lbs minimum (NEC 314.27(A)); anchors aren’t.
Then: Connect wires *in this order*: 1. Grounds: Join fixture green + all bare/green wires + grounding screw on box (if metal). Tighten nut until no copper shows. 2. Neutrals: Join fixture white + all white wires. Do *not* include any taped-black wires. 3. Hots: Join fixture black + switched-hot only. Cap the always-hot and load-hot separately—or join them *with the fixture disconnected*, if the fixture isn’t controlled by that switch.
Tug each wire gently after capping. If any pulls out, re-strip and re-twist. A loose neutral causes flickering; a loose hot can arc and melt insulation.
H2: When You Hit a Smart Switch — Wiring Isn’t Magic, It’s Mapping
Upgrading to a smart switch (e.g., Lutron Caseta, TP-Link Kasa) adds two complications: neutral requirement and multi-wire circuits.
Most smart switches need a neutral wire in the switch box. But 70% of homes built before 2011 have switch loops *without* neutrals (Updated: April 2026). If you open your switch plate and see only two wires (black and white), and the white is connected to the switch—not capped with others—you’re in a switch loop. You *cannot* install a neutral-requiring smart switch there without running new cable. Your alternatives: use a neutral-free model (Lutron PD-6ANS), or install a smart *fixture* instead (like Philips Hue White Ambiance ceiling light).
Also: If your ceiling box has red, black, white, and ground, you likely have a 3-way switch setup. Don’t guess. Shut off power, label every wire with tape (‘SW1’, ‘SW2’, ‘COM’, ‘LOAD’), and consult the smart switch’s wiring diagram *for 3-way applications*—not the generic one.
H2: Why the Breaker Keeps Tripping — And How to Fix It in 90 Seconds
A tripped breaker after installation almost always means one of three things:
1. Hot-to-ground short: Fixture ground wire accidentally touching hot terminal (common with cheap knock-out clamps that cut insulation). Solution: Power off, inspect all terminals, re-seat wires.
2. Overloaded circuit: Adding a 120W LED fixture to a circuit already powering 10 outlets and a fridge. Residential 15A circuits support ~1,440W continuous (80% rule). A single 15W LED isn’t the issue—but if your breaker trips *only when you turn on another device*, calculate total load. Use a Kill-A-Watt meter on suspect appliances.
3. AFCI/GFCI nuisance trip: Modern breakers detect tiny arcs or ground faults. If the breaker trips *after 2–3 seconds*, not instantly, it’s likely an AFCI detecting loose wire nut contact or damaged insulation. Re-torque every connection. If it persists, replace the wire nut with a lever-type connector (e.g., Wago 221-412).
To reset: Flip the breaker fully to OFF, wait 2 seconds, then firmly to ON. If it trips again immediately, stop. Something is physically shorted. Call an electrician.
H2: Dimmer Switches — Yes, You Can Install One (But Not Every LED Will Play Nice)
Dimmable LEDs require compatible dimmers. Using a standard incandescent dimmer with a 12W LED often causes buzzing, limited range, or no dimming below 30%. Check your LED packaging: look for “ELV”, “MLV”, or “TRIAC” compatibility icons. Most budget LEDs work with forward-phase (TRIAC) dimmers like Lutron Diva DVCL-153P—but only if total wattage is ≥25W (per Lutron spec, Updated: April 2026). A single 9W bulb? Won’t dim reliably.
Wiring a dimmer is identical to a standard switch—except you must land the load wire on the dimmer’s “LOAD” terminal, not “LINE.” Mix those up, and the dimmer will overheat. Label terminals with masking tape before connecting.
H2: Bonus Scenarios — Fan, Outlet, Flicker, Low-Voltage
• Ceiling fan mounting: Fans require a fan-rated ceiling box (marked “Acceptable for Fan Support”) and a brace kit if joists aren’t aligned. Standard lighting boxes *cannot* handle fan vibration. If yours isn’t rated, install a retrofit brace (e.g., Westinghouse 7777000, ~$24) before hanging anything.
• Outlet cover replacement: If swapping a receptacle near your light circuit, ensure it’s tamper-resistant (NEC 2023 406.12) and rated for the amperage (15A or 20A). Never mix aluminum and copper wires without COPALUM crimps.
• Lights flickering on startup: Often caused by incompatible LED drivers or failing electronic transformers. Try swapping in a known-compatible bulb (e.g., Feit Electric BR30 9.5W). If flicker stops, your fixture’s driver is marginal—not dangerous, but worth replacing.
• Low-voltage灯带 installation: For 12V LED strips, use a UL-listed Class 2 power supply (e.g., Mean Well LPV-60-12, ~$32), mount it in open air (not inside insulation), and never daisy-chain more than 16.4 ft per run without voltage boosters.
• Plug adapter usage: Renters love plug-in adapters to avoid hardwiring—but avoid cube taps or daisy-chained power strips. Plug only one lamp per outlet, and never use adapters with grounded (3-prong) fixtures unless the outlet itself is grounded. Ungrounded outlets + grounded lamps = shock hazard.
H2: Final Checks — Because ‘It Turns On’ ≠ ‘It’s Safe’
Before calling it done:
• Turn power ON and test operation for 5 minutes. Watch for heat at the fixture base or switch—warm is OK; hot enough to burn skin is not.
• Verify ground continuity: Use a multimeter in continuity mode between fixture housing and known ground (e.g., cold water pipe). Should read <1 ohm.
• Check for phantom voltage: Some digital testers show 2–5V on neutrals due to induction. If your analog tester shows nothing, it’s fine.
• Document it: Write the breaker number and fixture model on the panel door with a permanent marker. Future you (or your tenant) will thank you.
| Task | Time Required | Tools Needed | Risk Level (1–5) | Code Compliance Notes |
|---|---|---|---|---|
| Ceiling light replacement | 25–40 min | Voltage tester, wire strippers, wire nuts, ladder | 2 | Must use listed fixture; box must support weight (NEC 314.27) |
| Smart switch installation | 35–60 min | Voltage tester, screwdriver, label tape, multimeter (optional) | 3 | Neutral required in box unless using neutral-free model (NEC 404.22) |
| Circuit breaker reset & diagnosis | 5–15 min | Voltage tester only | 1 | No tools needed—but misdiagnosis risks fire (NEC 110.3(B)) |
| Dimmer switch installation | 20–35 min | Voltage tester, screwdriver, wattmeter (recommended) | 2 | Load must meet min/max wattage; ELV dimmers require compatible transformers |
| LED retrofit upgrade | 10–20 min | None (bulb swap) or basic tools (fixture swap) | 1 | Fixture must be rated for enclosed use if covered (UL 1598) |
H2: When to Walk Away — Honest Boundaries Save Lives
Some jobs aren’t beginner-safe—and that’s okay. Stop and call a licensed electrician if you encounter:
• Aluminum wiring (silver-colored, stiff, often in homes built 1965–1973). Requires special CO/ALR devices and antioxidant paste.
• Burnt insulation, melted wire nuts, or scorch marks in the box. Indicates chronic overload or arcing—requires full circuit inspection.
• More than four cables entering the ceiling box. Suggests complex multi-circuit or shared-neutral configuration beyond visual ID.
• A GFCI breaker tripping *only* when the light is installed—not when other loads are active. Points to ground fault in fixture housing or moisture intrusion.
This isn’t failure. It’s respect—for the code, for your home’s hidden infrastructure, and for the people who train for years to read wiring like text. You’ve already done the hardest part: deciding to learn, not just replace.
For deeper troubleshooting—including how to map unknown circuits, verify grounding paths, or select the right dimmer for your specific LED brand—visit our complete setup guide. It’s free, updated monthly, and written by journeymen who’ve fixed these exact issues in 127 different home vintages.