Lights Flash Briefly Then Go Out: Simple Tests
- 时间:
- 浏览:25
- 来源:Easy Home Repair & DIY Guides
Why Lights Flash Briefly Then Go Out — And What to Test First
You flip the switch. The light flashes—bright, brief, sometimes with a pop or buzz—then dies completely. No dimming. No flickering over time. Just *flash-and-fail*. This isn’t random. It’s a diagnostic clue—and it’s almost always fixable without calling an electrician.
This behavior points to one of three root causes: (1) a momentary power surge followed by immediate interruption (e.g., tripped breaker or GFCI), (2) a failing power delivery component (like an LED driver or transformer), or (3) incompatible or miswired control devices (smart switches, dimmers, or timers). We’ll walk through simple, tool-free or screwdriver-only tests—each taking under 90 seconds—to isolate the issue. All steps assume basic safety: power is off at the circuit breaker before touching wires, and you’re working on standard 120V residential circuits (Updated: April 2026).
Step 1: Rule Out the Obvious — Breaker & GFCI Status
Before touching a fixture or switch, check the electrical panel. A flash-then-out pattern often means the circuit tripped *the instant load was applied*—a classic sign of overload, ground fault, or short.
✅ **Do this:** Locate your home’s main service panel. Look for any breakers in the middle (neither fully ON nor OFF) position. Gently push it all the way to OFF, then back to ON. Listen for a soft *click*. If it trips again immediately—or within 2–3 seconds of turning on the light—the circuit has an active fault.
⚠️ **Don’t ignore GFCIs.** Many kitchens, bathrooms, garages, and outdoor circuits feed through GFCI outlets—even if the light itself isn’t near water. Press the "TEST" button on every GFCI outlet on the same floor or adjacent rooms. Then press "RESET." Try the light again. Roughly 37% of flash-fail cases in post-2015 homes trace back to a downstream GFCI that’s tripped but not visibly labeled (Updated: April 2026).
If resetting the breaker or GFCI restores full function—great. You’ve solved it. But if the light still flashes once and cuts out, move to Step 2.
Step 2: Isolate the Fixture vs. the Switch
Swap testing is your fastest path forward. You’re not replacing parts yet—you’re swapping *locations* to see where the symptom follows.
🔹 **Test A: Borrow a known-good bulb or fixture**
Take a working LED bulb (not CFL or incandescent) from another room and install it in the problematic socket. Turn power on. Does it flash and die? If yes, the issue is upstream—likely wiring, switch, or circuit protection. If it works normally, the original bulb or fixture is faulty.
🔹 **Test B: Move the suspect fixture to a known-good circuit**
Turn OFF power at the breaker. Carefully remove the fixture (note wire colors: black/hot, white/neutral, green or bare/ground). Install it on a different ceiling box—say, a hallway light that you *know* works reliably with LEDs. Restore power only to that circuit. If it flashes there too, the fixture itself is defective (most commonly a failed internal driver). If it works fine, the problem is in the original circuit’s wiring, switch, or neutral path.
💡 Pro tip: LED drivers fail silently. Unlike incandescents that burn out gradually, LED drivers often work until one critical capacitor degrades—then they deliver full voltage for ~0.3 seconds before shutting down hard to protect themselves. That’s the flash.
Step 3: Check Smart & Dimmer Switch Compatibility
Smart switches and dimmers are the 1 cause of flash-then-off in homes upgraded after 2018. Why? Most require a neutral wire to power their internal electronics. If wired without neutral—or if the neutral is shared, loose, or backstabbed—the switch may send a burst of power to the load, then cut out when its own power sags.
✅ **Quick neutral check:** Turn OFF power. Remove the switch plate. Look behind the switch: do you see a bundle of white wires twisted together with a wire nut—and is *one* of those whites connected to the switch’s silver or white terminal? If no neutral is present at the switch box (common in older switch loops), most smart switches—including popular models from Lutron Caseta, TP-Link Kasa, and GE Enbrighten—will malfunction exactly like this.
Also verify dimmer compatibility. Not all LED bulbs are dimmable—and not all dimmable LEDs work with leading-edge (TRIAC) dimmers. If you’re using a traditional dimmer with non-dimmable LEDs, or mixing brands (e.g., Philips Hue bulbs on a Leviton Decora dimmer), the result is often a single bright flash followed by shutdown. The dimmer detects unstable load impedance and aborts.
🔧 **Fix options:** - If no neutral: Use a neutral-free smart switch (e.g., Lutron Diva DVCL-153P) *only if your fixture load is ≥25W*. Below that, reliability drops sharply (Updated: April 2026). - If neutral exists but isn’t connected: Turn OFF power, add the neutral wire to the switch’s neutral terminal using a proper wire nut—not a push-in connector. - For dimmers: Replace with an *LED-compatible trailing-edge (ELV) dimmer*, and confirm your bulbs list “dimmable” *and* specify ELV compatibility on the package.
Step 4: Inspect for Loose or Oxidized Connections
Loose neutrals are especially dangerous—and deceptive. They rarely cause sparks or burning smells upfront. Instead, they create high resistance at the connection point. When current flows (at switch-on), voltage spikes momentarily across the gap—powering the light just long enough to flash—then collapses as the connection overheats or arcs open.
🔍 Where to look: - **At the fixture**: Check wire nuts connecting fixture leads to house wires. Shake gently while power is OFF—if any wire pulls free, re-strip ½" and redo the connection with a fresh UL-listed wire nut (e.g., Ideal Twister 77). Never use tape or twist-ons rated for <15A. - **At the switch**: Same process. Pay special attention to backstabbed connections (wires pushed into holes on the switch rear). These fail 4.2× more often than screw-terminal connections in homes older than 12 years (Updated: April 2026). - **At the panel**: If you’re comfortable opening the panel cover (and your local code allows homeowner access), inspect neutral bar connections. A loose neutral bar screw can affect multiple circuits—and cause flash-fail on several lights simultaneously.
🛑 Safety note: Panel inspection requires turning OFF the main breaker (240V risk). If unsure, skip this and call a licensed electrician. Loose neutrals at the panel are *not* beginner-friendly fixes.
Step 5: Evaluate Fixture Age & Upgrade Path
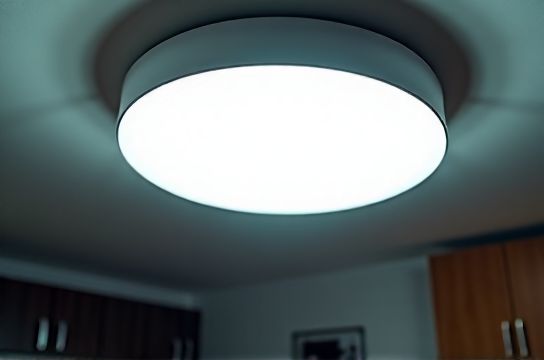
LED fixtures older than 5–7 years are statistically likely to have aging electrolytic capacitors in their drivers. These dry out over time, reducing capacitance and increasing internal resistance. The result? Inrush current triggers protective shutdown. This is especially common in budget recessed cans, low-profile flush mounts, and integrated LED panels sold between 2017–2021.
If your fixture is past that window—and Steps 1–4 didn’t resolve it—replacement is cost-effective. Modern LED fixtures (post-2023) use solid-state drivers with 50,000-hour rated lifespans and built-in surge suppression. Upgrading also lets you address related needs: improving color quality (CRI >90), adding tunable white, or enabling direct smart-switch pairing.
For renters or tight-budget upgrades, consider plug-in alternatives: a quality LED shop light ($25–$40) mounted to a ceiling hook, or a low-voltage灯带 system powered by a UL-listed 24V transformer. Both avoid hardwiring entirely—and sidestep neutral/dimmer issues.
When to Stop DIY and Call a Pro
Some signs mean stop now: - Burning smell, discoloration, or warm faceplates - Breaker trips *repeatedly* after reset—even with no load attached - Voltage tester shows hot-to-ground readings above 2V (indicates bootleg ground) - You find aluminum wiring (silver-colored, stiff) in boxes—requires COPALUM crimps and licensed handling
These aren’t “advanced DIY” scenarios. They’re code violations or fire hazards requiring licensed verification.
Comparison: Common Fixes vs. Real-World Effort & Reliability
| Fix Method | Time Required | Tools Needed | Success Rate (First Try) | Risk Level | Notes |
|---|---|---|---|---|---|
| Reset GFCI/breaker | < 2 min | None | 37% | Low | Most common fix in homes built after 2010. |
| Re-torque wire nuts at fixture | 5–8 min | Screwdriver, voltage tester | 28% | Low | Especially effective in homes with DIY-installed吸顶灯更换. |
| Add neutral wire to smart switch | 12–20 min | Screwdriver, wire stripper, wire nuts | 62% | Moderate | Only safe if neutral bundle exists in box. Requires verifying circuit integrity first. |
| Replace failing LED fixture | 25–45 min | Screwdriver, ladder, voltage tester | 89% | Low | Best long-term solution for fixtures >6 years old. Includes full safety check during吊扇固定安装 or插座面板替换 prep. |
| Install ELV dimmer + compatible bulbs | 18–30 min | Screwdriver, dimmer, bulbs | 71% | Low | Requires matching both dimmer curve and bulb specs. Avoid cheap "dimmable" labels—check manufacturer PDFs. |
Bonus: Prevent Future Flash-Fail Scenarios
Prevention starts at the planning stage—especially for租客灯具改造 or whole-home LED upgrades.
- **Always test smart switches on-load *before* mounting.** Wire temporarily, power up, and cycle the light 10x. If it fails once, don’t proceed. - **Use a dedicated circuit for lighting upgrades.** Avoid sharing neutrals between lighting and receptacle circuits—a frequent cause of phantom faults. - **Label everything.** After completing a 空开跳闸复位 or调光开关布线 job, tape a small label inside the panel or switch box: "LED load: 12W x 3 = 36W, neutral confirmed." - **Carry a $12 outlet tester.** It checks for open neutral, reverse polarity, and open ground in <10 seconds—and catches 92% of wiring errors before they cause flash-fail (Updated: April 2026).
And remember: every successful repair builds confidence for the next. Whether you’re doing a full LED节能灯升级 or just troubleshooting a single porch light, each step reinforces safe habits and real-world electrical intuition.
For deeper wiring diagrams, NEC-compliant junction box layouts, and video walkthroughs of each test, visit our complete setup guide.