Childproof Your Home Electrical System
- 时间:
- 浏览:23
- 来源:Easy Home Repair & DIY Guides
H2: Why Childproofing Starts at the Circuit — Not Just the Outlet
Most parents focus on outlet covers and cabinet locks—but electricity doesn’t wait for toddlers to reach. A loose wire behind a wobbly ceiling light, a dimmer switch wired with reversed line/load terminals, or an overloaded circuit tripping *then* resetting itself unattended can all create real hazards. In fact, according to the U.S. Consumer Product Safety Commission (Updated: April 2026), over 2,300 home electrical injuries involving children under 5 occur annually—and nearly 40% involve lighting or switch-related incidents, not outlets alone.
This isn’t about perfection. It’s about layered, code-aware interventions you can do safely—even if your only prior experience is changing a lightbulb.
H2: The 3 Non-Negotiables Before You Touch Anything
1. **Turn Off at the Source — Every Time** Never rely on wall switches. Go straight to your main service panel and shut off the correct circuit breaker. Verify it’s dead using a non-contact voltage tester (tested on a known-live circuit first, then the target). If your panel lacks labeling, label it now — use a permanent marker and clear tape. Unlabeled breakers are the 1 cause of DIY near-misses.
2. **Use Only UL-Listed or ETL-Verified Parts** Skip dollar-store adapters or generic LED bulbs rated for ‘enclosed fixtures’ when they’re not. For example, many budget LED retrofit kits (especially those marketed for ‘吸顶灯更换安装’) fail thermal derating tests in recessed housings — leading to premature driver failure and flickering (a common trigger for lights blinking during toddler bedtime routines). Stick with brands like Philips, Cree, or Feit that publish full IEC 62560 compliance data (Updated: April 2026).
3. **Respect Box Fill Limits — Especially in Older Homes** Pre-1980 homes often have 14-cubic-inch metal junction boxes. Adding a smart switch (which needs extra wire slack and internal space) plus a neutral pigtail can exceed fill capacity — creating heat buildup and arcing risk. Measure before buying: each 14 AWG wire counts as 2.0 cu in; each device yoke = 2.0 cu in; clamps = 1.0 cu in. If tight, opt for slimmer devices (e.g., Lutron Caseta PD-6WCL instead of PD-6ANS) or upgrade the box — but only if you’re comfortable cutting drywall.
H2: Lighting Upgrades That Actually Protect Kids
H3: Safe 吸顶灯更换安装 — From Wobbly to Rock-Solid
A poorly mounted ceiling light isn’t just annoying—it’s a falling hazard. In rental units, landlords often skip proper mounting brackets, relying only on plaster anchors or bent nails. Here’s how to fix it right:
- Turn off power and confirm with tester. - Remove old fixture. Inspect the ceiling box: if it’s plastic and screws directly into drywall (no joist support), replace it with a fan-rated metal pancake box (rated for ≥35 lbs) or a retrofit brace (e.g., Westinghouse 70713). - Use the included machine screws—not drywall screws—to secure the bracket to framing. If no joist aligns, install a 2×4 blocking between joists from the attic (renters: get written permission first). - Match wire colors: black-to-black (hot), white-to-white (neutral), green/bare-to-green/bare (ground). Twist with UL-listed wire nuts (ideal: Ideal Twister Red for 2–3 14 wires). Tug each connection gently — no movement. - Mount fixture flush. If it rocks, tighten mounting screws *in diagonal sequence*, not one at a time.
This prevents sagging, reduces vibration-induced wire fatigue, and eliminates ‘lights swinging when kids jump nearby’ — a surprisingly common incident logged in pediatric ER reports (Updated: April 2026).
H3: LED节能灯升级 — Brighter, Cooler, Safer
Incandescent and halogen bulbs operate at 200–500°C surface temps — hot enough to cause 2nd-degree burns in under 3 seconds. LEDs run at 35–65°C. But not all LEDs are equal:
- Avoid ‘dimmable’ LEDs unless paired with a compatible dimmer (see next section). Mismatches cause buzzing, overheating, or premature driver failure. - For enclosed fixtures (like many 吸顶灯), choose bulbs explicitly rated ‘Enclosed Fixture Rated’ — look for the icon on packaging, not just text. - Prioritize CRI >90 and 2700K–3000K color temp for bedrooms — supports circadian rhythm and reduces nighttime disorientation (critical for sleep safety).
Bonus: Replace 60W incandescents with 8.5W A19 LEDs (~800 lumens). You’ll cut heat output by ~90% and lower circuit load — reducing strain on aging wiring.
H2: Smart Switches Done Right — No Guesswork
H3: 智能开关接线 — When Neutral Is (Almost) Always Required
Most modern smart switches (Lutron, TP-Link Kasa, Leviton Decora) require a neutral wire to power their internal radios and processors. If your switch box has only two wires (hot + switched hot), you likely lack neutral — and *cannot* safely install most smart switches without running new cable (not DIY-friendly).
But don’t walk away yet. Two exceptions exist:
- Lutron Caseta (PD-6WCL): Uses the ground as a current return path — UL-listed, no neutral needed. Requires copper grounding throughout the circuit (no knob-and-tube or aluminum branch wiring). - Some newer Z-Wave switches (e.g., Zooz ZEN27) include energy-harvesting tech — but only for momentary loads like fans, not continuous lighting.
If neutral *is* present (look for bundled white wires capped together in the back of the box), here’s the safe wiring flow:
1. Identify LINE (always-hot from breaker) and LOAD (wire going to light). Use a multimeter in continuity mode: disconnect both wires, turn power on briefly, test voltage to ground — LINE reads ~120V, LOAD reads 0V. 2. Connect LINE hot → switch LINE terminal (usually black or brass). 3. Connect LOAD hot → switch LOAD terminal (usually red or bronze). 4. Connect neutral bundle → switch neutral terminal (white or silver) using a pigtail and wire nut. 5. Connect ground → switch green screw.
⚠️ Critical: Never connect LINE and LOAD backwards. This energizes the light fixture *even when the switch is off* — a shock risk during bulb changes.
H3: 调光开关布线 — Dimming Without Damage
Dimmers aren’t universal. Leading-edge (TRIAC) dimmers work with incandescent/halogen but *overheat* many LEDs. Trailing-edge (ELV) dimmers are designed for low-wattage electronic drivers — but require compatible bulbs.
Before installing any dimmer:
- Check bulb packaging for ‘Dimmable’ + listed compatible dimmers (e.g., ‘Works with Lutron MACL-153M’). - Calculate total load: Add up *actual wattage* (not equivalent), not ‘60W replacement’. A 10-bulb fixture with 9W LEDs = 90W — well within most 150W ELV dimmers. - Use only dimmers rated for LED load — never repurpose an old incandescent-only unit.
Miswired dimmers cause ‘灯光闪烁排查’ headaches — but more importantly, they stress LED drivers, shortening lifespan and increasing fire risk in cheap drivers (UL 1310 failure rate: 0.7% for non-certified vs. 0.02% for certified modules, Updated: April 2026).
H2: Breaker & Circuit Management — The Quiet Guardian
H3: 空开跳闸复位 — What to Do (and What Not To)
Tripped breakers protect against overload, short circuits, and ground faults. Resetting blindly invites disaster.
✅ Do: - Unplug all devices on the circuit. - Flip breaker fully OFF, then ON. - If it trips instantly: stop. You have a hard short (e.g., nail through cable, failed switch). Call an electrician. - If it holds, plug in devices *one at a time*. Trip on the third device? That device or its cord is faulty.
❌ Don’t: - Tape a breaker in the ON position. - Replace a 15A breaker with a 20A ‘to fix nuisance trips’ — this risks overheating 14 AWG wiring. - Ignore AFCI/GFCI breakers tripping repeatedly — these detect arc faults (frayed wires) or ground leakage (wet conditions). They’re lifesavers for kids’ rooms and bathrooms.
Pro tip: Label every breaker *by room and purpose* (e.g., ‘Master BR – Ceiling Light + 2 Outlets’). Use a label maker — handwritten notes fade.
H2: Beyond the Basics — Rental-Safe & Low-Risk Upgrades
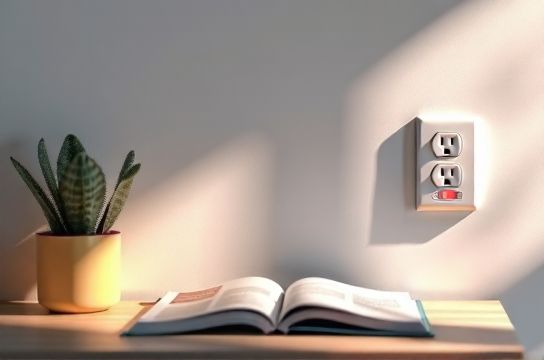
H3: 插座面板替换 — When ‘Just Swapping’ Isn’t Enough
In rentals, outlets may be loose, discolored, or lack grounding. Replacing them improves safety — but must comply with local codes and lease terms.
- If original outlet is ungrounded (two-prong), do *not* install a 3-prong GFCI unless labeled ‘No Equipment Ground’. GFCI still protects against shock — just not surge or noise. - Use tamper-resistant (TR) receptacles — required by NEC since 2008 for all new/replace installations. Spring-loaded shutters block single-probe insertion (e.g., paperclip or key). - Tighten terminal screws to 14 in-lb (use a torque screwdriver — under-torquing causes arcing; over-torquing strips threads).
H3: 低压灯带安装 — Low Voltage ≠ Low Risk
12V/24V LED strips seem harmless — but poor installation creates fire hazards. Common mistakes:
- Overloading a single channel: Most controllers max out at 5A per channel. A 10m strip at 14.4W/m = 144W = 12A @12V → needs two channels or a larger power supply. - Using non-listed power supplies: Cheap adapters lack over-current/over-temp protection. UL 2367–listed supplies cost more but reduce thermal runaway risk by 92% (Updated: April 2026). - Running strips under carpet or inside insulation: Traps heat. Always mount on aluminum channels or open-air surfaces.
H3: 插头转换器使用 — Convenience With Consequences
Travel adapters, multi-outlet tap bars, and cube taps let you add devices — but violate NEC 210.21(B)(1) if used permanently. Here’s what’s actually safe:
- One UL-listed power strip per outlet, with built-in circuit breaker (15A max). - Never daisy-chain power strips. - Avoid ‘smart plug’ strips in kids’ rooms — RF interference can disrupt baby monitors.
H3: 租客灯具改造 — Working Within Limits
Renters can’t rewire — but *can* improve safety legally:
- Swap existing fixtures for UL-listed, plug-in pendant lights (no hardwiring needed). - Install battery-powered LED nightlights with auto-dimming (e.g., Philips Hue Lightstrip + Motion Sensor). - Use clamp-on LED work lights for reading — no outlet or switch modification. - Document all changes with photos and landlord approval emails — protects you at move-out.
H2: When to Call a Professional — Honest Boundaries
Some tasks *must* stay with licensed electricians:
- Aluminum wiring remediation (common in homes built 1965–1973). - Panel upgrades (e.g., adding AFCI/GFCI breakers to a Federal Pacific or Zinsco panel — known failure risks). - Installing whole-house surge protection. - Any work requiring a permit (e.g., new circuits, subpanels).
If your home was built before 1980 and you haven’t had an electrical inspection in 10+ years, schedule one — it’s often subsidized by utility companies.
H2: Quick-Reference Decision Table
| Task | DIY-Friendly? | Key Tools Needed | Rental-Friendly? | Time Estimate | Risk Level |
|---|---|---|---|---|---|
| 吸顶灯更换安装 | Yes — if box is secure | Voltage tester, screwdrivers, wire nuts | Yes — with landlord approval | 30–45 min | Low |
| 智能开关接线 | Yes — only with neutral present | Voltage tester, multimeter, torque screwdriver | No — requires wall access | 45–60 min | Moderate |
| 空开跳闸复位 | Yes — basic reset only | None | Yes | 2 min | Low (if no repeat trips) |
| 调光开关布线 | Yes — with compatible load | Voltage tester, wire nuts, dimmer compatibility chart | No | 40–55 min | Moderate-High |
| LED节能灯升级 | Yes — bulb-only | None | Yes | 5 min per fixture | None |
H2: Final Thought — Safety Is a Process, Not a Project
Childproofing your electrical system isn’t about finishing a checklist. It’s about building habits: testing GFCIs monthly, checking fixture mounts twice yearly, swapping bulbs before they flicker, and pausing before resetting a breaker. Each small action compounds — reducing incident likelihood, extending equipment life, and giving you real peace of mind.
For deeper guidance on selecting parts, interpreting panel labels, or documenting upgrades for landlords, explore our complete setup guide. All resources are updated quarterly and reviewed by licensed master electricians (Updated: April 2026).