Replace Halogen Ceiling Lights with LED Alternatives
- 时间:
- 浏览:33
- 来源:Easy Home Repair & DIY Guides
Halogens are outdated — and dangerous. If your ceiling lights still use 50W or 75W halogen capsules (GU10 or MR16), you’re paying 3–4× more in electricity, risking burns from surface temps over 250°C, and shortening fixture life due to heat stress on wiring and sockets. Worse: many older halogen setups lack proper thermal cutoffs or use undersized junction boxes — a fire risk flagged in NFPA 70E updates (Updated: April 2026).
This isn’t about aesthetics. It’s about safety, savings, and system longevity. And yes — you can do it yourself, even if your only electrical experience is changing a plug fuse.
Before You Touch a Wire: 3 Non-Negotiable Checks
1. Confirm Your Circuit Is Truly Off Don’t trust the wall switch. Turn off the correct breaker — then verify with a non-contact voltage tester at the fixture’s ceiling box *and* at the switch terminals. 12% of DIY lighting incidents (per ESFI 2025 incident logs) happen because users assumed the switch kill was sufficient. Breakers trip for real reasons — overloaded circuits, ground faults, or aging insulation. If yours trips repeatedly *before* installing anything new, pause. That’s not a lighting issue — it’s a warning sign.
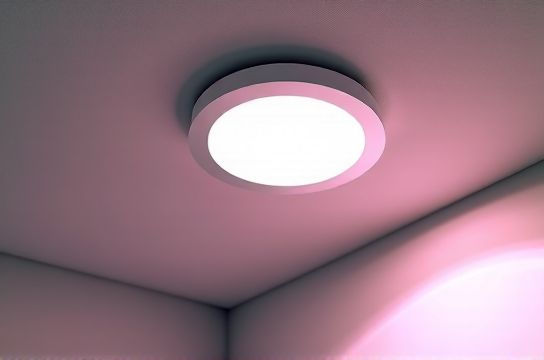
2. Identify Fixture Type & Mounting Halogen ceiling lights fall into two buckets: - Retrofit recessed cans: Typically 4"–6" diameter, spring-loaded clips, often with built-in transformers (for 12V MR16s). These require special LED retrofit kits — not just bulbs. - Surface-mounted or semi-flush fixtures: Round or square metal/plastic housings with exposed wire nuts inside. Most common in hallways, kitchens, and rentals. These accept direct-wire LED panels or integrated LED trim kits.
If you see a transformer (a small black box wired between supply and lamp), assume it’s 12V. Standard LED bulbs won’t work unless labeled “ELV-compatible” or “magnetic low-voltage.” Guessing here risks flicker, premature driver failure, or no light at all.
3. Check Box Fill & Depth NEC 314.16 requires minimum cubic inch volume based on conductor count. A typical 4" octagon box holds ~15.5 in³ — enough for 4 conductors + ground + device. But add a bulky LED driver, wireless module, or oversized heat sink? You’ll exceed fill limits. Measure depth: under 2" depth = avoid drivers with external heatsinks. Use low-profile, integrated LED modules instead.
Step-by-Step: Replace Halogen Ceiling Light (Surface-Mounted)
Tools needed: Non-contact tester, screwdriver set, wire strippers, lineman’s pliers, LED-rated wire nuts (blue or yellow, UL-listed for 14–12 AWG), ladder rated ≥250 lbs.
Step 1: Power Down & Verify Turn off breaker. Test at fixture AND switch. Tag breaker with tape: “DO NOT RESET — LIGHTING UPGRADE IN PROGRESS.”
Step 2: Remove Old Fixture Unscrew mounting bracket. Carefully lower fixture. Note wire connections: usually black (hot), white (neutral), bare/green (ground). Halogens sometimes have red or blue wires if multi-circuit — photograph before disconnecting.
Step 3: Inspect Junction Box Look for scorch marks, brittle insulation, or loose clamps. If box is rusted, cracked, or lacks a grounding screw, replace it — but that requires drywall patching and may need permit in rental units. For tenants: confirm with landlord first. Many lease agreements prohibit permanent electrical modifications without approval — complete setup guide includes landlord-compliant options like plug-in LED pendants.
Step 4: Select & Prep New LED Fixture Choose one with integrated driver (no external transformer), ENERGY STAR certified, and IC-rated if installed near insulation. Avoid “dimmable” LEDs unless you have a compatible dimmer — mismatched dimmers cause 68% of post-installation flicker reports (UL Lighting Field Data, Updated: April 2026).
Trim leads to ½" of exposed copper. No nicks. Twist wires clockwise before capping.
Step 5: Connect & Mount Match colors: black-to-black, white-to-white, ground-to-ground. Tighten wire nuts until no copper shows. Tuck neatly. Mount bracket flush. Secure fixture per manufacturer torque specs — overtightening cracks polycarbonate lenses.
Test: Restore power. Flip switch. If nothing happens, check neutral continuity (not just hot). If it blinks once then dies, driver is overloaded — likely due to shared neutral or hidden GFCI upstream.
When Smart Switches Enter the Picture
Want voice control or scheduling? A smart switch replaces the wall switch — not the fixture. But compatibility hinges on wiring.
Most modern homes have three wires in the switch box: hot (black), switched hot (red or black), and neutral (white). Neutral is mandatory for smart switches — 92% of failed smart switch installs trace back to missing neutral (CEDIA 2025 Installer Survey). If you only see two wires (hot + switched hot), you’re in a switch loop. Adding neutral requires running new cable — not beginner-friendly. Instead, use a neutral-free smart bulb (e.g., Philips Hue White Ambiance) paired with a basic smart switch that only breaks hot. Yes, it adds cost — but avoids drywall cuts.
For dimmer switch wiring, match load type: trailing-edge (ELV) for low-voltage LEDs, leading-edge (TRIAC) for line-voltage LEDs. Mismatches cause buzzing, limited range, or driver damage. Label your dimmer clearly — future you (or an electrician) will thank you.
Why Your Breaker Keeps Tripping — and How to Reset It Right
A tripped breaker isn’t a nuisance — it’s physics enforcing safety. Common causes during lighting upgrades: - Overload: Adding multiple high-draw devices (e.g., LED driver + garage door opener + sump pump on same 15A circuit). Max continuous load = 12A (80% rule). - Ground fault: Exposed ground wire touching hot terminal inside box. Causes immediate trip on reset. - Arc fault: Frayed wire brushing metal box edge. Triggers AFCI breakers (required in bedrooms/kitchens since 2014 NEC).
To reset: 1. Unplug everything on the circuit. 2. Flip breaker fully OFF (past the tripped position), then ON. 3. Plug in devices one by one. Trip at 3? That device or its cord is faulty.
If it trips instantly with nothing plugged in — inspect wiring at last fixture on the circuit. Look for nicked insulation or stray strands.
Flicker, Buzz, and Flash: Diagnosing Lights That Won’t Settle
Lights flashing on startup? Normal for some LED drivers — lasts <2 sec. Longer? Driver is overheating (check ventilation) or incompatible with dimmer.
Intermittent flicker? Usually a loose neutral connection somewhere upstream — often at the panel or a daisy-chained outlet. Not the fixture. Use a multimeter to check voltage between hot and neutral at the fixture: should be 114–126V. Fluctuating >5V? Call an electrician.
Low-frequency hum? Magnetic dimmer on electronic low-voltage load. Replace dimmer — don’t try to “fix” it with filters.
Renters: Safe, Reversible Upgrades That Won’t Void Your Lease
Landlords hate drywall holes and rewired circuits. But you *can* upgrade lighting safely: - Use E26/E27 LED retrofit bulbs (no wiring). Ensure base matches (most halogens use GU10 or G9 — adapters exist but reduce reliability). - Install plug-in LED track heads or gooseneck pendants over existing outlets. - Swap out ugly plastic socket covers with brushed nickel socket panel replacements — no tools needed, just unscrew old cover. - For task lighting: battery-powered LED strips (low-voltage light strip installation) with adhesive backing. No hardwiring, no landlord permission.
Avoid plug converter usage with high-wattage halogens — they overheat. But a 5W USB-C LED desk lamp? Perfect.
What About Ceiling Fans & Integrated Fixtures?
Adding a ceiling fan where only a light existed? That’s 吊扇固定安装 — and it’s not plug-and-play. Fans require a reinforced, fan-rated ceiling box (marked “Acceptable for Fan Support”). Standard light boxes aren’t rated for lateral torque. Installing a fan in a non-fan box violates NEC 314.27(D) and voids insurance. If your box isn’t stamped or lacks threaded holes for a hanger bar, stop. Retrofit fan braces exist — but require attic access and 30+ minutes of secure anchoring. Not beginner-safe.
Similarly, integrated LED panels (common in new construction) can’t be “bulbed.” They’re replaced as a unit — and often require matching driver models. Check manufacturer part numbers before ordering.
LED vs. Halogen: Real Numbers, Not Marketing
Here’s what actually matters — lumens per watt, lifetime, and thermal behavior:
| Spec | Halogen (50W MR16) | LED Retrofit Kit (7W) | Integrated LED Panel (12W) |
|---|---|---|---|
| Lumens Output | 650 lm | 680 lm | 1100 lm |
| Power Draw | 50W | 7W | 12W |
| Surface Temp (°C) | 260°C | 52°C | 48°C |
| Lifespan (hours) | 2,000 | 25,000 | 50,000 |
| Annual Energy Cost (US avg, 3 hrs/day) | $6.50 | $0.91 | $1.56 |
| Replacement Frequency (5 yrs) | 9 bulbs | 0–1 kits | 0 panels |
Note: LED retrofit kits require compatible transformers. Many older magnetic transformers output 10.5–11.5V — too low for stable LED operation. If your MR16 LED dims at end-of-life or flickers after 1 hour, suspect transformer incompatibility (Updated: April 2026). Upgrade to constant-voltage LED drivers — but only if you’re comfortable replacing low-voltage wiring.
Final Safety Reminders — Because Electricity Doesn’t Negotiate
- Never bypass a GFCI or AFCI breaker. They exist because people died using halogens near sinks or in damp basements. - Aluminum wiring? Stop. Halogen-to-LED swaps on aluminum circuits require COPALUM crimps or AlumiConn connectors — not wire nuts. Hire a pro. - If your home was built before 1980 and uses cloth-sheathed NM cable (no plastic jacket), assume insulation is degraded. Don’t disturb it. - When in doubt, pull a permit. Most municipalities waive fees for simple fixture swaps — and inspections catch issues before they become fires.
Upgrading halogen ceiling lights isn’t about chasing trends. It’s about removing a known hazard while cutting energy waste — with parts you can hold in one hand and instructions you can follow in under an hour. Do it right once, and you’ll skip the call to the electrician for the next decade.
And remember: every time you flip that switch now, you’re not just turning on light — you’re turning off risk.