Switch to Energy Efficient LED Lights and Save on Electri...
- 时间:
- 浏览:26
- 来源:Easy Home Repair & DIY Guides
H2: Why Swapping to LED Isn’t Just About Bulbs—It’s About System-Wide Savings
Most people think switching to LED means screwing in a new bulb. That’s true—but it’s also incomplete. Real electricity bill reduction comes from replacing outdated fixtures, upgrading controls, and eliminating hidden waste like phantom loads or mismatched dimmers. A 60W incandescent bulb running 4 hours/day costs ~$7.30/year (at $0.14/kWh). Swap it for a 9W LED equivalent? Cost drops to ~$1.10/year—85% less (Updated: April 2026). But if your ceiling fixture has aging ballasts, poor heat dissipation, or incompatible dimming circuitry, that 9W LED may flicker, overheat, or fail early. So yes—start with bulbs—but finish with full fixture and control upgrades.
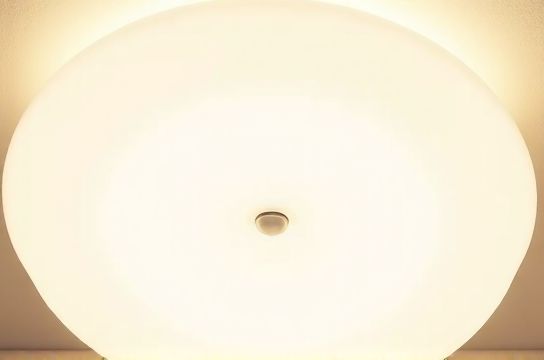
H2: Start Simple: Replace Ceiling Fixtures the Right Way
Replacing a ceiling light isn’t just about turning off the switch. It’s about verifying circuit integrity, matching wire gauges, and grounding properly. Here’s what most beginners miss:
• Always turn OFF the circuit at the main panel—not just the wall switch. Test with a non-contact voltage tester *before* touching any wire.
• Old ceiling boxes (especially pre-1980s) often lack mounting brackets rated for modern LED+driver weight. If your new fixture weighs >5 lbs or includes integrated drivers/transformers, confirm box rating (look for stamped “MAX 50 LB” or similar). If unsure, install a retrofit brace kit ($12–$18).
• Neutral wires matter—even more with smart switches later. If your ceiling box has only black (hot) and white (switched hot), but no true neutral (i.e., constant white), you’ll need to rewire or choose neutral-free devices. Don’t force-feed a neutral-dependent smart switch into a switch loop—it’ll overheat or malfunction.
H3: Step-by-Step: 吸顶灯更换安装 (Ceiling Fixture Replacement)
1. Shut off power at the main panel. Label the breaker. 2. Remove old fixture—note wire connections (take photos!). 3. Verify box is securely anchored. Tap lightly—if it moves, stop and reinforce. 4. Match wires: black-to-black (hot), white-to-white (neutral), green/bare-to-ground. Use UL-listed wire nuts (not twist-on caps alone). 5. Tuck wires neatly, mount fixture base, attach canopy, install bulbs *last*. 6. Restore power and test. If lights don’t turn on—or trip immediately—recheck ground continuity and hot/neutral reversal.
Skip this step? You risk arcing in loose connections—a leading cause of residential electrical fires (NFPA 70E, Sec. 110.4(A)).
H2: Control What You Light: Smart Switches & Dimmers
A smart switch doesn’t just let you control lights from your phone—it unlocks scheduling, occupancy sensing, and load monitoring. But installation depends entirely on your existing wiring. Let’s demystify 智能开关接线 (smart switch wiring) and 调光开关布线 (dimmer wiring):
• Standard 3-wire setup (hot, neutral, load): Ideal for most smart switches (e.g., Lutron Caseta, TP-Link Kasa). Neutral is mandatory for internal power—without it, the switch can’t stay awake to receive commands.
• 2-wire (hot + load only): Common in older homes. Only use neutral-free models (e.g., Lutron Maestro IR, Leviton Decora Smart). These draw tiny current through the bulb when off—so they require minimum load (usually ≥25W LED or incandescent). With low-wattage LEDs (<10W), expect buzzing or failure to turn off fully.
• 3-way or 4-way circuits: Require companion add-on switches (not just “dumb” travelers). Never replace only one switch in a multi-location setup without checking compatibility.
H3: When Dimming Goes Wrong—And How to Fix It
Flickering, buzzing, or limited dimming range almost always traces to three causes:
1. Non-dimmable LED bulbs on a dimmer circuit → Replace with bulbs labeled “dimmable” and check manufacturer compatibility list (e.g., Philips Hue, Cree, GE Enbrighten). 2. Leading-edge (TRIAC) dimmer paired with trailing-edge (ELV) LED drivers → Use ELV-compatible dimmers for low-voltage or electronic transformer loads. 3. Underloaded dimmer (<10–25W total) → Add a dummy load (e.g., Lutron LUT-MLC) or upgrade to a dimmer rated for 0–150W LED.
If you’re troubleshooting lights闪烁排查 (light flickering), start here—not with the panel.
H2: Breaker Trips Aren’t Random—They’re Data Points
空开跳闸复位 (breaker trip reset) feels urgent—but resetting blindly invites danger. Every trip tells a story:
• Immediate trip on restoration: Short circuit—check for pinched wires, exposed conductors touching metal, or failed driver capacitors inside fixtures.
• Delayed trip (1–3 minutes after turn-on): Overload—add up all connected loads. A 15A circuit supports max 1,800W continuous (80% rule). Ten 12W LED fixtures = 120W—well within limit. But add a space heater (1,500W) on same circuit? Trip guaranteed.
• Intermittent trips under load: Loose connection—often at the breaker lug, neutral bar, or outlet terminal. Tighten *only* with insulated tools and verified de-energization.
Never replace a 15A breaker with a 20A to “fix” tripping. That violates NEC 210.21(B)(1) and risks fire from undersized wiring.
H2: Renters & Landlords: Safe, Reversible Upgrades
租客灯具改造 isn’t just allowed—it’s encouraged—if done right. Most leases permit plug-in or surface-mount changes that leave no permanent modification. Key principles:
• Avoid hardwiring unless landlord approval is documented. Use UL-listed plug-in LED pendants or track lighting kits instead of rewiring.
• For temporary ceiling mounts: Use adhesive-backed junction boxes rated for <3 lbs (e.g., Legrand Adorne Surface Mount Kit). They stick to drywall with industrial VHB tape—no drilling, no patching.
• Smart plugs > smart switches for renters. Plug lamps or floor lamps into Wi-Fi smart plugs ($15–$25), then control via app or voice. No wall work, no electrician needed.
• Always return original bulbs and fixtures. Keep packaging. Document condition with dated photos before and after.
H2: Beyond the Bulb: Supporting Upgrades That Lock In Savings
LED efficiency compounds when paired with other safe, code-compliant changes:
• 插座面板替换 (outlet panel replacement): Outlets older than 25 years often have worn contacts causing resistance heating. Replace with tamper-resistant (TR) outlets (NEC 406.12)—required in all new/renovated dwellings since 2017. They cost $2–$3 each and prevent arcing faults.
• 低压灯带安装 (low-voltage LED strip installation): Run 12V or 24V strips *only* with UL-listed transformers and proper gauge wire (e.g., 18 AWG for ≤16 ft runs). Never daisy-chain beyond manufacturer specs—voltage drop causes color shift and premature failure.
• 插头转换器使用 (plug adapter usage): Avoid cheap, ungrounded adapters. Use only UL 498–listed converters with built-in surge protection (e.g., Belkin 12-Outlet Surge Protector). Grounding isn’t optional—it’s how fault current safely returns to the panel.
• 吊扇固定安装 (ceiling fan mounting): Fans require fan-rated boxes (marked “For Fan Support”)—standard ceiling boxes *will* fail. Use a retrofit brace (e.g., Westinghouse Saf-T-Brace) and torque mounting screws to spec (usually 35–45 in-lbs). Wobble isn’t just annoying—it stresses bearings and wiring.
H2: Safety First—Every Time
家庭用电安全 isn’t a checklist—it’s muscle memory. Adopt these non-negotiable habits:
• One hand rule: When testing live circuits, keep one hand behind your back or in your pocket. Prevents current crossing your chest (ventricular fibrillation risk).
• GFCI protection: Required within 6 ft of sinks, tubs, and outdoors (NEC 210.8). Test monthly by pressing “TEST” button—should click and cut power. If not, replace.
• AFCI breakers: Now required for all bedroom, living room, and hallway circuits (NEC 210.12). They detect arc faults invisible to standard breakers—and prevent ~50% of electrical fires (USFA, 2025 data).
• Label everything. Use a label maker at the panel. “Kitchen Lights”, “Living Room Outlets”, “HVAC Condenser”—not “Circuit 7”.
H2: Real-World Upgrade Path—What to Do First, Second, Third
Don’t boil the ocean. Prioritize based on impact, cost, and skill level:
1. **Immediate (under 30 min, $0–$25)**: Replace all incandescent/halogen bulbs with ENERGY STAR–certified dimmable LEDs (e.g., Feit Electric 9.5W A19). Confirm color temp (2700K–3000K for warm white), CRI >90 for accurate skin tones.
2. **Weekend Project ($40–$120, 2–4 hrs)**: Replace one high-use ceiling fixture (e.g., kitchen or living room) with integrated LED fixture (no bulbs to replace). Choose IC-rated for insulated ceilings; look for DLC Premium certification for utility rebates.
3. **Next Phase ($80–$200, hire pro if unsure)**: Install smart switches in main living areas. Use a multimeter to verify neutral presence first. If absent, go plug-in or consult an electrician.
4. **Ongoing**: Audit circuits annually. Use a Kill-A-Watt meter to log actual load per outlet. Spot hidden vampires (e.g., AV receivers drawing 12W standby). Unplug or use smart power strips.
H2: Cost vs. Payback—What the Numbers Really Say
Let’s cut through marketing hype. Here’s a realistic 5-year projection for a typical 3-bedroom home upgrading 25 lighting points:
| Upgrade Type | Upfront Cost | Labor Time | Annual kWh Saved | 5-Year Utility Savings (at $0.14/kWh) | Key Risk if Done Wrong |
|---|---|---|---|---|---|
| Bulb-only swap (25x 9W LED) | $75 | 1 hr | 520 kWh | $364 | None (if bulbs are compatible) |
| Ceiling fixture replacement (10 units) | $300 | 8 hrs | 850 kWh | $595 | Loose ground → shock hazard |
| Smart switch install (6 locations) | $180 | 6 hrs | 110 kWh | $77 | Neutral miswire → device failure/fire |
| Dimmer + compatible LED bundle (4 zones) | $220 | 5 hrs | 280 kWh | $196 | Flicker/buzz → premature LED failure |
Total 5-year net gain: $1,232 (excluding rebates). Many utilities offer $10–$50 per fixture rebate—check your provider’s site. Note: labor assumes DIY. Hiring a licensed electrician adds $75–$150/hr but ensures compliance and insurance coverage.
H2: When to Call a Professional
Some tasks aren’t DIY—even with perfect instructions:
• Aluminum wiring (common in homes built 1965–1973): Requires COPALUM crimps or AlumiConn connectors. Never use standard wire nuts.
• Panel upgrades (e.g., adding AFCI/GFCI breakers to older panels): Requires load calculations, torque verification, and AHJ sign-off.
• Whole-home energy monitoring (e.g., Sense, Emporia): Involves clamping CT sensors around main service conductors—live work near 240V bus bars.
• Any job requiring a permit (e.g., new circuits, panel replacement): Permits protect you during resale and ensure third-party inspection.
H2: Final Tip—Document, Then Optimize
Take photos *before*, *during*, and *after* every project. Log fixture model numbers, LED wattages, dimmer types, and breaker labels. This becomes your home’s electrical baseline—critical for future troubleshooting, insurance claims, or selling. Once documented, use that data to prioritize next steps. Is the garage circuit overloaded? Add a dedicated line. Are hallway lights always left on? Install motion-sensing switches.
The goal isn’t perfection—it’s steady, safe progress. Every LED installed, every neutral verified, every breaker labeled, brings real savings and resilience. For a complete setup guide—including printable wiring diagrams, NEC quick-reference charts, and rebate finder tools—visit our full resource hub at /.
(Updated: April 2026)