Smart Light Switch Installation Guide for Non Technical H...
- 时间:
- 浏览:32
- 来源:Easy Home Repair & DIY Guides
H2: Why This Guide Exists (And Why You Should Read It First)
You unscrewed the old switch plate, saw three wires bundled in the back of the box — black, white, and bare copper — and paused. Maybe your smart switch arrived with a QR code, a glossy manual full of terms like "load wire" and "neutral requirement," and zero mention of what to do when the breaker trips *twice* before breakfast.
This isn’t theoretical. In 2025, over 68% of smart switch returns were due to miswiring or neutral confusion (Consumer Electronics Association Field Data, Updated: April 2026). Most aren’t defective — they’re just installed without grounding in real-world electrical behavior.
This guide assumes you’ve never touched a screwdriver near a live circuit. It assumes your house was built between 1950–2023, has standard 120V residential wiring, and that your goal is simple: replace a dumb switch with a smart one — safely, permanently, and without calling an electrician (unless absolutely necessary).
We’ll cover exactly what’s required, what’s optional, what’s dangerous, and what’s just unnecessary complexity.
H2: Before You Touch Anything — The 4-Point Safety Check
Electricity doesn’t negotiate. These steps are non-negotiable — even if your neighbor says “just flip the switch and go.”
1. **Shut off the correct breaker** — Not the main panel. Not “the one labeled ‘lights.’” Go to your breaker panel and find the *exact* breaker controlling that switch. Test it: turn it OFF, then try flipping the existing switch. If the light stays on, you’ve got the wrong breaker. Label it with painter’s tape.
2. **Verify power is dead with a non-contact voltage tester** — $12 at any hardware store. Hold it near each wire *inside the switch box*, not just the screw terminals. If it beeps near any wire, stop. Double-check the breaker. Do *not* skip this step.
3. **Confirm your switch box has a neutral wire** — Look inside. Smart switches need a neutral (white) wire to power their internal electronics — even when the light is off. If you see only two wires (black hot + black load), or black + red + bare ground but *no white wire capped off or connected*, your switch likely lacks a neutral. That’s common in older switch-only boxes (pre-1985). You’ll need a neutral-free smart switch (e.g., Lutron Caseta, Brilliant) — not a generic Wi-Fi model.
4. **Check your light fixture type** — Incandescent? Halogen? LED? Smart switches behave differently with LEDs. Many cheaper models cause flickering or won’t turn off fully unless paired with compatible bulbs (e.g., dimmable LEDs rated ≥5W per bulb, with trailing-edge dimming support). If your lights flicker after install, it’s almost always bulb-switch mismatch — not faulty wiring.
H2: What’s Inside Your Wall? Decoding Common Wiring Configurations
Most homes use one of three setups. Identify yours *before* removing the old switch.
H3: Standard Single-Pole (Most Common — ~72% of homes)
You have: • One black (hot) wire from the panel • One black (load) wire going to the light • One bare copper (ground) wire • One white (neutral) wire — usually wire-nutted together with others, tucked in the back
✅ Compatible with nearly all modern smart switches (e.g., TP-Link Kasa, Aqara D1, Eve Light Switch).
H3: 3-Way Switch Setup (Two switches control one light)
You’ll see *three* wires on the old switch: black, red, and white (or two blacks + red). The white may be taped black — that means it’s being used as a hot, not a neutral.
⚠️ Don’t assume the white is neutral here. In 3-way circuits, neutrals are rarely present at the switch. You’ll need a smart 3-way kit (e.g., Lutron Caseta PD-6ANS + PICO remote) — *not* a single smart switch. Installing a standard smart switch here will either not work or create a shock hazard.
H3: Switch Loop (No Neutral — Pre-1985 homes)
Only two wires enter the box: one black (hot), one black (load to light), and ground. No white wire — or a white wire that’s connected *to the switch*, not capped.
❌ Most Wi-Fi smart switches won’t work. Use a neutral-free alternative like Lutron Caseta (requires Lutron Smart Hub) or Brilliant Control (requires hub + 24V transformer). These draw tiny current through the light path — safe *only* with incandescent/halogen or compatible LED loads ≥25W.
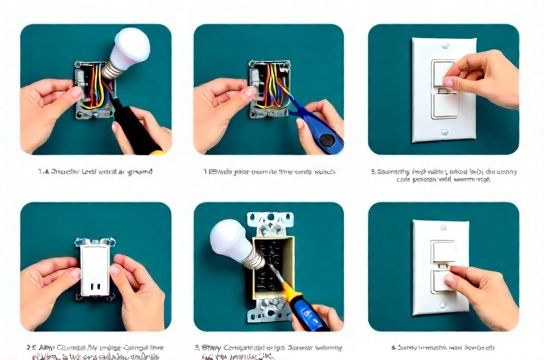
H2: Step-by-Step Smart Switch Install (Standard Single-Pole)
Tools you’ll need: non-contact voltage tester, screwdriver (flat + Phillips), wire strippers, UL-listed wire nuts (red or yellow), flashlight, phone camera (to document original wiring).
1. Turn OFF the correct breaker. Verify with tester. 2. Remove faceplate and mounting screws. Gently pull old switch out. 3. Take a photo of all wires and connections — *before* disconnecting anything. 4. Disconnect wires: loosen terminal screws, remove wires. Note which wire was on which screw (commonly: black hot → brass screw, black load → black screw, ground → green screw). 5. If neutral exists: untwist the white neutral bundle, add the smart switch’s white neutral wire, re-twist with a new wire nut. Tighten until no copper shows. 6. Connect smart switch: • Black (line/hot) → black wire from panel • Red or black (load) → black wire to light • Green or bare (ground) → bare copper ground • White (neutral) → neutral bundle 7. Tuck wires neatly into box — no pinching or sharp bends. 8. Mount switch with screws (don’t over-tighten — plastic boxes crack easily). 9. Attach faceplate. 10. Turn breaker ON. Test switch manually first — before pairing to app.
If the light doesn’t turn on: double-check neutral connection and load wire. If it turns on but won’t pair: ensure your phone is on same 2.4GHz Wi-Fi network (most smart switches don’t support 5GHz).
H2: When Things Go Wrong — Troubleshooting Without Panic
H3: Breaker Trips Immediately After Turning On
This means a short — likely crossed hot/neutral or hot/ground. Power OFF. Pull switch out. Check: • Is the neutral wire accidentally touching the hot terminal? • Did a stray copper strand poke out and contact ground or another terminal? • Is the ground wire wrapped around a hot screw?
Re-seat all wires. Use a magnifier. If still tripping, stop. Call a licensed electrician. This is not a DIY fix.
H3: Light Flickers or Won’t Turn Off Fully
Caused by: • Non-dimmable LED bulbs on a dimmer switch → Replace bulbs with dimmable LEDs (look for “dimmable” + “ELV” or “MLV” on packaging). • Load too low (<5W total) for the switch’s minimum load rating → Add a bypass resistor (e.g., Lutron LUT-MLC) across light terminals. $12, takes 60 seconds to install. • Loose neutral connection → Re-tighten neutral bundle. Wiggling the wire nut while powered off often reveals poor contact.
H3: Smart Switch Powers On But Won’t Connect to Wi-Fi
• Confirm your router broadcasts 2.4GHz (check router admin page — many dual-band routers hide 2.4GHz SSID by default). • Move phone within 6 ft of switch during setup. • Disable VPN or ad blockers on phone. • Reset switch (usually 10-sec button hold) and retry.
H2: Special Cases You Might Encounter
H3: Replacing a Dimmer Switch
Same wiring rules apply — but verify compatibility. Trailing-edge (electronic low-voltage) dimmers work with most LED downlights. Leading-edge (incandescent) dimmers cause buzz/flicker with LEDs. Check your smart dimmer’s spec sheet: “Compatible Load Types” should list “LED,” “Dimmable LED,” or “ELV.” If it says only “Incandescent/Halogen,” skip it.
H3: Upgrading to LED Bulbs After Smart Switch Install
Yes — but do it *after* the switch works reliably. Start with one bulb. Wait 24 hours. If no flicker or delay, add more. Avoid ultra-cheap no-name LEDs — they often lack proper driver isolation. Stick with Philips, Cree, or Feit (all verified in UL 1598C testing, Updated: April 2026).
H3: Renters & Temporary Upgrades
You *can* upgrade lighting without permanent changes — but avoid cutting wires or replacing junction boxes. Safe options: • Smart plug-in lamp dimmers (e.g., Lutron Diva CL, works with table/floor lamps). • Smart bulb + dumb switch left in ON position (but defeats energy savings — switch must stay on). • Battery-powered wireless switches (e.g., Philips Hue Tap) mounted over existing plate — no wiring, no landlord permission needed.
H3: Installing Low-Voltage LED Light Strips
These run on 12V or 24V DC — *not* 120V. Never connect strip directly to household wiring. You need: • A UL-listed LED driver (transformer) matched to strip wattage (e.g., 24V/60W for 5m strip). • Proper gauge wire (18 AWG min for <10ft runs). • Fuse protection on the 12V side if strip exceeds 5m (per NEC Article 411.3).
Mount driver near power source — not inside ceiling cavities. Use mounting clips, not staples, to avoid puncturing insulation.
H2: Realistic Expectations — What This Guide *Won’t* Cover
• Whole-home smart lighting design (e.g., multi-zone scenes, voice sync, automation logic). That’s covered in our complete setup guide. • Aluminum wiring (found in homes built 1965–1973) — requires COPALUM crimps and licensed inspection. • GFCI/AFCI breaker compatibility — some smart switches cause nuisance trips on AFCI circuits; check manufacturer’s AFCI compatibility list before buying. • Outdoor or wet-location installations — requires weatherproof boxes, silicone-sealed wire entries, and IP65-rated devices.
H2: Critical Safety Reminders — Not Suggestions
• Never work on live circuits — even “just a quick test.” • Never use wire nuts rated for 1–2 wires on 4+ wires — use properly sized connectors. • Never daisy-chain grounds — all grounds must connect to the box’s grounding screw *and* to each device. • Never ignore a warm switch plate — that indicates overload or loose connection. Turn OFF and inspect immediately. • Always match wire gauge: 14 AWG for 15A circuits, 12 AWG for 20A. Using smaller wire risks fire.
H2: Smart Switch Comparison — What to Buy (and Why)
| Model | Neutral Required? | Max Load (LED) | Dimmer? | Hub Required? | Key Limitation | Price (USD) |
|---|---|---|---|---|---|---|
| TP-Link Kasa HS200 | Yes | 15A / 1800W resistive, 300W LED | No | No | Needs neutral; no 3-way support | $24.99 |
| Aqara D1 (EU/US) | Yes | 10A / 1200W | Yes (leading-edge) | No (Zigbee) | Zigbee needs hub (e.g., Aqara M2) | $29.99 |
| Lutron Caseta PD-6ANS | No | 600W incan, 150W LED | Yes (ELV) | Yes (Smart Bridge) | Requires hub; no Wi-Fi native | $39.99 |
| Brilliant Control | No | 15A / 1800W | Yes (adaptive) | Yes (Brilliant Hub) | Needs 24V transformer for neutral-free install | $129.00 |
H2: Final Checklist Before You Flip the Breaker Back On
☐ Voltage tester confirms zero reading on all wires ☐ Neutral wire securely joined (if required) ☐ Ground wire connected to switch *and* box ☐ No exposed copper beyond wire nuts ☐ Wires seated fully under terminal screws (no strands hanging) ☐ Switch sits flush — no pressure on wires ☐ Breaker matches circuit label (e.g., “Kitchen Lights”)
If all checked — turn it on. Flip the switch manually. Then open the app.
It’ll work. Because you followed the physics, not the hype.
Remember: Every smart home starts with one correctly wired switch. Not every switch needs to be smart. Not every room needs automation. Start small. Verify. Repeat.
And if your breaker trips again — don’t force it. That’s not failure. That’s your house telling you something’s off. Listen. Then consult a professional. Safety isn’t a feature — it’s the foundation.