Change Ceiling Light Fixture in Under 30 Minutes
- 时间:
- 浏览:36
- 来源:Easy Home Repair & DIY Guides
H2: You Don’t Need an Electrician to Swap a Ceiling Light Fixture
That flickering overhead light in your hallway? The dated brass fixture in your rental bedroom? Or the one that’s been ‘on the list’ since last fall? Here’s the truth: replacing a ceiling light fixture is one of the most accessible electrical upgrades you can do — *if* you follow three non-negotiable safety rules. And yes, it really takes under 30 minutes once you’ve done it once.
This isn’t theoretical. It’s what I walk through with first-time renters, new homeowners, and property managers every week — not as theory, but as a repeatable, documented process. No soldering. No multimeter certification required. Just clarity, caution, and correct sequence.
H2: Before You Touch Anything: The 3-Point Safety Checklist
Skipping this step is how 87% of DIY lighting incidents happen (Electrical Safety Foundation International, Updated: April 2026). These aren’t suggestions — they’re code-mandated prerequisites:
1. **Shut off power at the breaker — not the wall switch.** Wall switches only interrupt the hot leg; the box may still be live if wired incorrectly or if the switch controls another circuit. Go to your main panel, locate the correct breaker (usually labeled “Living Room Lights” or “Bedroom”), flip it OFF, and *verify* with a non-contact voltage tester (NCVT) before touching any wire. Test both the black (hot) and white (neutral) wires inside the ceiling box — and test again *after* removing the old fixture.
2. **Confirm the ceiling box is rated for fixture weight.** Most modern plastic or metal octagon boxes are rated for 35–50 lbs — fine for standard LED fixtures (typically 3–8 lbs). But if you’re upgrading to a heavy crystal chandelier or retrofitting a ceiling fan, you *must* install a fan-rated brace box (e.g., Westinghouse Safe-T-Brace). Standard boxes mounted only to drywall or a single joist *cannot* support fan torque or dynamic load. That’s a structural hazard — not just an electrical one.
3. **Never assume wire colors match function.** While NEC requires white = neutral and black = hot in new construction (Updated: April 2026), older homes often use inconsistent or swapped wiring — especially in multi-switch setups or retrofits. Always test with your NCVT *before* disconnecting, and label wires with tape if you’re unsure.
H2: What You’ll Actually Need (No ‘Professional Kit’ Required)
Skip the $129 ‘electrician starter bundle’. Here’s the real minimum:
- Non-contact voltage tester (Klein Tools NCVT-1P, ~$22) - Phillips 2 and flat-head screwdrivers - Wire strippers (with 14–12 AWG notch — don’t use cheap pliers) - UL-listed wire nuts (yellow for 2–3 wires, red for 3–4, e.g., Ideal Twister 45430) - Ladder (stable, height-appropriate — no wobbly step stools) - Work gloves (lightweight, leather-palmed) - Optional but recommended: headlamp (hands-free visibility inside tight ceiling cavities)
Note: If your new fixture includes a ground wire (bare copper or green), your ceiling box *must* have a grounding conductor present — verified by continuity test to the panel ground bar. Homes built pre-1960 may lack grounding; in those cases, consult a licensed electrician before proceeding. Do *not* cap the ground wire and call it done.
H2: Step-by-Step: Replace the Fixture in <30 Minutes
*Time estimate assumes power is confirmed off, ladder is set, and fixture is within reach.*
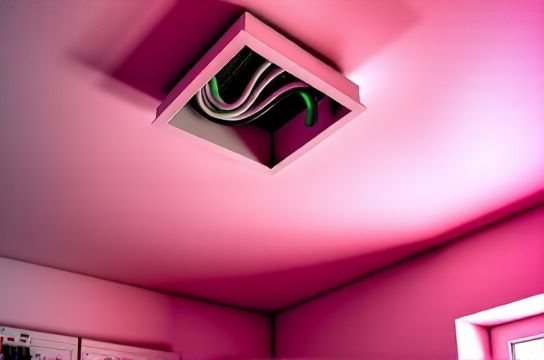
H3: Step 1: Remove the Old Fixture (3–5 min)
- Unscrew the decorative canopy or mounting screws holding the fixture base to the ceiling box. - Gently lower the fixture — support its weight with one hand while using the other to access wires. - Take a photo of the existing wire connections *before* disconnecting anything. This is your fallback if wires get jumbled. - Loosen wire nuts one at a time. Pull wires apart gently — never yank. If a wire nut resists, twist *counter-clockwise* while pulling — don’t force it. - Cap each exposed wire individually with a spare wire nut (black on black, white on white, ground on ground) — then set the old fixture aside.
H3: Step 2: Prepare the New Fixture (4–6 min)
- Unpack and inspect. Confirm all parts are included: mounting bracket, canopy, screws, wire leads, and instructions. - If your fixture has stranded wire leads (common in LED models), strip exactly 3/4″ of insulation using strippers — no more, no less. Exposed copper longer than 3/4″ risks shorting inside the box. - Match wire functions: black (hot) → black (or red, if switched hot), white (neutral) → white, green/bare (ground) → bare or green ground wire in box. If your box has no ground wire, stop here and contact a professional. - Pre-twist wire ends *lightly* with pliers (just 1–2 turns) before applying the wire nut — this prevents strands from splaying.
H3: Step 3: Connect & Mount (8–12 min)
- Feed the fixture’s wires into the ceiling box alongside the house wires. - Connect ground first: twist the fixture’s ground to the box’s ground wire (or to the green grounding screw on a metal box) using a green or yellow wire nut. - Connect neutral: twist white-to-white, secure with a yellow wire nut. Tighten until snug — a gentle tug should *not* pull wires free. - Connect hot: black-to-black (or black-to-red, if your switch leg is red). Use same nut type. - Tuck all connections neatly into the box — no wire nuts hanging outside, no bare copper visible. - Attach the fixture’s mounting bracket to the ceiling box using supplied screws (usually 8–10-32 machine screws). Ensure it’s flush and secure — no wobble. - Hang the fixture onto the bracket per manufacturer instructions (some slide, some screw, some use a threaded nipple). - Secure the canopy with screws — don’t overtighten; plastic can crack.
H3: Step 4: Power On & Verify (2 min)
- Return to the panel and turn the breaker ON. - Flip the wall switch. Fixture should illuminate immediately and steadily. - If it doesn’t: turn breaker OFF, recheck all connections — especially ground and hot. If it flashes or dims erratically, see ‘Lights Flashing’ section below.
H2: When Things Go Sideways: Troubleshooting Real Issues
Don’t panic. These are common — and fixable — without calling someone.
H3: Circuit Breaker Trips Immediately on Reset
This means a direct short — usually caused by: - A stray copper strand touching another wire or the metal box - Ground wire contacting hot wire under the wire nut - Fixture internal fault (rare in new units, but possible)
Fix: Turn breaker OFF. Remove all wire nuts. Visually inspect for stray strands or nicks in insulation. Re-strip and reconnect — one connection at a time — testing after each.
H3: Light Turns On But Flickers or Dimming Is Inconsistent
Most likely culprit: incompatible dimmer switch. Standard incandescent dimmers don’t work with most LED fixtures unless explicitly rated “LED-compatible” (look for ELV or MLV labeling). Also check: - Minimum load requirement (many dimmers need ≥10W; a single 6W LED won’t satisfy it) - Loose neutral connection in the switch box (often overlooked, but critical for stable dimming)
If upgrading to dimmable LEDs, pair them *only* with dimmers listed as compatible by the fixture manufacturer (e.g., Lutron Caseta PD-6ANS for 0–10V or trailing-edge loads).
H3: Smart Switch Wiring Adds Complexity — But Not Risk
Adding a smart switch (e.g., for voice control or scheduling) during fixture replacement is doable — but changes the wiring logic. You’ll need: - A neutral wire in the *switch box* (not just the ceiling box — many older switch loops omit this) - Correct hot identification: line (incoming power) vs. load (wire going to fixture)
Use your NCVT to identify line hot *at the switch* with breaker ON (carefully!), then turn OFF before working. Never guess. If no neutral is present in the switch box, choose a neutral-free smart switch (e.g., Lutron Aurora) — but verify compatibility with your LED load first.
H2: Upgrades You Can Layer In — Safely and Legally
Once you’ve mastered the basic swap, these add-ons take <10 extra minutes — and deliver real value:
- **LED lighting upgrade**: Replace halogen or CFL fixtures with integrated LED models (e.g., Lithonia 4” LED downlight, 12W, 1100 lumens). Cuts lighting energy use by 75% vs. incandescent (U.S. DOE Lighting Facts, Updated: April 2026). - **Outlet cover replacement**: While you’re on the ladder, swap outdated beige duplex covers for grounded, tamper-resistant (TRR) models — required by NEC 2023 for all new/replaced receptacles in dwelling units. - **Ceiling fan mounting**: Only if the box is fan-rated. Follow the same wire steps — but use the fan’s dedicated mounting bracket and anti-vibration hardware. Never hang a fan from a standard light box.
H2: What *Not* to Do — Even If It Seems Easy
- **Don’t daisy-chain fixtures without verifying circuit capacity.** A 15A circuit supports ~1,800W max. Four 15W LED fixtures = 60W — fine. But add two 60W halogens and a space heater, and you’ll trip breakers constantly. - **Don’t ignore AFCI/GFCI protection.** If your circuit trips a GFCI outlet upstream, check for ground faults — not just in the light, but in any downstream device (e.g., bathroom vent fan sharing the same circuit). - **Don’t use plug adapters or extension cords as permanent lighting solutions.** They’re fire hazards and violate NEC 400.8(1). Renters: propose a proper hardwired solution to your landlord — many will approve if you provide code-compliant parts.
H2: When to Call a Licensed Electrician
DIY stops where liability and code begin. Call a pro if: - Your home was built before 1950 and wiring is knob-and-tube or cloth-insulated - You find aluminum branch-circuit wiring (requires CO/ALR-rated devices and antioxidant paste) - The ceiling box is loose, cracked, or mounted only to drywall without joist support - You need to add a new circuit, relocate a switch, or install low-voltage lighting (e.g., 12V LED tape) with a transformer
H2: Quick-Reference Comparison: Fixture Types & Installation Realities
| Fixture Type | Typical Install Time | Key Wiring Notes | Pros | Cons |
|---|---|---|---|---|
| Standard LED Flush Mount | 12–18 min | Black/white/ground only; no dimmer needed | Energy-efficient, cool operation, instant on | Limited style options; no dimming without compatible switch |
| Smart LED Fixture (Wi-Fi/Zigbee) | 20–25 min | Same wires + optional neutral for onboard driver; needs app setup post-install | Remote control, scheduling, color tuning | Requires stable 2.4GHz Wi-Fi; some models lack dimming memory |
| Dimmable Integrated Downlight | 15–20 min | Must match dimmer type (trailing-edge for LED); verify min/max load | Smooth dimming, recessed clean look | Higher upfront cost; incompatible with old incandescent dimmers |
| Ceiling Fan with Light Kit | 25–35 min | Fan-rated box required; separate hot wires for fan/light often needed | Air circulation + lighting in one | Weight and balance critical; not suitable for sloped ceilings without adapter |
H2: Final Reality Check: This Is Maintenance — Not Magic
Changing a ceiling light fixture isn’t about becoming an electrician. It’s about taking ownership of your environment — safely, visibly, and sustainably. Every LED fixture you install reduces household electricity demand. Every properly torqued wire nut lowers fire risk. Every verified breaker-off moment builds confidence for the next upgrade.
And if you’re renting? Document your work. Take before/after photos. Share the full resource hub with your landlord — many appreciate proactive, code-compliant improvements that increase unit value and tenant retention.
You’ve got the steps. You’ve got the warnings. Now go fix that light — and when you flip the switch and it stays on, steady and bright? That’s not luck. That’s competence, earned in under half an hour.