Smart Switch Wiring Without Electrician Help
- 时间:
- 浏览:41
- 来源:Easy Home Repair & DIY Guides
H2: Before You Touch a Wire — The 3-Minute Safety Checklist
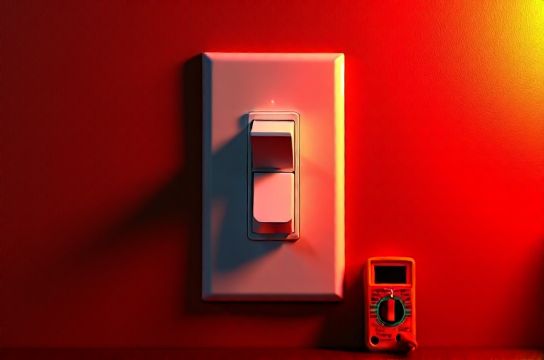
Smart switches promise voice control, scheduling, and energy tracking—but they’re not plug-and-play. Unlike smart bulbs, smart switches require physical rewiring inside your wall box. That means real voltage, real risk, and real consequences if done wrong. So before you unscrew a single faceplate, do this:
• Turn OFF the correct circuit breaker—not just the wall switch—and verify with a non-contact voltage tester (NCVT) at both the switch and fixture terminals. Test every wire in the box, including neutrals and grounds. (Updated: April 2026) • Confirm your switch box has a neutral wire (white, usually bundled or capped). Most modern smart switches—including Lutron Caseta, TP-Link Kasa, and Aqara—require neutral for standby power. If you only see black (hot), red (traveler), and bare copper (ground), you likely have a "switch loop"—and most smart switches won’t work without rewiring or using neutral-free alternatives like Lutron Diva DVCL-153P (load-rated up to 600W incandescent / 150W LED). • Check your load type and wattage. Smart switches list max compatible loads: e.g., 15A resistive (incandescent/halogen), 10A inductive (fan/motor), or 600W total LED equivalent. Overloading causes heat buildup, flickering, or premature failure. A typical 4-light LED ceiling fixture draws ~24–48W—not 400W—so don’t assume ‘it’s just LEDs, it’s fine.’
Skip this step? You risk nuisance tripping, damaged devices, or fire hazard. And yes—renters: check your lease. Some prohibit permanent electrical modifications. When in doubt, use plug-in smart outlets or smart bulbs instead.
H2: Step-by-Step Smart Switch Installation (Single-Pole, Neutral-Required)
This assumes a standard single-pole setup: one switch controls one light/fixture, neutral present, no three-way or multi-location control.
Step 1: Remove the Old Switch Safely Turn off power. Unscrew the faceplate. Use your NCVT again—even after breaker-off—to confirm zero voltage. Loosen the terminal screws and gently pull the old switch from the box. Note wire connections: typically black (hot line), black or red (load to light), white (neutral), and bare/green (ground). Take a photo before disconnecting.
Step 2: Identify Your Wires Correctly • Line (Hot In): Usually black, connected to brass or dark screw on old switch. Often comes from the panel direction. • Load (Hot Out): Usually black or red, goes to the light fixture. Connected to other brass/dark screw. • Neutral: White, often capped alone or with other whites. Must be accessible—not buried under tape. • Ground: Bare copper or green-insulated. Attached to green screw or box.
⚠️ Critical note: If your neutral is shared across multiple circuits (e.g., tied to neutrals from different breakers), do NOT proceed. This violates NEC 2023 Article 300.13(B) and risks overloading the neutral. Call an electrician.
Step 3: Connect the Smart Switch Most brands follow same color coding: • Black (Line) → connects to your hot line (black from panel) • Red or Blue (Load) → connects to your hot load (black/red to light) • White (Neutral) → connects to neutral bundle (use a UL-listed wire nut; never twist-on with tape alone) • Green or Bare (Ground) → connects to ground bundle or grounded metal box
Use stranded pigtails if wires are stiff or short. Never force wires into backstabs—they loosen over time and cause arcing. Always use side-screw terminals, tightened firmly (but don’t strip insulation).
Step 4: Mount & Restore Power Tuck wires neatly—no pinching. Secure switch to box with mounting screws (not faceplate screws). Attach faceplate. Turn breaker ON. Test with a lamp or multimeter before connecting fixture.
If the switch powers on but light doesn’t respond: double-check load wire continuity with a continuity tester (power OFF). If light flickers or dims inconsistently: verify LED driver compatibility—some magnetic low-voltage drivers conflict with trailing-edge dimmers.
H2: When It Doesn’t Work — Common Failures & Fixes
• Circuit trips immediately on restore: Short between line/load or line/neutral. Recheck wire nuts—no stray strands touching. Verify no neutral is accidentally connected to load. • Switch powers on but no response in app: Ensure Wi-Fi signal strength ≥ -65 dBm at the switch location. Smart switches need 2.4 GHz network only—no 5 GHz. Also confirm firmware is updated via manufacturer app before pairing. • Light turns on but won’t dim: Your smart switch may be a non-dimming model (e.g., Kasa HS200). Dimming requires a dedicated dimmer switch (e.g., Lutron Caseta PD-6WCL) AND dimmable LED bulbs/drivers. Non-dimmable LEDs + dimmer = buzzing, reduced lifespan, or no dimming below 30%. • Flickering after install: Caused by insufficient minimum load. Many dimmers need ≥10W load to stabilize. Add a Lutron LUT-MLC (minimum load capacitor) wired in parallel at the fixture—this draws just enough current to satisfy the dimmer without consuming noticeable power (Updated: April 2026).
H2: What About Three-Way or Multi-Switch Setups?
You can’t replace just one three-way switch with a standard smart switch—it breaks the second location. Solutions: • Use a smart master + companion kit (e.g., Lutron Caseta PD-6WCL + PICO remote). Only the master replaces the wired switch; PICO mounts wirelessly on wall. • Install smart switches at both locations—but only if both boxes contain neutral. Rare in older homes. • Avoid wireless remotes that rely on battery-only operation if you want automation triggers (e.g., “turn on when door opens”). They lack local reporting capability.
H2: Renters & Temporary Upgrades — Safer Alternatives
If you can’t modify wiring—or your landlord says no—these are code-compliant, reversible options: • Smart plug-in adapters (e.g., TP-Link HS110) for table/floor lamps. Plug into existing outlet, then lamp into adapter. Adds energy monitoring and scheduling. • Smart bulbs (Philips Hue, Nanoleaf) in existing fixtures. No wiring changes. Works with most standard wall switches left in ON position. • Battery-powered smart switches (e.g., Aqara D1) mounted over existing switch plate—no wires touched. Uses RF or Zigbee to trigger hub-based lighting control.
All comply with NEC 2023 Section 404.14(F) for cord-and-plug connected equipment. Just ensure your plug adapter is rated for your lamp’s wattage (e.g., HS110 handles 1800W max).
H2: Troubleshooting Lights That Flash, Buzz, or Won’t Stay On
Flickering isn’t always wiring—it’s often compatibility or design. Here’s how to diagnose:
• Single-bulb flicker: Try another known-dimmable bulb. If fixed, original bulb is incompatible. • Whole-fixture strobing: Check for loose neutral at fixture junction box—not just at switch. A floating neutral causes voltage imbalance. • Intermittent on/off: Could indicate failing thermal protection in smart switch. Measure surface temp with IR thermometer—if >60°C after 10 min runtime, switch is overloaded or poorly ventilated. • Buzzing sound: Almost always inductive noise from dimmer interacting with non-compatible driver. Replace driver or add LUT-MLC.
Never ignore persistent buzzing—it indicates arcing or resonance, both fire risks per NFPA 70E Table 130.7(C)(15)(a).
H2: Upgrading Fixtures — Ceiling Light Replacement & Fan Mounting
Replacing a ceiling light or installing a ceiling fan follows similar safety logic—but adds mechanical load concerns.
For ceiling light replacement: • Confirm junction box is rated for fixture weight. Standard plastic/octagon boxes support ≤50 lbs. Heavy chandeliers (>35 lbs) require fan-rated metal box (UL 508A, marked “Acceptable for Fan Support”). • Always connect fixture ground to box ground—even if box is plastic (use grounding clip and pigtail to green wire). • Match wire gauge: 14 AWG for 15A circuits, 12 AWG for 20A. Never splice 14 AWG to 12 AWG without approved connector.
For ceiling fan mounting: • Use a UL-listed fan brace kit (e.g., Westinghouse BRKT-FAN) if existing box isn’t fan-rated. These expand inside joist cavity and support up to 70 lbs. • Balance the fan *before* final tightening—most come with balancing kit. Unbalanced fans vibrate, loosen connections, and fatigue mounting hardware. • Set fan direction seasonally: clockwise (low speed) in winter pushes warm air down; counterclockwise (high speed) in summer creates breeze.
H2: Outlet & Faceplate Swaps — Simpler Than You Think
Replacing a worn outlet or switch plate is low-risk—if you follow one rule: never swap a 15A outlet for a 20A without verifying the entire circuit uses 12 AWG wire and 20A breaker. Doing so violates NEC 210.21(B)(2) and risks overheating.
Steps: • Turn OFF breaker. Verify with NCVT. • Remove faceplate and outlet. Note wire positions: brass (hot), silver (neutral), green (ground). • For GFCI outlets: LINE terminals go to panel feed; LOAD terminals go to downstream outlets you want protected. Miswiring causes false trips or no protection. • Tighten all screws to 0.9 lb-ft torque (use a torque screwdriver—over-tightening cracks yokes).
H2: Resetting a Tripped Breaker — Why It Happens & When to Stop
Breakers trip for three reasons: overload, short circuit, or ground fault.
• Overload: Too many devices on one circuit. Example: 15A circuit powering space heater (1500W), microwave (1200W), and toaster (900W) = 3600W > 1800W max. Solution: redistribute loads. • Short circuit: Hot touches neutral or ground—often due to damaged wire insulation or faulty device. Smell of burnt plastic? Don’t reset—call pro. • Ground fault: Hot contacts ground path (e.g., water in outlet, frayed cord). GFCI breakers trip faster (<25ms) than standard breakers.
Reset procedure: 1. Unplug everything on the circuit. 2. Flip breaker fully OFF (past neutral), then ON. 3. If it trips instantly: short or ground fault exists—don’t retry more than twice. 4. If it holds, plug in devices one-by-one until trip recurs. That device is faulty.
Persistent tripping after verified load reduction? Likely failing breaker—replace only with exact same brand, amperage, and series (e.g., Siemens Q115, not generic).
H2: Smart Switches vs. Dimmers vs. Fans — Specs at a Glance
| Feature | Lutron Caseta PD-6WCL | TP-Link Kasa HS220 | Leviton DW6HD-1BZ | Aqara D1 (No-Neutral) |
|---|---|---|---|---|
| Max Load (LED) | 150W | 150W | 200W | 800W (resistive only) |
| Neutral Required? | Yes | Yes | No | No |
| Dimming Type | Leading-edge | Trailing-edge | Leading-edge | Not applicable (on/off only) |
| 3-Way Compatible | Yes (w/ Pico) | No | Yes (w/ companion) | No |
| Installation Time (Avg.) | 25 min | 20 min | 18 min | 12 min |
| Price (USD) | $49.99 | $29.99 | $34.99 | $24.99 |
H2: Final Reality Check — When to Call a Pro
DIY is empowering—but not universal. Stop and call a licensed electrician if: • You find aluminum wiring (silver-colored, brittle, requires CO/ALR-rated devices and antioxidant paste). • Your home was built pre-1965 and lacks grounding (2-prong outlets, no ground wire). • You measure >2V AC between neutral and ground at any outlet—indicates neutral-to-ground bond violation. • You need to run new cable, drill through studs, or add a subpanel.
These aren’t ‘nice-to-have’ consults—they’re code-mandated for safety and insurance compliance (NEC 2023 Article 110.2).
The goal isn’t to do everything yourself. It’s to know what you *can* do safely—and where the line sits. Every correctly installed smart switch reduces energy waste, improves convenience, and builds confidence for the next project. And if you’d rather skip the guesswork and get full wiring diagrams, load calculators, and video walkthroughs for every common scenario, our complete setup guide walks you through it—step-by-step, code-checked, renter-friendly. (Updated: April 2026)