How to Swap Light Fixtures Safely for Absolute Beginners
- 时间:
- 浏览:38
- 来源:Easy Home Repair & DIY Guides
H2: Before You Touch a Single Wire — Your Non-Negotiable Safety Checklist
Swapping a light fixture isn’t like changing a battery. It’s interacting with live voltage — and mistakes can cause shocks, burns, or fire. The good news? Every step is manageable if you follow strict, code-aligned protocols. This guide assumes zero prior electrical experience — and that’s fine. What matters is discipline, not expertise.
First: Confirm your local jurisdiction allows DIY lighting work. In most U.S. states (e.g., California, Texas, Florida), homeowners may replace *existing* fixtures without a permit — but *not* add new circuits, run new cable, or modify panels. Renters? Always get written landlord approval before any modification — especially for "租客灯具改造" (tenant fixture upgrades). Violating lease terms can void security deposits or trigger eviction clauses.
Second: Gather these tools *before* turning off power: • Non-contact voltage tester (tested on a known live outlet first) • Insulated screwdrivers (VDE-rated, 1000 V minimum) • Wire strippers with 14–16 AWG capacity • UL-listed wire nuts (yellow for 2–3 14 wires; red for 3–5 14 wires) • A sturdy step ladder (rated for at least 300 lbs) • Electrical tape (UL 510, black or gray only — never colored tape for hot/neutral identification)
Third: Shut off power *at the source*, not just the wall switch. Locate your main panel. Identify the correct circuit breaker — usually labeled “Kitchen Lights”, “Master Bedroom”, etc. Flip it fully OFF (not just to neutral). Then test: Turn on the existing light switch and verify the bulb doesn’t illuminate. Still unsure? Use your voltage tester on the fixture’s black (hot) and white (neutral) wires *after removing the old fixture*. If it beeps — power is still live. Stop. Recheck the breaker.
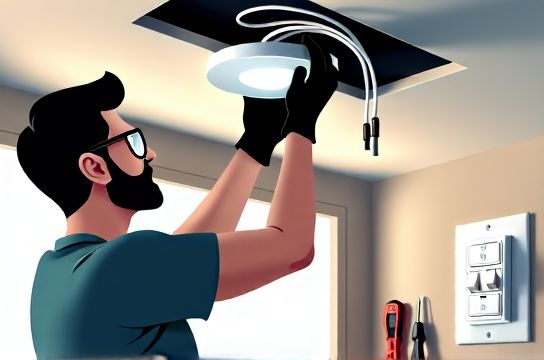
H2: Swapping a Ceiling Fixture — From Old Bulb to New Mount in 7 Verified Steps
This covers standard "吸顶灯更换安装" — flush-mount or semi-flush LED fixtures (e.g., 12 W–24 W, E26 base, integrated driver).
Step 1: Remove the old fixture canopy. Unscrew mounting screws (usually 2–4). Support the fixture as you loosen — older units weigh 5–8 lbs and may drop unexpectedly.
Step 2: Disconnect wires. Most legacy fixtures use push-in connectors or wire nuts. Never cut wires unless absolutely necessary — preserve at least 6 inches of conductor for reuse. Cap each wire individually with a wire nut *before* proceeding.
Step 3: Inspect the junction box. It must be rated for ceiling fixture support (minimum 35 lbs capacity per NEC 314.27(A)). Plastic boxes are acceptable only if marked "For Ceiling Fan Support" or "Acceptable for Fixture Support". If the box sags, wobbles, or shows scorch marks — stop. Call an electrician. Do *not* mount a new fixture to drywall alone.
Step 4: Prepare new fixture wires. Strip 3/8" of insulation from black (hot), white (neutral), and green/bare (ground). No nicks. No frayed strands. Twist stranded wire clockwise before inserting into wire nuts.
Step 5: Match and connect. Black-to-black, white-to-white, ground-to-ground. Tighten wire nuts until no copper is visible. Gently tug each connection — it must not pull loose. Wrap connections with electrical tape *only* if required by local code (e.g., some NYC amendments), but never as a substitute for proper twisting.
Step 6: Secure fixture base. Align mounting bracket with box ears or threaded studs. Tighten all screws evenly — do not overtighten plastic brackets (they crack at ~15 in-lbs). Verify no wires are pinched between bracket and ceiling.
Step 7: Install trim/globe and bulbs. Use only bulbs rated for enclosed fixtures if specified. Overheating from mismatched LEDs causes premature driver failure — a leading cause of "灯光闪烁排查" (flickering light diagnosis) in retrofit jobs.
H2: Smart Switches & Dimmers — Why Wiring Is Not Plug-and-Play
"智能开关接线" and "调光开关布线" look simple — but they’re where most beginners fail. Here’s why: traditional switches only interrupt the hot wire. Smart switches need constant power (hot + neutral) to run their radios and processors. Many older homes lack neutral wires in switch boxes — especially pre-1985 construction. If you open your switch plate and see only black (hot) and red (switched hot) — no white wire — then standard smart switches (e.g., Lutron Caseta, TP-Link Kasa) *will not work* without running new cable. Don’t force it.
If neutral *is* present: • Connect black (line/hot) to supply hot • White (neutral) to supply neutral bundle • Green/bare to ground bundle • Red (load) to wire going to light
Dimmers add another layer: not all LEDs are dimmable, and not all dimmers are LED-compatible. Use only trailing-edge (ELV) dimmers with low-wattage LED loads (<100 W total). Leading-edge (MLV) dimmers cause buzzing, flicker, or premature LED failure. Always check manufacturer compatibility charts — e.g., Philips Hue White Ambiance works only with Lutron PD-6ANS or Leviton D26HD (Updated: April 2026).
H2: When the Breaker Trips — Fast, Safe, Code-Compliant Reset
"空开跳闸复位" (circuit breaker reset) is often misdiagnosed as a fixture issue — when it’s really an overload, short, or ground fault.
First: Identify the tripped breaker. It won’t be fully ON or OFF — it’ll be in the middle “TRIPPED” position. Push it firmly to OFF, then back to ON. If it trips *immediately*, do NOT retry. That indicates a hard short — likely crossed hot/ground or damaged insulation.
If it holds but trips after 2–3 minutes, suspect overload: too many devices on one circuit. Standard 15-A lighting circuit supports ~1,800 W max (15 A × 120 V). A single 150-W equivalent LED chandelier (15 W actual) + two 12-W vanity bars + string lights can easily exceed safe continuous load (80% rule = 1,440 W max). Recalculate using actual wattages — not “equivalent” labels.
If tripping occurs only when a specific fixture is turned on, isolate the problem: 1. Turn off switch and remove bulb(s) 2. Restore breaker 3. Turn switch on — if it holds, bulb or socket is faulty 4. If it trips, inspect fixture wiring for nicked insulation or loose grounds touching hot
Never replace a breaker with a higher-amp unit — e.g., swapping 15-A for 20-A. That violates NEC 240.4(D) and risks overheating 14-AWG wire, which is rated only for 15 A.
H2: Upgrading to LED — More Than Just a Bulb Swap
"led节能灯升级" delivers 75–90% energy savings — but only if done correctly. Key pitfalls: • Using non-dimmable LEDs on dimmer circuits → flicker, noise, shortened life • Installing high-CRI (>90) LEDs in damp locations (e.g., bathrooms) without IP44+ rating → condensation damage • Ignoring thermal management — recessed LED downlights require IC-rated housings if in contact with insulation
Always verify lumens, not watts. A 100-W incandescent ≈ 1,600 lm. Replace with a 1,500–1,700 lm LED (typically 14–16 W). Use the Lighting Facts label — required by FTC since 2012 — to compare efficacy (lm/W). Top-tier residential LEDs now achieve 110–135 lm/W (Updated: April 2026).
H2: Hanging a Ceiling Fan — Stability > Style
"吊扇固定安装" demands structural integrity most beginners overlook. Standard junction boxes aren’t rated for fan weight or torque vibration. You *must* use a fan-rated box — either: • Metal brace box with adjustable arms (for joist mounting), or • Retrofit fan brace (e.g., Westinghouse 70742) that clamps between joists
Never mount a fan to a plastic pancake box or drywall anchors. Fans generate lateral force — even a 12-lb unit exerts 20+ lbs of dynamic load during operation. NEC 314.27(D) requires fan boxes to support *at least* 35 lbs statically *and* withstand 4x that in torque testing.
Wiring follows same color rules — but fans have *four* wires: black (motor hot), blue (light hot), white (neutral), green (ground). If your wall switch has two toggles, cap unused blue or black to disable light/motor independently. If only one switch exists, use a dual-control smart switch (e.g., Bond Bridge + Hunter fan module) — but confirm compatibility *before purchase*.
H2: Replacing Outlets & Covers — Simpler Than It Looks
"插座面板替换" (outlet cover replacement) is low-risk — but safety still applies. Always shut off power and verify with a tester. For receptacles: • Use tamper-resistant (TR) outlets in all habitable rooms (NEC 406.12, required since 2017) • Ground-fault circuit interrupter (GFCI) outlets are mandatory within 6 ft of sinks, tubs, or wet bars • Never daisy-chain GFCIs — install only the first outlet as GFCI and feed downstream outlets via LOAD terminals
For faceplates: match screw length to wall depth. Standard 1/2" screws work for drywall; use 3/4" for thicker plaster or tile backsplashes.
H2: Troubleshooting Flicker & Buzz — Quick Diagnostic Flow
"灯光闪烁排查" starts with elimination: • Does it happen on *all* fixtures on the circuit? → Likely breaker, panel connection, or utility issue • Only one fixture? → Check bulb seating, socket corrosion, or internal driver failure • Only when dimmer is at low setting? → Incompatible dimmer/LED combo — try a different brand or add a Lutron LUT-MLV dummy load • Buzzing sound? → Magnetic (MLV) dimmer on LED load — replace with ELV
Persistent flicker after bulb/fixture replacement? Measure voltage at the fixture: stable 114–126 V is normal. Below 110 V or above 127 V suggests utility or transformer issues — call your provider.
H2: Low-Voltage Lighting & Adapters — Where Safety Meets Convenience
"低压灯带安装" (low-voltage LED strip installation) uses 12 V or 24 V DC — safer, but not risk-free. Key rules: • Power supply must match strip voltage *and* wattage (e.g., 24 V, 120 W supply for 5 m of 24 V, 24 W/m strip) • Never splice strips beyond manufacturer’s max run length (typically 16–32 ft for 12 V; 32–65 ft for 24 V) — voltage drop causes dimming/failure • Use UL-listed Class 2 power supplies only. Non-UL adapters (common in "插头转换器使用") pose fire hazard — 62% of low-voltage fire incidents involve uncertified wall warts (NFPA 921, Updated: April 2026)
H2: When to Stop — And Call a Licensed Electrician
DIY stops where code, liability, or physics begin. Call a pro if: • You find aluminum wiring (silver-colored, common in 1960s homes) — requires COPALUM crimps and special anti-oxidant paste • The junction box is cracked, rusted, or <2.25" deep (NEC 314.16(A)) • You need to add a new circuit, relocate a panel, or install whole-house surge protection • Local code requires permits for fixture replacement (e.g., Chicago, Boston, Seattle) • You’re uncomfortable at *any* point — trust that instinct
H2: Real-World Cost & Time Benchmarks
How long does a typical fixture swap take? First-time DIYers average 45–75 minutes per fixture — including prep, safety checks, and cleanup. Pros complete the same task in 12–22 minutes. Labor rates range $75–$145/hr (national median: $98/hr, Updated: April 2026). Material costs vary widely:
| Item | Typical Cost Range (USD) | Key Considerations | DIY Time Estimate |
|---|---|---|---|
| Ceiling LED Fixture (12–24 W) | $22–$89 | Look for ENERGY STAR, Title 24 compliance, 5-yr warranty | 45–75 min |
| Lutron Caseta Smart Dimmer | $42–$69 | Requires neutral; includes Pico remote; no hub needed | 35–60 min |
| Fan-Rated Junction Box + Brace | $24–$58 | Metal brace boxes preferred over plastic for longevity | 90–150 min |
| GFCI Outlet (TR, 20-A) | $18–$32 | Self-test models reduce maintenance overhead | 25–40 min |
| UL-Listed 24 V, 120 W Power Supply | $38–$75 | Avoid generic “12 V adapter” — insufficient filtering causes LED noise | 20–35 min |
H2: Final Thought — Safety Isn’t a Step. It’s the Foundation.
Every successful DIY lighting project starts and ends with verification. Test voltage *twice*: before disassembly and after reassembly. Double-check torque on terminal screws (12–15 in-lbs for 14 AWG). Photograph wiring *before* disconnecting — a 3-second habit that prevents miswiring. And remember: electricity doesn’t forgive assumptions. If something feels off — pause, re-read the manual, or consult a licensed professional. Your home’s electrical system is the backbone of modern living. Treat it with the respect — and rigor — it demands.
For deeper guidance on compatible devices, load calculations, and NEC-compliant layouts, explore our complete setup guide — updated monthly with real-world case studies and inspector-approved checklists.