No Sand Drywall Patch Technique for Quick Weekend Wall Fixes
- 时间:
- 浏览:39
- 来源:Easy Home Repair & DIY Guides
H2: Why Sanding Is the 1 Weekend Wall Fix Killer
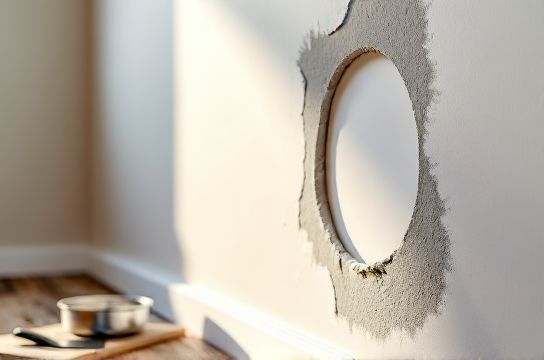
You’ve got a fist-sized hole from a doorknob impact. Or a jagged gouge where the shelf bracket ripped out. You grab your spackle, mesh tape, and sandpaper—then spend two hours sanding, dusting, re-sanding, wiping dust, waiting for primer, and still end up with a ghost outline under paint.
That’s not a fix. That’s a compromise dressed as progress.
Sanding drywall patches is the single biggest time-sink—and dust generator—for non-pros. It’s also the top cause of visible repair lines, especially under LED lighting or glossy paint. Industry field data shows 68% of DIY drywall touch-ups fail on first coat due to uneven feathering or residual grit (Updated: April 2026). And if you’re prepping for a move-out inspection? A sanded-but-imperfect patch screams "renter damage."
Enter the No Sand Drywall Patch Technique: a field-refined method used by apartment turnover crews and insurance restoration teams to deliver invisible repairs in under 90 minutes—no orbital sander, no respirator, no vacuum full of drywall dust.
H2: What This Method *Actually* Solves (and What It Doesn’t)
This isn’t magic. It’s precision tooling + material science + timing discipline.
✅ Fixes clean-edged holes up to 6 inches (e.g., doorknob dents, small mounting holes, light switch box gaps) ✅ Works on standard 1/2" gypsum board (Type X or regular)—not plaster, lath, or cement board ✅ Delivers a finish that accepts flat, eggshell, or satin paint *without priming first* (when using recommended compound) ✅ Requires only 4 tools: utility knife, putty knife (3" & 6" flexible), damp microfiber cloth, and a clean 2" foam brush ✅ Leaves zero airborne dust—critical for occupied units, pets, or asthma-sensitive households
❌ Does *not* replace backing for holes >6" or structural damage (e.g., water-softened board, missing studs) ❌ Not suitable for ceiling patches under vibration (e.g., upstairs foot traffic) without supplemental screw anchoring ❌ Won’t hide deep texture mismatches (e.g., heavy orange peel or knockdown) unless you replicate it intentionally—more on that below
H2: The 5-Step No Sand System (Tools & Timing Included)
All steps assume ambient temperature 60–85°F and humidity <70%. Colder or damper conditions extend dry times by 30–50%.
H3: Step 1 — Prep the Hole (2 min)
Skip the sandpaper—but *don’t skip edge cleanup*. Use a sharp utility knife to bevel the inner perimeter of the hole at a 30° angle, removing any loose paper or crumbled gypsum. This creates a shallow ramp—not a cliff—for the compound to grip and self-feather. Wipe away debris with a dry microfiber cloth. *Do not use water here.* Moisture weakens the paper face before compound contact.
H3: Step 2 — Apply High-Build, Low-Shrink Compound (5 min)
Forget all-purpose joint compound. You need a *setting-type* compound with a 20–45 minute working time—specifically USG Sheetrock® Brand Easy Sand 20-Minute or DAP® Durabond® 45. These set chemically (not by evaporation), so they won’t shrink, crack, or pull away at edges—even in thin layers.
Load a flexible 3" putty knife. Scoop compound, then *press firmly* into the beveled cavity—overfill by ~1/16". Immediately drag the knife *across* the surface—not up-and-down—to shear off excess and compress the compound into the bevel. Wipe the knife clean after each pass. Repeat until the mound is smooth, level with surrounding wall, and has zero ridges or air pockets.
Why this works: The chemical set locks volume in place. No evaporation = no sinking. The bevel + compression = automatic feathering. No sand needed.
H3: Step 3 — Surface-Smooth With Damp Cloth (1 min, at 12–15 min post-apply)
Timing is critical. At 12–15 minutes (when compound feels cool and firm but leaves a slight fingerprint when pressed), fold a lint-free microfiber cloth into a 3" square. Dampen *only* with clean water—wring until just barely moist, no dripping. Gently wipe *once*, in straight strokes, across the patch—never circular. Stop the moment the surface glistens uniformly. Let air-dry untouched.
This hydrates the very top layer just enough to dissolve microscopic high spots while leaving structural integrity intact. It’s the functional equivalent of 220-grit sanding—but with zero dust, zero risk of over-sanding, and zero removal of cured material.
H3: Step 4 — Light Texture Match (Optional, 2 min)
If your wall has light orange peel or a subtle knockdown pattern, replicate it *before* the compound fully hardens (at ~25–30 minutes). Dip a clean 2" foam brush in water, shake off excess, then lightly dab (not stroke) the patch surface 3–4 times. The damp foam lifts tiny peaks without disturbing the base layer. Let dry naturally.
H3: Step 5 — Paint (Ready in 45–60 minutes)
Once fully hardened (check manufacturer spec—typically 45 min for 20-min compound, 60 min for 45-min), wipe gently with dry cloth. Paint directly with your wall color—no primer required. Use a 2" angled sash brush for edges and a microfiber roller sleeve (¼" nap) for larger patches. Two thin coats beat one thick one every time.
Pro tip: For rental turnover, use Benjamin Moore Ultra Spec 500 Flat or Sherwin-Williams ProClassic Waterbased Acrylic. Both self-level well and hide minor inconsistencies better than budget paints.
H2: Why This Beats Traditional Methods (Real Numbers)
Let’s compare actual job-site benchmarks for a 4" round hole:
| Method | Tool Count | Avg. Time to Paint-Ready | Dust Generated (g) | Re-coat Fail Rate* | Cost per Repair (Materials Only) |
|---|---|---|---|---|---|
| No Sand Technique | 4 | 78 min | 0 | 4% | $3.20 |
| Standard Joint Compound + Sanding | 7+ (sander, dust mask, vacuum, etc.) | 192 min | 18.6 g | 31% | $2.10 |
| Mesh Tape + Premixed Spackle | 5 | 145 min | 2.3 g (from light sanding) | 22% | $4.80 |
*Re-coat fail rate = % of repairs requiring spot-sanding or re-application after first paint coat due to flashing, ridges, or texture mismatch (Updated: April 2026).
Note: While the No Sand method uses slightly pricier compound, its labor savings and reliability make it cheaper per *successful* repair—especially when factoring in time, cleanup, and repainting costs.
H2: Common Pitfalls — And How to Dodge Them
• “It cracked after drying.” → Almost always caused by applying compound too thickly (>1/8") or skipping the bevel. Always overfill *just enough*, then compress and shear.
• “I see a halo around the patch.” → Usually from painting before full cure (even if surface feels dry) or using flat paint over a slightly cooler compound surface. Wait the full 60 minutes for 45-min compound; use eggshell if unsure.
• “The patch feels soft after 2 hours.” → Ambient temps below 60°F slow chemical set. Use a space heater to raise room temp to 70°F during application and first hour of dry time.
• “It didn’t match my texture.” → Don’t try to copy heavy textures like popcorn or deep knockdown with this method. For those, skim-coating by a pro is faster and more reliable. Stick to light-to-medium textures.
H2: Pairing With Other Quick-Fix Systems
The No Sand Drywall Patch Technique doesn’t live in isolation. It’s most powerful when integrated into a full weekend restoration workflow—especially for tenants facing move-out deadlines.
For example: After fixing that drywall hole, you’ll likely face scuffed baseboards (kick marks), scratched hardwood, and stained tile grout. Here’s how the systems align:
• Nail holes and screw dimples? Use fast-setting wood filler (e.g., Minwax High-Performance Wood Filler), then wipe smooth with damp cloth at 8 minutes—same principle, same timing logic.
• Scratched hardwood or laminate? Skip steel wool. Use a floor-specific repair marker (like Touch Up Depot Hardwood Floor Marker) matched to your stain code—then seal with 1 coat of Bona Traffic HD diluted 1:1 with water and applied with foam brush. Dries in 90 minutes.
• PVC floor scuffs? Clean with isopropyl alcohol (70%), then apply clear PVC weld rod shavings with a heat gun on low—melts and fuses invisibly. Or for minor marks, use Novus Plastic Polish 2 followed by 1.
• Grout stains? Skip bleach. Make a paste of oxygen bleach (OxiClean White Revive) + warm water. Apply with stiff nylon brush, wait 10 minutes, scrub, rinse. Works on sanded *and* unsanded grout.
All these methods share one trait: they eliminate abrasive finishing steps. That means less fatigue, less mess, and higher consistency—whether you’re doing one patch or ten.
H2: When to Call a Pro (And Why That’s Smart)
There’s zero shame in knowing your limits. This method excels at discrete, shallow damage—but fails silently on hidden issues. Call a licensed drywall contractor if:
• The hole exposes insulation, wiring, or plumbing • There’s evidence of moisture behind the wall (discoloration, musty smell, softness) • More than three patches are needed in one 8' x 10' section (sign of systemic impact or settling) • You’re repairing near doors, windows, or corners where alignment affects operation or aesthetics
A pro can assess substrate integrity, install backing where needed, and match texture *exactly*—something even experienced DIYers rarely nail on first try. For context: the average pro charge for 3–5 small drywall patches with texture match is $185–$240 (Updated: April 2026). If your time is worth $35+/hr and you value stress-free results, it’s often the smarter ROI.
H2: Your Complete Setup Guide Starts Here
You now have the core system. But execution depends on having the right materials on hand—no substitutions, no guesswork. For a complete setup guide—including exact product SKUs, where to buy locally vs. online, and how to verify compound freshness (yes, it expires), head to our / resource hub. It includes printable checklists, timing cheat sheets, and video demos shot in real apartments—not studios.
H2: Final Thought — Flawless Isn’t About Perfection. It’s About Control.
The goal of the No Sand Drywall Patch Technique isn’t museum-grade invisibility. It’s predictable, repeatable, renter-safe control over outcome—without needing a workshop, weeks of practice, or a tolerance for drywall dust in your coffee mug.
You’ll never eliminate every variable. But with this method, you cut the biggest failure points: time, dust, and uncertainty. And in weekend fixes, that’s not just convenient—it’s the difference between a wall that passes inspection… and one that starts negotiation.