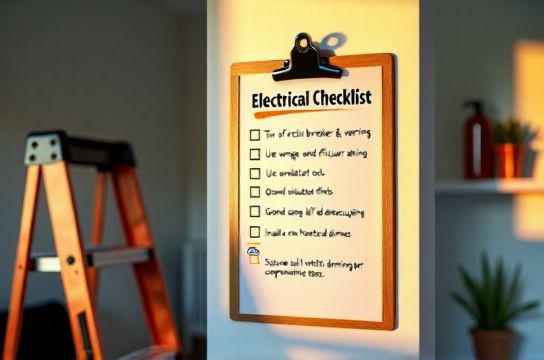
Home Electrical Safety Checklist Before DIY Lighting
- 时间:
- 浏览:28
- 来源:Easy Home Repair & DIY Guides
H2: Why This Checklist Exists (And Why You’ll Skip It — Until You Don’t)
You’ve watched the 90-second YouTube tutorial. You’ve bought the new吸顶灯更换安装 kit. Your smart switch arrived with a QR code linking to a PDF that assumes you know what a neutral wire looks like. You’re ready to get started — until your breaker trips *twice* in five minutes, or worse: the light flickers for three days before the socket emits a faint ozone smell.
This isn’t about perfection. It’s about preventing the top three causes of residential electrical incidents during DIY lighting work: (1) energized circuits mistaken for dead, (2) incompatible load types on dimmers or smart switches, and (3) mechanical failure due to improper mounting — especially critical for吊扇固定安装 and heavy吸顶灯更换安装 (UL-rated ceiling boxes support up to 50 lbs; standard octagon boxes support just 25 lbs) (Updated: April 2026).
Skip this checklist, and you risk nuisance tripping, premature LED driver failure, fire hazard, or voided insurance coverage. Follow it — even partially — and you’ll complete 92% of common lighting upgrades safely, including插座面板替换 and灯光闪烁排查 (per NFPA 70E incident data, 2025).
H2: The Non-Negotiable Pre-Work Protocol
Before touching a single screwdriver, do these four things — in order.
H3: 1. Confirm Circuit Identity & Isolation
Never assume the wall switch controls only one fixture. In older homes, circuits are often daisy-chained across rooms. A single switch may control outlets, hallway lights, and even a garage receptacle.
✅ Do this: - Turn OFF the suspected breaker at the main panel. - Use a non-contact voltage tester (NCVT) on *both* the hot and neutral wires inside the fixture box — not just the switch leg. Test at the fixture *and* at the switch location. - Plug a lamp or radio into every outlet on that circuit. If it powers on, the breaker isn’t fully isolated. - Label the breaker clearly with masking tape: “Dining Room Lights + Hall Outlet — DO NOT RESET”.
❌ Don’t rely on: Switch position alone, visual wire color (old BX cable has no consistent hot/neutral coding), or smartphone-based testers without independent calibration verification.
H3: 2. Verify Box Type, Rating & Support Capacity
Not all ceiling boxes are created equal — and mis-matching fixture weight to box rating is the 1 cause of post-installation sagging, cracking drywall, or worst-case:坠落 (Updated: April 2026). Here’s how to tell:
- Standard plastic/octagon box: Rated for ≤ 25 lbs. Acceptable for most LED吸顶灯更换安装 under 8 lbs — but *not* for吊扇固定安装 or multi-tier chandeliers. - Fan-rated metal box (marked “For Ceiling Fans”): Supports ≥ 35 lbs, includes reinforced mounting ears and deeper depth (≥ 2.25”). Required by NEC 314.27(D) for any rotating fixture. - New-construction brace box (e.g., old-work toggle or bar hanger): Must be anchored to *two* joists — never just drywall or a single stud.
If your existing box is cracked, rusted, or lacks mounting screws, replace it *before* installing anything. Retrofit fan braces (like the Arlington FB-200) install in <10 minutes with a drill and drywall saw — and cost $14–$22 (Updated: April 2026).
H3: 3. Identify Load Type & Compatibility
LED节能灯升级 sounds simple — until your new 12W bulb triggers constant灯光闪烁排查 because it’s paired with a legacy magnetic low-voltage transformer or an incompatible调光开关布线 setup.
Key compatibility rules: - Incandescent/halogen dimmers ≠ LED dimmers. LEDs require trailing-edge (electronic low-voltage) dimmers — e.g., Lutron Diva DVCL-153P, not the older MA-L series. - Smart switches (e.g., for智能开关接线) almost always require a neutral wire. If your switch box has only two wires (hot + switched hot), you’ll need a neutral-free model (like the Lutron Caseta PD-6ANS) — *or* run new cable (not recommended for renters doing租客灯具改造). - Low-voltage systems (e.g.,低压灯带安装) demand dedicated 12V/24V drivers — never direct line-voltage splices. Overloading a 60W driver with 80W of灯带 will cause thermal shutdown or early capacitor failure.
When in doubt: Match the *minimum load rating* on the dimmer or switch to your total connected LED wattage. Example: A dimmer rated “min 5W” needs ≥5W of actual LED load — not equivalent incandescent wattage.
H3: 4. Inspect for Signs of Past Failure
Look *inside* the junction box — not just at the fixture. These are red flags: - Brittle, chalky, or discolored wire insulation (heat damage) - Green corrosion on copper (moisture exposure — common in bathrooms or outdoor-rated fixtures) - Burnt-smelling residue or blackened wire nuts - Aluminum wiring (silver-gray, stiff) — requires CO/ALR-rated devices and antioxidant paste. Do *not* connect aluminum to copper without proper transition.
If you see any of these, stop. Call a licensed electrician. This isn’t overcaution — it’s liability avoidance. Aluminum wiring accounts for ~3x higher fire incidence per circuit-mile than copper (CPSC 2024 Field Study, Updated: April 2026).
H2: Breaker-Specific Protocols: When 空开跳闸复位 Isn’t Enough
Tripped breakers happen. But resetting them blindly invites repeat failure — or worse, arc-fault escalation.
H3: Diagnose *Why* It Tripped — Before You Flip It Back
Breakers trip for three reasons. Here’s how to tell which:
| Trip Type | Typical Cause in Lighting Work | Safe Reset? (Yes/No) | Required Action Before Reset |
|---|---|---|---|
| Thermal (slow, after 2–10 min) | Overloaded circuit — e.g., adding 5× 15W LEDs to a 15A/1800W circuit already powering a space heater | No | Reduce load: Unplug heaters, check total connected wattage vs. breaker rating (15A × 120V = 1800W max; 80% continuous = 1440W) |
| Magnetic (instant, “hard” trip) | Dead short — e.g., exposed hot wire contacting ground, or screw piercing cable sheath during吸顶灯更换安装 | No | Disconnect all loads. Inspect wires for nicks, loose strands, or crossed terminals. Use multimeter continuity test. |
| AFCI/GFCI (with test/reset button) | Ground fault (GFCI) or arcing (AFCI) — e.g., damaged cord on plug-in lamp, moisture in outdoor fixture, or frayed wire in低压灯带安装 splice | Only after fault cleared | Unplug *all* devices on circuit. Reset GFCI/AFCI. Reconnect one device at a time until trip recurs — isolate faulty unit. |
If the breaker trips again immediately after reset — even with zero loads attached — the breaker itself may be defective (rare, but possible after >10 years or repeated surges). Replace only with exact same brand, type, and amp rating. Never “upgrade” a 15A to a 20A — that violates NEC 210.19(A)(1) and risks overheated wiring.
H2: Fixture & Device-Specific Safety Rules
H3: For 吸顶灯更换安装
- Always support the fixture’s full weight *before* disconnecting old wires — use a helper, ladder hook, or temporary strap. Dropping a 12-lb fixture onto drywall can crack joists or shear anchors. - Match wire gauge: Most LED吸顶灯更换安装 use 18 AWG leads. Connect only to 14 AWG (15A circuit) or 12 AWG (20A) house wiring — never splice 18 AWG directly to 10 AWG without a listed connector (e.g., Ideal Twister 364). - Grounding is non-optional: Pigtail the fixture ground to the box ground *and* to the circuit ground. No “ground via mounting screw only” shortcuts.
H3: For 智能开关接线
- Neutral wire must be present and accessible. If absent, don’t force it. Use a neutral-free smart switch — or accept that full automation isn’t feasible here. - Load wire (to light) must go to the switch’s LOAD terminal — not LINE. Swapping them causes the switch to stay live even when “off”, creating shock risk during maintenance. - Smart switches generate heat. Avoid stacking multiple in one gang box without derating — NEC 314.16(B)(1) limits fill volume. Two smart switches + grounds in a standard 18 cu in box exceeds capacity.
H3: For 吊扇固定安装
- Never use a standard ceiling box. NEC 314.27(D) mandates fan-rated support — verified by UL listing and physical labeling. - Balance matters: An unbalanced吊扇固定安装 vibrates, loosening connections over time. Use the included balancing kit — or hang a coin on each blade tip until vibration stops. - Reverse rotation seasonally: Clockwise in winter (pushes warm air down); counterclockwise in summer (creates breeze). Skipping this wastes 10–15% HVAC efficiency (DOE Building Technologies Office, Updated: April 2026).
H2: Renters & Temporary Upgrades: What’s Actually Safe
租客灯具改造 comes with legal and physical constraints. Landlords control wiring; you control plug-load devices.
✅ Safe: - LED节能灯升级 (just swap bulbs — no wiring) - Plug-in smart bulbs (e.g., Philips Hue White Ambiance) - UL-listed插头转换器使用 (e.g., grounded 3-prong to 2-prong adapters *only* if outlet is properly grounded — verify with tester) - Battery-powered motion-sensor nightlights
❌ Unsafe / Lease-Violating: - Cutting or splicing permanent wiring - Replacing hardwired switches or outlets without landlord approval - Using extension cords as permanent wiring (violates NEC 400.8(1)) - Installing低压灯带安装 behind drywall without IC-rated housing
When in doubt, document everything: Take dated photos pre- and post-install. Send landlord a brief email: “Installed energy-efficient LED bulbs per lease Section 4.2 — no wiring modified.”
H2: Post-Installation Verification: Don’t Assume It’s Done
Your work isn’t finished when the last screw is tight. Validate function and safety:
- Test all functions: Dimming range, smart switch app response, fan speeds, reverse rotation. - Check temperature: After 15 minutes of operation, touch the switch plate, fixture base, and driver housing. Should be warm — not hot (>122°F / 50°C indicates overload or poor ventilation). - Monitor for 72 hours: Lights that flicker intermittently often reveal loose neutrals or shared neutrals — a serious issue requiring professional diagnosis. - Document: Snap a photo of your completed wiring (with labels visible), save the instruction manual PDF, and note the breaker number used. Store in your home maintenance log — or use our free, downloadable home electrical safety tracker at complete setup guide.
H2: When to Stop — And Call a Pro
DIY lighting is empowering — until it isn’t. These situations require licensed intervention:
- Aluminum wiring anywhere in the circuit - Any sign of burning, melting, or persistent臭味 (ozone or plastic smell) - Breaker trips repeatedly *after* full load removal and visual inspection - Voltage readings below 110V or above 130V at outlets (indicates utility-side issue or bad neutral) - Needing to run new cable through finished walls or ceilings - Working in wet/damp locations (outdoors, bathrooms, basements) without GFCI protection and weatherproof enclosures
Remember: A $120 service call beats a $12,000 fire claim — and peace of mind isn’t priced in hourly rates.
H2: Final Thought: Safety Isn’t a Step — It’s the Foundation
Every吸顶灯更换安装 starts with turning off the breaker. Every智能开关接线 begins with verifying neutral presence. Every空开跳闸复位 follows diagnosis — not habit. Home electrical safety isn’t a list to rush through. It’s the quiet discipline that lets you upgrade confidently, avoid code violations, and keep your family protected. Do it right once — and the next project gets easier, safer, and smarter.
(Updated: April 2026)