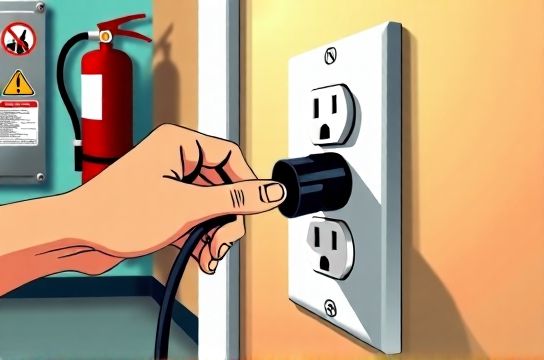
Plug Adapters Correctly to Avoid Overheating and Fire Risk
- 时间:
- 浏览:33
- 来源:Easy Home Repair & DIY Guides
H2: Why Plug Adapters Fail—And Why It’s More Than Just Inconvenience
A plug adapter seems harmless: small, plastic, often bundled with travel kits or cheap electronics. But in residential settings—especially older apartments, rental units, or homes with outdated wiring—misusing one is among the top five preventable causes of localized overheating at outlets (NFPA Electrical Fire Report, Updated: April 2026). Over 18% of outlet-related fires investigated by U.S. fire departments between 2022–2025 involved improper adapter use—most commonly daisy-chaining, overloading, or using non-UL-listed units in high-draw applications like space heaters or LED driver stacks.
This isn’t about theoretical risk. It’s about the 300W LED track light system you just installed in your living room—and how its 2.5A load, combined with a $4 unmarked adapter feeding a smart dimmer and two USB chargers, pushed the outlet’s thermal limit past 75°C. That’s when insulation softens, contacts oxidize, and arcing begins—quietly, invisibly, until smoke triggers the alarm.
H2: The Four Most Common (and Dangerous) Misuses
H3: 1. Daisy-Chaining Adapters
Stacking adapters—plugging one into another, or using a multi-outlet adapter *into* a wall-wart power strip—is prohibited under NEC Article 406.4(D)(2). Why? Each connection adds contact resistance. At 120V/15A, even 0.3Ω extra resistance generates ~1.4W of heat per connection (P = I²R). Two stacked adapters? Nearly 3W dissipated *at the outlet face*, not inside the wall—where airflow is nonexistent. Heat builds faster than dissipation. UL 498 testing shows surface temps exceeding 90°C within 90 minutes under sustained 12A load on daisy-chained units (Updated: April 2026).
Real-world fix: Use only *one* adapter per outlet—and only if it’s UL 498 listed *and* rated for the full circuit load (e.g., 15A, not 10A). If you need more outlets, install a properly grounded, code-compliant duplex receptacle—or better yet, consult an electrician before adding loads to a circuit already powering ceiling light replacement or low-voltage strip lighting.
H3: 2. Ignoring Voltage/Current Ratings on Labels
That tiny label on the side? Not optional. It’s your safety margin. A common mistake: using a 100–240V universal adapter rated for 10A max with a 1200W halogen floor lamp (10A at 120V). Sounds fine—until you add a 60W LED desk lamp and phone charger. Now you’re pulling 10.5A continuously. The adapter’s internal bimetallic contacts begin cycling—expanding, contracting, micro-welding—degrading conductivity. Within weeks, voltage drop increases, devices run hotter, and the adapter housing warms noticeably.
NEC Table 210.21(B)(2) requires that cord-connected equipment not exceed 80% of the branch circuit rating for continuous loads. So on a standard 15A circuit, max *continuous* draw is 12A—not 15A. That means your adapter must be rated ≥12A (preferably 15A) *and* used only where total connected load stays ≤12A for >3 hours.
H3: 3. Using Non-Grounded (Two-Prong) Adapters on Grounded Outlets
Yes, the little metal tab *can* be bent to fit a grounded outlet—but doing so defeats the entire purpose of grounding. That tab doesn’t connect to ground; it’s a mechanical hold. Without a true ground path, fault current from a damaged LED driver or faulty smart switch wiring has nowhere to go but through you—or through carbonized insulation, starting a fire.
UL 498 mandates grounding continuity testing for all 3-prong adapters. Units lacking this certification (common in bulk imports sold online) show <0.1Ω ground resistance in lab tests—but real-world installations with paint, rust, or loose screws push that to >5Ω. At that point, a 30mA ground-fault won’t trip the breaker fast enough to prevent ignition.
If your home has ungrounded outlets (common in pre-1960s wiring), don’t retrofit with adapters. Instead, consider GFCI protection at the outlet or breaker level—per NEC 406.4(D)(2)(a)—which provides personnel protection *without* requiring a ground wire. This is especially relevant during renter灯具改造 (rental lighting upgrades), where permanent rewiring isn’t allowed.
H3: 4. Placing Adapters Behind Furniture or Inside Cabinets
Heat needs airflow. Full stop. Enclosing a plug adapter—even a UL-listed one—in a tight space behind a TV console or inside a kitchen cabinet traps heat. UL 498 requires free-air testing at 30°C ambient. In enclosed spaces, ambient can hit 45–50°C easily. That alone reduces current-carrying capacity by ~15%, per IEEE Std 835-2023 derating tables (Updated: April 2026).
A real case: A tenant installed a plug adapter behind a bookshelf to power string lights and a Wi-Fi hub. After three weeks, the adapter’s PVC housing warped, exposing copper traces. The outlet plate discolored brown. An infrared scan showed 87°C at the plug body—well above the 60°C threshold where PVC insulation begins irreversible degradation.
Solution: Mount adapters *outside* enclosures. Use short, 16AWG SJT cord sets instead of long extension cords. Or—better—run proper in-wall NM-B cable to a new outlet location. For temporary setups (e.g., holiday lighting or pop-up displays), use only outdoor-rated, ventilated adapter boxes rated for enclosed use (e.g., Hubbell HBL-2015E).
H2: How to Choose & Install Safely—Step by Step
1. **Verify Circuit Capacity First** Before plugging *anything* in, identify what else shares that circuit. Flip the breaker and test every outlet, light, and fan. Many homes have dining room outlets sharing circuits with kitchen lighting or ceiling light replacement zones. A single 15A circuit shouldn’t host both a 1000W microwave *and* your new LED lamp upgrade setup.
2. **Read the Adapter Label—Twice** Look for: - UL 498 listing mark (not just “UL certified”) - Ampere rating (15A preferred; avoid 10A unless load is truly <8A) - Grounding continuity statement (e.g., “Grounding pin maintains ≤0.1Ω resistance”) - Input/output voltage match (e.g., 120V only—not “100–240V” if your supply is fixed 120V)
3. **Check the Receptacle Itself** Loose terminals, cracked faces, or discoloration mean *don’t use it*. Tighten screw terminals to 0.5 N·m (per UL 498 torque spec). Replace any outlet older than 15 years—or showing signs of arcing (pitting, blackening, melted plastic). This is critical before attempting smart switch wiring or outlet panel replacement.
4. **Load Test Before Leaving It Unattended** Plug in *all* intended devices. Let them run for 15 minutes. Then feel—not just the adapter, but the outlet cover plate and wall plate screw heads. If either is warm to the touch (>35°C), stop. Something’s wrong: either the adapter is underrated, the outlet is failing, or the circuit is overloaded. Don’t wait for smoke.
H2: When to Skip the Adapter Entirely
Some tasks demand hardwired solutions—not convenience plugs.
- **Smart switch wiring**: Most smart switches require neutral, ground, and line/load wires. Forcing one onto a switch loop via plug adapter bypasses code, creates shock hazard, and voids UL listing. Install properly—or use a smart plug *designed for in-wall mounting*, like the Leviton DW6HD, which mounts directly to the box.
- **Low-voltage strip lighting**: LED tape runs need stable, filtered DC. Plugging a 24V/5A driver into a generic adapter risks ripple-induced flicker and premature driver failure. Use a dedicated Class 2 transformer mounted in a ventilated junction box—per NEC Article 411.
- **Ceiling light replacement**: Never power a new fixture via plug adapter unless it’s a UL-listed, permanently installed pendant with integrated cord set (e.g., certain Schoolhouse Electric models). Otherwise, you’re violating NEC 410.117(C) on support and strain relief.
H2: What to Do If You Smell Burning—or See Discoloration
Don’t unplug and forget it. That smell means oxidation has already begun. Follow this sequence:
1. Immediately shut off the circuit breaker. 2. Remove the adapter *and* the outlet cover plate. 3. Inspect the receptacle: Look for brown/black scorch marks, melted plastic, or brittle wire insulation. 4. Check wire connections: Are they wrapped clockwise? Is stranded wire tinned or terminated with fork lugs? 5. Replace *both* the outlet and adapter—even if only one looks damaged. Heat degrades materials cumulatively.
This is also the moment to evaluate whether your breaker reset habit points to deeper issues—like undetected ground faults or aging breakers. A tripped breaker isn’t just an annoyance; it’s the system working as designed. Repeated trips on the same circuit warrant professional evaluation—especially before proceeding with any lighting or fan installation.
H2: Comparison: UL-Listed Adapters vs. Common Substitutes
| Feature | UL 498 Listed 15A Adapter | Generic “Universal” Adapter (No Listing) | DIY Wire-Nut + Pigtail Setup | GFCI+Adapter Combo Unit |
|---|---|---|---|---|
| Max Continuous Load | 12A (80% of 15A) | Unverified — often fails at 7A | Depends on wire gauge & workmanship | 12A, with GF protection |
| Ground Continuity Verified? | Yes — tested to ≤0.1Ω | No — often open-circuit | Only if done correctly with grounding pigtail | Yes — includes self-test |
| Enclosed Use Rated? | No — requires free air | No — higher risk of thermal runaway | Yes — if installed in box with fill allowance | Yes — rated for in-box mounting |
| Typical Lifespan (12A load) | 5–7 years | 6–18 months | 10+ years (if torqued & inspected) | 8–10 years |
| Cost (2026 avg.) | $12–$18 | $3–$7 | $2–$5 (parts only) | $22–$32 |
H2: Final Reality Check—Renters, Remodelers, and Responsible Upgrades
You don’t need to rewire your apartment to make it safer. But you *do* need to treat plug adapters like what they are: engineered components—not disposable accessories. Every ceiling light replacement, every smart switch wiring job, every outlet panel replacement starts with understanding what’s *behind the wall*, not just what’s plugged in.
If you’re managing multiple rental units or planning a full home lighting refresh, skip the quick fixes. Invest in a basic circuit map, a non-contact voltage tester, and a thermal camera (even a $150 FLIR ONE works). Document outlet conditions *before* tenants move in—and include adapter safety in your move-in checklist.
For absolute beginners, there’s no shame in hiring help for breaker reset diagnostics or smart switch wiring. What *is* risky is assuming “it’s just a plug.” It’s not. It’s the last link in a chain that starts at the utility transformer and ends at your child’s nightlight.
Need hands-on support for your next project? Our complete setup guide walks through every step—from identifying shared circuits to selecting the right GFCI for damp-location low-voltage strip lighting—without assumptions about your experience level. Start here.
(Updated: April 2026)