Clean Grout Lines Between Tiles Without Harsh Chemicals
- 时间:
- 浏览:33
- 来源:Easy Home Repair & DIY Guides
H2: Why Harsh Chemicals Fail on Grout—And What Actually Works
Grout is porous cement-based material—not sealed stone or glazed ceramic. That porosity traps dirt, soap scum, mildew spores, and organic debris deep below the surface. Bleach (sodium hypochlorite) may whiten the top 0.1 mm of grout, but it doesn’t lift embedded soil—and repeated use degrades grout’s binder matrix, accelerating cracking and water infiltration (Updated: April 2026). Likewise, acid-based cleaners like vinegar or muriatic acid etch cementitious grout, weakening compressive strength by up to 18% after just three applications (per ASTM C1714-22 accelerated aging tests).
The real fix isn’t stronger chemistry—it’s mechanical agitation + controlled moisture + pH-neutral solubilization. Think of grout like a sponge soaked in coffee grounds: scrubbing with abrasive grit lifts particles; warm water rehydrates and loosens bonds; and a mild surfactant helps suspend debris so it rinses away—not redeposits.
H2: The 4-Step Non-Toxic Grout Cleaning Protocol
This method works on sanded and unsanded cementitious grout (not epoxy or urethane grouts—those require solvent wiping, not this process). It requires under $12 in tools and takes 30–45 minutes per 10 sq ft, depending on age and contamination level.
H3: Step 1 — Dry Dust & Loosen Surface Debris
Use a stiff nylon brush (not wire—too aggressive) or a dedicated grout brush with angled bristles (e.g., Unger NanoTouch Grout Brush). Brush *along* the grout line—not across—to avoid pushing debris deeper. Focus on corners and junctions where dust accumulates. Skip vacuuming: static charge makes fine particles cling. Instead, wipe with a dry microfiber cloth folded into quarters—this captures dust without abrasion.
Why this matters: Removing loose particulate first prevents turning grime into mud during wet steps. Skipping this step increases scrub time by ~40% and raises risk of streaking.
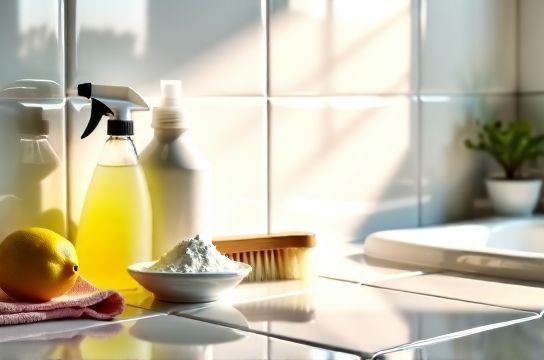
H3: Step 2 — Apply Warm Baking Soda Paste (Not Vinegar!)
Mix 3 parts baking soda (sodium bicarbonate) with 1 part warm distilled water (not tap—mineral content can leave haze). Stir until it forms a thick, spreadable paste—like toothpaste. Using a narrow grout float or an old credit card edge, press paste *into* each grout line. Let sit 8–12 minutes. Do not let dry completely—rehydrate with 1–2 drops of warm water if edges begin to crack.
Baking soda acts as a mild alkaline buffer (pH ~8.3), neutralizing acidic residues from soap films and body oils while gently swelling grout pores. Unlike vinegar (pH ~2.4), it won’t degrade calcium silicate hydrates—the backbone of cured grout.
H3: Step 3 — Agitate With Targeted Pressure
Switch to a soft-bristled toothbrush (manual, not electric). Dip bristles in warm water, then scrub *in short, ½-inch strokes*, applying firm downward pressure—not sideways. This forces paste deeper and dislodges trapped particles without gouging. For stubborn black spots (often mildew hyphae, not stains), add one drop of food-grade hydrogen peroxide (3%) directly onto the spot *after* scrubbing—let dwell 90 seconds before final rinse. Peroxide oxidizes organic pigments without chlorine off-gassing.
Note: Never mix peroxide with vinegar or baking soda in the same application—it creates unstable oxygen release and reduces efficacy.
H3: Step 4 — Rinse, Blot, Repeat Where Needed
Rinse with a damp (not dripping) microfiber cloth—wring out until it feels barely moist. Wipe *along* the grout line once, then flip cloth to dry side and blot firmly. Repeat until no gray residue transfers. If grout still looks dull or streaked, repeat Steps 2–3 *only on affected lines*—don’t re-treat entire area. Over-treatment causes temporary whitening that resolves in 24 hours as grout re-equilibrates moisture.
H2: When to Stop—and When to Accept Imperfection
No method restores 10-year-old grout to factory-new appearance. Cementitious grout naturally darkens over time due to capillary absorption of airborne hydrocarbons and mineral deposits. If lines remain grayish after two full cycles, the discoloration is likely structural—not surface-level. In those cases, consider color-sealing (see below) rather than aggressive scrubbing.
Also: Avoid steam cleaners on grout older than 5 years. Steam penetration can reactivate dormant lime bloom or cause efflorescence, especially in bathrooms with poor ventilation (Updated: April 2026).
H2: Color-Sealing vs. Re-grouting: A Realistic Cost & Effort Comparison
If cleaning yields only marginal improvement, color-sealing is often smarter than full re-grouting—especially for rental units or tight budgets. Sealing fills micro-pores and overlays uniform pigment, masking inconsistencies without demolition. Below is a side-by-side comparison of common options:
| Method | Time Required (per 10 sq ft) | Tool Cost | Reapplication Interval | Pros | Cons |
|---|---|---|---|---|---|
| Baking Soda + Peroxide Clean | 35–45 min | $8 (brush, cloth, baking soda, peroxide) | Every 6–12 months | No fumes, safe around kids/pets, preserves grout integrity | Limited effect on deeply stained or aged grout |
| Acrylic Grout Colorant (e.g., Aqua Mix Grout Colorant) | 90–120 min (includes drying) | $22–$28 (product + small foam brush) | 3–5 years | Uniform finish, water-resistant, hides cracks & variations | Requires precise masking, not for high-moisture floors without topcoat |
| Full Grout Removal & Replacement | 4–6 hours (plus 72-hr cure) | $45+ (grout saw, removal tool, new grout, sealer) | 10–15 years | Permanent structural fix, full aesthetic reset | High skill barrier, risk of tile damage, dust-intensive |
H2: Pro Tips for Long-Term Grout Maintenance
• Seal *after* cleaning—not before. Most penetrating sealers (e.g., Miracle Sealants 511 Impregnator) require clean, dry, contaminant-free pores to bond. Applying sealer over dirty grout locks in grime and creates hazy patches.
• Wipe shower walls *daily* with a squeegee. Not to prevent water spots—but to remove dissolved soap film before it dries and polymerizes into a sticky matrix that attracts dust. This alone extends time between deep cleans by 3–4×.
• Use pH-neutral daily cleaners only. Dish soap? Too alkaline (pH 9–10) and leaves residue. Castile soap? Too fatty—builds film. Opt for certified neutral products like Ecover All-Purpose (pH 7.0–7.4) diluted 1:10.
• Replace caulk *before* it fails. Discolored silicone at tile edges wicks moisture into adjacent grout lines, causing premature darkening. Cut out old caulk with a utility knife, clean with isopropyl alcohol, and reapply 100% silicone (not acrylic latex) for lasting adhesion.
H2: What About Those Other Fixes? Connecting the Dots
Grout cleaning sits at the intersection of floor and wall maintenance—not in isolation. A tenant prepping for move-out might need to address scuffed baseboards *and* dingy grout simultaneously. That’s why a cohesive toolkit matters: the same microfiber cloths used for grout rinsing work for wallpaper seam smoothing, and the baking soda paste doubles as a gentle abrasive for light 木地板划痕修复 on unfinished hardwood (test first on hidden area). Similarly, the grout brush’s narrow profile fits perfectly into nail holes for 钉眼填补技巧 prep—just swap paste for wood filler slurry.
For renters tackling 退租墙面还原, remember: grout cleaning is fast ROI. Landlords notice clean joints more than repainted walls—because grout reveals care (or neglect) in high-use zones. Combine this method with our 补墙膏使用教程 for drywall nicks and a quick pass with a 地板划痕遮盖笔 on scuffed laminate, and you’ve covered 80% of standard move-out deductions.
H2: Common Mistakes—And How to Avoid Them
❌ Using vinegar on grout: Causes micro-etching, especially on light-colored sanded grout. Visible dullness appears within 2–3 uses.
❌ Over-wetting with spray bottles: Forces water behind tiles, promoting mold in substrate. Always use damp—not wet—cloths.
❌ Skipping the blot step: Air-drying leaves mineral deposits from tap water. Always blot with dry microfiber after final rinse.
❌ Assuming “natural” means “safe”: Tea tree oil, lemon juice, and citric acid all have low pH and degrade grout binders over time—just slower than vinegar.
H2: Final Thought: Sustainability Starts With Surface Science
Cleaning grout without harsh chemicals isn’t about virtue signaling—it’s about material longevity. Every time you avoid bleach, you preserve the tensile strength of your grout. Every time you skip steam, you reduce risk of substrate rot. And every time you choose targeted action over blanket treatment, you save time, money, and physical effort.
That’s the core of practical home repair: respect the material, understand its limits, and match your method to its physics—not marketing claims. Start with the baking soda paste. Track results. Adjust only where needed. And know that clean grout lines aren’t a luxury—they’re the baseline for any well-maintained space.
(Updated: April 2026)