Ceiling Fan Installation Kit Checklist for Secure Mounting
- 时间:
- 浏览:15
- 来源:Easy Home Repair & DIY Guides
H2: Why Your Ceiling Fan Kit Checklist Matters More Than You Think
Most DIYers assume swapping a light fixture for a ceiling fan is just "bigger screws and extra wires." That’s dangerously wrong. A standard ceiling fan weighs 15–35 lbs (Updated: April 2026), spins at up to 300 RPM, and creates dynamic lateral forces no standard light junction box is rated to handle. The National Electrical Code (NEC) Article 314.27(D) mandates that all ceiling fan support systems must be listed and labeled for fan use—and that includes the mounting bracket, electrical box, and framing attachment. Skip one item on this checklist, and you risk cracked drywall, loose wiring, motor wobble, or worse: a falling fan.
This isn’t theoretical. In 2025, the CPSC logged 127 reported incidents tied to improper fan mounting—including 9 injuries requiring ER visits. Over 80% involved retrofitting into an old plastic or shallow pancake box originally installed for a 3-lb flush-mount light.
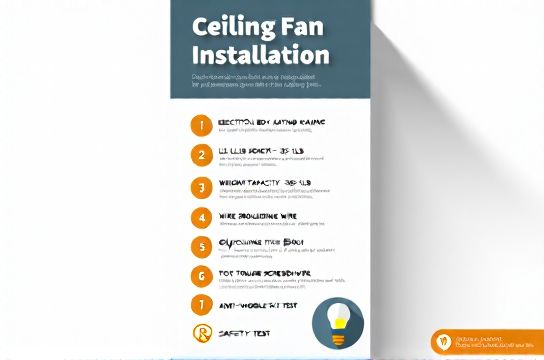
H2: The Non-Negotiable 10-Item Installation Kit Checklist
Use this list *before* you unscrew the old fixture—even if your kit claims to be "all-in-one." Real-world kits often omit critical components or mislabel load ratings.
H3: 1. Verify Box Type & Rating (Not Just "Fan-Rated")
A box stamped "For Use With Ceiling Fans" isn’t enough. Look for the UL listing number and exact weight rating (e.g., "Rated for 70 lbs static, 35 lbs dynamic load"). Standard fan-rated metal octagon boxes handle only 35–50 lbs *static*, but dynamic load (vibration + rotation) demands 1.5× the fan’s actual weight. For a 30-lb fan, you need ≥45 lbs dynamic capacity. If your existing box is plastic, shallow (<1.5" depth), or lacks a stamped rating—replace it. Do not reuse.
H3: 2. Confirm Mounting Bracket Compatibility
There are three main bracket types: low-profile (for ceilings <9'), standard downrod (8'–12'), and angled/flush (sloped or vaulted). Your kit’s bracket must match both your ceiling height *and* slope. A standard bracket on a 12/12 pitch roof will bind the downrod, causing premature bearing wear. Check the bracket’s tilt range—it should cover at least ±30° from level.
H3: 3. Downrod Length & Diameter Match
Downrods aren’t universal. Most kits include a 3" or 6" rod (½" diameter), but taller ceilings need longer rods—and those require thicker diameters for torsional rigidity. NEC Table 400.3(B) recommends minimum ⅝" diameter for rods >24". Measure from ceiling to desired fan blade height (minimum 7 ft above floor; 8–9 ft ideal for airflow). Subtract 12" (motor + canopy + bracket depth) to get true downrod length needed.
H3: 4. Wiring Harness & Wire Nuts Rated for 90°C
Fans generate heat. Standard wire nuts rated for 60°C or 75°C soften and loosen over time. Your kit must include UL-listed, 90°C-rated twist-on connectors (e.g., Ideal Twister Red or Blue). Also verify the included lead wires are 16 AWG THHN (not cheaper stranded lamp cord)—16 AWG handles 10A continuous duty, which covers all residential fans (max draw: 0.8–1.2A per speed setting).
H3: 5. Canopy Gasket & Sealing Ring
Moisture infiltration behind the canopy causes corrosion and short circuits—especially in bathrooms or covered porches. A proper kit includes a silicone or EPDM rubber gasket that compresses fully when the canopy screws tighten. Skip this, and humidity migrates into the box, accelerating oxidation on splices. Test fit: when tightened, the gasket should bulge slightly—not crack or extrude.
H3: 6. Blade Iron Hardware with Lock Washers
Blade irons attach blades to the motor. Many budget kits ship with flat washers only. That’s insufficient. Vibration loosens hardware fast. Every screw must include a split lock washer *and* nylon-insert lock nut (or thread-locker applied). Torque spec: 12–15 in-lbs (use a torque screwdriver—don’t guess). Overtightening strips threads; undertightening invites blade wobble.
H3: 7. Grounding Integrity Components
Your kit must provide a dedicated green grounding screw *and* a bare copper pigtail long enough to reach the box’s grounding terminal—even when the canopy is fully seated. Never rely on the mounting screws alone for grounding. NEC 250.148 requires a separate, unbroken ground path back to the panel. If your box has no grounding terminal (e.g., old metal box with painted threads), sand threads clean and add a grounding bushing.
H3: 8. Speed Control Compatibility Verification
If you’re pairing the fan with a wall-mounted speed control (not pull chains), confirm compatibility *before* wiring. Not all fan motors accept solid-state controls. Dual-capacitor AC motors (most common) require either a triac-based control *or* a mechanical regulator. Using a dimmer-style switch designed for LEDs on a fan motor causes buzzing, overheating, and capacitor failure within 3–6 months. Check the motor label: "AC Induction, Dual Capacitor" = OK for most fan-speed controls; "DC Brushless" = requires PWM-specific controller.
H3: 9. Weight Distribution Test Tools
You need two things: a digital luggage scale (±0.1 lb accuracy) and a 2x4 scrap. Before final mounting, hang the assembled fan (blades + motor + downrod) from the scale to verify actual weight. Then place the 2x4 across the joists directly under the box location and press down with 2× rated load (e.g., 70 lbs for a 35-lb fan). If the drywall flexes >⅛", your framing support is inadequate—you’ll need a brace kit or sistered joist reinforcement.
H3: 10. Circuit Protection Audit
A ceiling fan shares a circuit with lights, outlets, or other loads. NEC 210.23(A)(2) limits total cord-and-plug-connected loads on a 15A circuit to 12A (1440W). Add your fan’s wattage (check motor label: typically 30–75W), plus any integrated LED light kit (5–25W), plus nearby loads. If total exceeds 12A—or if the breaker trips when you first energize the fan—don’t just reset it. Investigate root cause: overloaded circuit, shared neutral issues, or faulty motor winding. This is where knowing how to perform an accurate 空开跳闸复位 matters—but resetting without diagnosis risks insulation damage. Always test voltage at the box *before* connecting (should be 115–125V AC, ±5%).
H2: What’s NOT in Most Kits (And Why You Must Add It)
Manufacturers cut corners. Here’s what reputable pros always source separately:
• UL-listed 4" × 4" fan-rated metal box with deep mud ring (min. 2.25" depth, 50-lb dynamic rating) • 10-32 x 1" machine screws for bracket-to-box attachment (not drywall screws) • 14 AWG THHN ground wire (if box lacks pigtail) • Non-contact voltage tester with continuity mode (to verify hot/neutral/ground before touching wires) • Torque screwdriver (critical for blade iron and canopy screws)
Skip any of these, and you’re compromising safety—not convenience.
H2: Wiring Integration: Where 吸顶灯更换安装 Meets 智能开关接线
Replacing a ceiling light with a fan often means upgrading the wall control too. But here’s the hard truth: most smart switches (like Lutron Caseta or TP-Link Kasa) are *not* rated for fan motor loads unless explicitly labeled "fan control." Standard smart dimmers handle resistive loads only (incandescent, LED). Plugging a fan motor into one violates UL 1472 and voids insurance coverage.
If you want smart fan control, choose one of two paths:
1. Use a smart switch *designed for fans* (e.g., Hunter Symphony, Bond Bridge + legacy switch, or Leviton DZ15S). These include internal relays rated for inductive loads and thermal protection.
2. Keep the fan on a dumb switch and use a smart *pull-chain adapter* (e.g., Haiku SenseME module) wired directly to the motor leads. This preserves native speed/light control while adding app integration.
Never splice a smart switch output into a fan’s blue (light) and black (motor) leads without verifying the switch’s inductive load rating. Doing so causes rapid relay pitting and eventual failure—often within 90 days.
H2: Troubleshooting Real-World Failures
Even with perfect parts, things go sideways. Here’s how to diagnose common post-installation issues:
• Lights work, fan doesn’t spin → Check capacitor (located inside motor housing). Use a multimeter in microfarad mode: reading should be within ±6% of labeled value (e.g., 4.5µF ±0.27). If out of spec, replace capacitor *with same voltage rating* (typically 250V or 370V AC).
• Fan wobbles at high speed → Not a balance issue first. Confirm downrod is fully seated in both top (motor) and bottom (bracket) collars. A 0.5mm gap causes harmonic vibration. Tighten collar set screws with Allen key—do *not* use pliers.
• Intermittent clicking or lights flickering → Likely neutral wire backstabbed in the switch box or loose in the ceiling box. Backstabs fail under fan vibration. Move all neutrals to side-wire terminals and torque to 14 in-lbs.
• Circuit trips immediately on power-up → Motor winding short or ground fault. Disconnect fan leads at the ceiling box. Reset breaker. If it holds, reconnect leads one at a time (hot, then neutral, then ground). Trip on hot+neutral reconnection? Motor is shorted. Replace motor assembly.
H2: When to Call a Licensed Electrician
DIY is safe *only* when scope matches skill. Stop and call a pro if:
• Your home was built before 1985 and uses knob-and-tube or aluminum branch wiring (fan loads accelerate oxidation and fire risk) • The ceiling box is mounted to plaster lath—not joists—and you can’t access attic space to reinforce • You measure >3V AC between neutral and ground at the box (indicates shared neutral or bootleg ground) • Your panel is Federal Pacific (FPE), Zinsco, or Challenger—these have documented failure modes under load
These aren’t “just in case” warnings. They’re code-mandated stop-work conditions per NEC 110.3(B) and local AHJ requirements.
H2: Comparison: Fan Mounting Kits vs. Full Support Systems
| Feature | Basic Fan Kit (e.g., Harbor Breeze) | Premium Support System (e.g., Westinghouse SupraMount) | Pro Retrofit Kit (e.g., AccuLift) |
|---|---|---|---|
| Box Dynamic Load Rating | 35 lbs | 70 lbs | 100 lbs |
| Downrod Max Length Supported | 24" (½" dia) | 48" (⅝" dia) | 72" (¾" dia) |
| Included Wiring Connectors | Standard 60°C wire nuts | UL 90°C twist-ons | Heat-shrink insulated crimps |
| Slope Ceiling Support | None (flat only) | Up to 30° | Up to 45° with pivot bracket |
| Avg. Install Time (Experienced) | 45 min | 75 min | 120 min (includes framing brace) |
| UL Listing Scope | Box + bracket only | Full assembly (box, bracket, downrod, canopy) | Complete structural system (box, brace, hanger, hardware) |
H2: Final Safety Reminders
• Always turn OFF power at the breaker—not just the wall switch—and verify with a non-contact tester *and* a multimeter before touching wires.
• Never mount a fan where blades are <18" from walls or cabinets (NEC 422.10). Clearance prevents turbulence and noise.
• If integrating with LED节能灯升级, ensure driver compatibility. Some fan-integrated LED modules require constant-current drivers—not standard 120V AC input. Mismatches cause premature LED failure or strobing.
• For租客灯具改造, document every change: take photos of box label, wiring, and torque specs. Landlords require proof of code compliance—especially after an incident.
• And remember: secure mounting isn’t just about bolts and brackets. It’s about understanding how electricity, mechanics, and building physics interact. When in doubt, consult the full resource hub — it walks through every scenario with annotated diagrams and video walkthroughs.
H2: Bottom Line
A ceiling fan installation kit checklist isn’t a shopping list. It’s a risk mitigation protocol. Each item exists because someone, somewhere, skipped it—and paid the price in repair bills, injury, or worse. Treat the fan like the rotating machine it is: respect its mass, its torque, its heat, and its electrical demands. Follow this checklist exactly—not as guidance, but as procedure. Your ceiling, your wiring, and your family’s safety depend on it. (Updated: April 2026)