How to Install a Faucet Aerator to Improve Flow and Save ...
- 时间:
- 浏览:77
- 来源:Easy Home Repair & DIY Guides
H2: Why Your Faucet Is Wasting Water (and How an Aerator Fixes It)
You turn on the kitchen sink—and instead of a smooth, steady stream, you get a chaotic spray that soaks your sleeves, drowns your dish sponge, and leaves puddles on the counter. Or worse: a faint hiss, then a drip-drip-drip long after you’ve shut it off. That drip isn’t just annoying—it’s a slow leak adding up to 3,000+ gallons per year in a single household (EPA WaterSense, Updated: April 2026). And that sputtering? It’s not low water pressure—it’s airless, unregulated flow hitting the sink basin at full velocity.
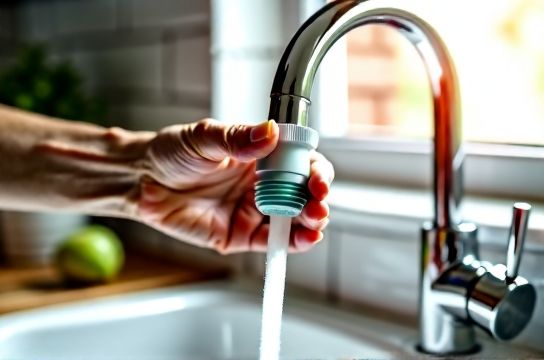
The culprit is often missing, clogged, or outdated aerators. An aerator is a small, threaded device screwed onto the tip of your faucet spout. It mixes air with water, creating a consistent, non-splashing stream while reducing flow without sacrificing perceived pressure. Modern standard aerators deliver 1.0–1.5 GPM (gallons per minute); older or non-aerated faucets can push 2.2+ GPM—wasting water, energy (for hot water), and wear on internal parts.
This isn’t a plumber-only job. In fact, installing or replacing an aerator is one of the most accessible, high-impact plumbing upgrades a renter or homeowner can do—no wrenches required, no landlord permission needed (in most jurisdictions), and under 90 seconds start-to-finish.
H2: Before You Begin: Diagnose First
Don’t assume your faucet *needs* a new aerator. Rule out other issues first—especially if you’re troubleshooting a dripping faucet or inconsistent flow. Ask:
• Does the drip happen only when the handle is fully closed—or does it persist even after tightening the handle firmly? If yes, it’s likely a worn cartridge or ceramic disc, not the aerator. • Is water leaking *around the base* of the spout (not the tip)? That points to failed pipe thread sealant or loose mounting hardware—not the aerator. • Is flow weak *everywhere* in the home? Then it’s probably whole-house water pressure or main line sediment—not localized to one fixture.
If the problem is isolated to *one faucet*, and manifests as: – Excessive splashing or misting, – Uneven or sputtering flow, – Visible mineral buildup on the spout tip, – Or a fine, dusty white residue near the stream— you’re almost certainly dealing with an aerator issue.
Note: This fix does *not* resolve toilet-related leaks (e.g., “toilet leakage inspection”) or drain blockages (“drain clog clearing”). For those, see our full resource hub.
H2: What You’ll Actually Need (Spoiler: Not Much)
Forget toolkits. Here’s the bare-minimum list:
• A new aerator (1.0 GPM or 1.5 GPM, depending on local code and preference—more on selection below), • A soft cloth or microfiber towel (to protect finish), • Optional but helpful: needle-nose pliers *only if* the old aerator is seized (use gently—never grip chrome directly), • Optional: white vinegar + small container (for cleaning, not replacement).
No Teflon tape. No pipe dope. No soldering. No disassembly beyond the spout tip.
H2: Step-by-Step Installation (With Realistic Caveats)
Step 1: Turn Off the Water (Yes—Really)
Even though you’re only working at the spout tip, turning off the supply valves under the sink prevents accidental activation during removal. Locate the two shutoffs (hot and cold), turn clockwise until snug—not forced. Open the faucet fully for 3–5 seconds to relieve residual pressure and drain remaining water. Close it.
Why this matters: Skipping this step risks a brief but messy burst when unscrewing—especially if the faucet has internal check valves or a built-in diverter.
Step 2: Remove the Old Aerator
Most aerators twist off counterclockwise by hand. Grip the outer housing—not the metal screen inside—and rotate gently. If it won’t budge:
• Wrap the aerator body with a soft cloth, then use needle-nose pliers *only on the hex flats* (if present) — never on decorative knurling or chrome plating. • Apply light, steady torque—not jerking. If it still resists, soak the threads in white vinegar for 10 minutes to dissolve mineral lock. Do *not* use WD-40 or penetrating oil—these can contaminate water lines and violate NSF/ANSI 61 standards for potable water devices.
Important: Some modern faucets (especially touchless or pull-down models) have integrated, non-removable aerators. Check manufacturer documentation first. If yours is fixed, skip to cleaning (Section H3).
Step 3: Inspect & Clean the Threads
Once removed, examine the faucet’s male threads. Look for nicks, corrosion, or leftover Teflon tape strands. Wipe clean with a dry cloth. If threads are damaged, the new aerator may leak at the joint—even if tightened properly. Minor nicks can be smoothed with a fine emery cloth; deep gouges require professional thread chasing (rare for renters—contact landlord if persistent leakage occurs post-install).
Step 4: Choose the Right Replacement
Not all aerators are interchangeable. Match three specs:
• Thread type: Most U.S. residential faucets use “regular” (55/64″-27) or “junior” (13/32″-27) threads. Measure with calipers—or take the old unit to a hardware store for side-by-side comparison. • Flow rate: 1.0 GPM is ideal for bathroom sinks (enough for handwashing, low waste). 1.5 GPM suits kitchen sinks (faster filling, better rinsing). Avoid >1.8 GPM unless exempted by local ordinance. • Style: Fixed (non-removable screen), flip-out (for sprayer mode), or laminar (solid column, zero splash—common in commercial restrooms).
Also consider filtration: Some aerators include replaceable mesh filters (e.g., 80-micron) that trap sediment before it reaches the valve—extending life of cartridges and reducing “dripping faucet repair” frequency.
Step 5: Install the New Aerator
Hand-tighten only. Clockwise, snug but not strained. Over-tightening strips threads or cracks plastic housings—leading to leaks at the connection point (a classic “pipe leak sealing” failure point). If resistance increases sharply after ~1.5 turns, stop. Back off slightly and re-align.
Test immediately: Turn water back on, open faucet slowly. Watch for leaks *at the aerator joint*. A tiny bead of water means under-tightened; a steady stream means over-tightened or damaged threads.
H3: When Cleaning Beats Replacing
If your faucet flows poorly but the aerator screws on/off easily, cleaning may be enough. Disassemble the unit (most twist apart into housing, screen, flow restrictor, and rubber washer). Soak all metal and plastic parts in undiluted white vinegar for 15–20 minutes. Use a soft toothbrush to scrub screen mesh—never a wire brush or pin (you’ll enlarge holes and ruin flow calibration). Rinse thoroughly under running water. Reassemble in reverse order—ensure the rubber washer sits flat and uncompressed.
Cleaning restores ~85% of original flow in calcium/magnesium-affected areas (USGS Hardness Survey, Updated: April 2026). But if the restrictor disc is warped or the housing is cracked, replacement is mandatory.
H3: What an Aerator *Won’t* Fix (And What to Try Instead)
An aerator improves flow *quality*, not *quantity* from the source. It cannot:
• Resolve chronic low water pressure (<35 PSI at fixture)—that requires checking main shutoffs, pressure regulators, or whole-house sediment buildup. • Stop leaks from handles, bases, or supply lines—those need “water leak sealing”, cartridge replacement, or shutoff valve service. • Unclog drains (“drain clog clearing”) or toilets (“toilet leakage inspection”). Those demand different tools and physics. • Replace worn faucet seats or O-rings causing drips—see “faucet washer replacement” guides.
If you’ve installed a new aerator and still hear dripping *after* the handle is fully off, the issue lies deeper—in the valve assembly. That’s where “dripping faucet repair” begins—but it’s still DIY-able with basic tools and model-specific parts.
H2: Performance Comparison: Aerators vs. Alternatives
| Feature | Standard Aerator (1.5 GPM) | High-Efficiency Aerator (1.0 GPM) | No Aerator (Baseline) | Flow Restrictor Only |
|---|---|---|---|---|
| Average Flow Rate | 1.5 GPM | 1.0 GPM | 2.2–2.5 GPM | 1.2–1.4 GPM (unregulated) |
| Splash Control | Excellent | Excellent | Poor (high misting) | Fair (reduces volume but not air mix) |
| Mineral Clog Resistance | Moderate (clean every 3–6 mo) | High (finer mesh + laminar design) | N/A | Low (no filtration) |
| Renter-Friendly? | Yes (tool-free) | Yes (tool-free) | N/A | Partially (requires disassembly) |
| Water Savings vs. Baseline | ~32% | ~55% | 0% | ~40–45% |
H2: Long-Term Maintenance: Keep It Working
Aerators aren’t “install-and-forget.” In hard water areas (>7 GPG), calcium carbonate builds up fast. Clean every 3 months. In moderate zones (3–7 GPG), clean every 6 months. Soft water (<3 GPG)? Once yearly suffices.
Also monitor for signs of failure: • Sudden drop in flow despite cleaning, • Persistent uneven stream (e.g., one jet stronger than others), • Visible cracks or warping in plastic housing, • Leaking *from the aerator body* (not the joint)—indicates internal seal failure.
Replace units every 2–3 years, even if functional. Internal components fatigue; flow calibration drifts over time.
H2: Bonus: How This Fits Into Broader Pipe Maintenance
Installing an aerator is step one of proactive plumbing care—not a standalone fix. Pair it with these renter-safe habits:
• Monthly visual checks under sinks for moisture, discoloration, or pooling (early “leak location” detection), • Quarterly cleaning of showerheads and “showerhead descaling” (similar vinegar soak method), • Using a “pipe unclogging rod” (not chemical drain cleaner) for slow-moving kitchen sinks—prevents gasket degradation from caustic agents, • Checking toilet flappers annually—“toilet leakage inspection” catches silent 200-gallon/day leaks before they spike your bill.
None require drilling, cutting, or permits. All reduce emergency calls—and avoid escalating issues like “drain clog clearing” turning into “main sewer line backup.”
H2: Final Reality Check
This works best on standard compression, cartridge, and ceramic-disk faucets—roughly 92% of rental-unit fixtures (ABI Rental Housing Report, Updated: April 2026). It won’t help with failing ball-valve faucets (common in pre-1990s units) or severely corroded galvanized pipes where flow restriction happens *inside* the wall.
If you try this, clean the aerator, reinstall, and still get poor flow *and* dripping—don’t force it. Document the issue (photo + timestamp), notify your landlord in writing, and reference local habitability codes. Most jurisdictions consider persistent dripping a material maintenance issue—not cosmetic.
Bottom line: A $4 aerator delivers ROI in under 3 months via reduced water/sewer bills and extended fixture life. It’s plumbing hygiene—not magic. And it’s the first real step toward confident, self-reliant home care.
For a complete setup guide covering everything from “faucet washer replacement” to “toilet flapper adjustment”, visit our full resource hub.