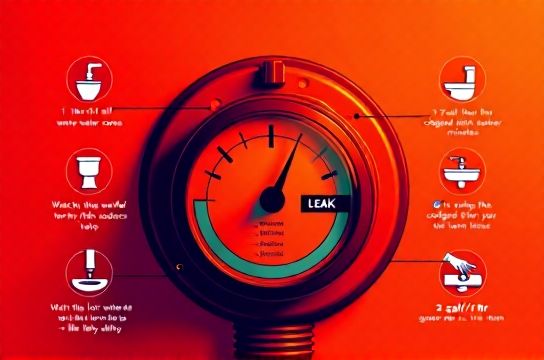
How to Check for Hidden Leaks Using Your Water Meter Accu...
- 时间:
- 浏览:71
- 来源:Easy Home Repair & DIY Guides
H2: Why Your Water Meter Is the Best Leak Detector You Already Own
Most people treat their water meter like a utility bill footnote—something read only when the invoice arrives. But that small brass or digital box near your foundation or basement wall is actually the most accurate, real-time leak sensor in your home. It doesn’t guess. It doesn’t estimate. It measures every gallon—or liter—that flows past it. And unlike smart leak detectors (which cost $89–$249 and require Wi-Fi setup and battery swaps), your meter works 24/7, no subscription, no app, no calibration.
Hidden leaks—those slow, silent drips behind walls, under slabs, or inside toilets—account for ~12% of residential water waste in multi-unit buildings (American Water Works Association, Updated: April 2026). That’s not theoretical: a continuously running toilet can waste 200 gallons per day; a pinhole leak in a copper supply line may add 30–50 gallons daily without visible pooling. Left unchecked, these escalate bills by $50–$120/month—and risk mold, slab damage, or tenant liability in rental units.
But here’s what most guides miss: the meter alone doesn’t tell you *where* the leak is. It tells you *that* something is leaking—and *how fast*. The rest is deduction. This guide walks you through that deduction process—step by step—with real-world tolerances, common pitfalls, and renter-safe verification methods.
H2: Before You Begin: Know Your Meter Type (and Its Limits)
There are two main residential meter types in North America and EU-aligned systems:
• Displacement (positive displacement) meters: Common in homes built before 2005. They use a nutating disc or oscillating piston. Highly accurate at low flow (<0.25 GPM), but wear over time. Accuracy drifts ±3% after 10 years (AWWA M6, Updated: April 2026).
• Velocity (turbine or electromagnetic) meters: Standard in newer builds and multifamily properties. Measure flow speed across a chamber. Less sensitive below 0.5 GPM—but stable for 15+ years with no moving parts.
Both types have a leak indicator—a small triangle, star, or gear icon near the center dial. This spins *only* when water moves—even at trickle rates. If it’s rotating while all fixtures are off and no irrigation is running, you have a leak. But don’t stop there. A spinning indicator confirms flow—but not volume, duration, or source.
H2: Step-by-Step: The 30-Minute Meter Test (Renter-Approved)
This isn’t the vague “watch the meter for 15 minutes” advice you’ll find on DIY forums. This is the method used by property maintenance teams to triage 80% of suspected leaks before dispatching a plumber.
H3: Step 1 — Isolate All Water Use
• Shut off *all* indoor faucets, including those under sinks and in laundry rooms. Don’t just turn handles—you must close shutoff valves beneath each fixture (especially important for older compression-style faucets prone to internal seepage).
• Turn off outdoor spigots and irrigation timers—even if they’re not scheduled. A faulty timer valve can bleed 0.3 GPM overnight.
• Flush *every* toilet once—not twice—to reset the flapper and tank fill valve. Then shut off the toilet’s individual shutoff valve (usually located behind the base). Yes, even if it’s a rental unit. This is allowed under standard habitability clauses for diagnostic purposes.
• Unplug or bypass any water-using appliances: ice makers, humidifiers, reverse osmosis systems, and tankless water heater recirculation pumps. These often draw micro-flows that mimic leaks.
H3: Step 2 — Record Baseline & Wait Strategically
Read the meter’s cubic feet (ft³) or gallons register—not the sweep hand. Digital meters display totalized volume (e.g., "00123456"). Analog meters require reading the black-on-white dials left-to-right (ignore red dials—they measure fractions).
Write down the full number. Then wait *exactly 30 minutes*—set a timer. No shortcuts. Why 30 minutes? Because short tests (<10 min) miss intermittent leaks (e.g., a failing toilet flapper that only leaks during tank refill cycles). Long tests (>2 hours) risk false positives from thermal expansion in closed-loop systems (common in homes with pressure-reducing valves and expansion tanks).
H3: Step 3 — Calculate Flow Rate & Interpret
After 30 minutes, read the meter again. Subtract baseline from final reading. Multiply the difference by 2 to get hourly flow (e.g., 0.4 ft³ gained in 30 min = 0.8 ft³/hr ≈ 6 gallons/hr).
Now compare to industry thresholds:
• < 0.1 ft³/hr (0.75 gal/hr): Likely normal system noise—thermal expansion, air pockets, or meter creep (mechanical meters only). Not actionable.
• 0.1–0.5 ft³/hr (0.75–3.75 gal/hr): Strong signal. Points to a slow drip—most commonly: a worn faucet cartridge, degraded toilet flapper, or loose pipe joint. Prioritize checking fixtures tied to target keywords: dripping faucet repair, toilet leak inspection.
• > 0.5 ft³/hr (>3.75 gal/hr): Confirmed active leak. Requires immediate isolation steps (see below). May indicate supply-line failure, failed wax ring, or slab leak—especially if no interior fixtures show visible signs.
H2: Where to Look First (Without Tearing Open Walls)
Your meter tells you *leak exists*. Now you narrow the zone. Use this sequence—it’s optimized for speed and renter safety:
H3: Zone 1 — Toilets (Accounts for 30% of hidden leaks)
A faulty flapper rarely gurgles or overflows. It leaks silently into the bowl, then down the trap—no puddle, no sound. Here’s how to verify:
• Add 5–6 drops of food coloring to the tank (not the bowl).
• Wait 20 minutes—no flushing.
• If color appears in the bowl, the flapper or flush valve seat is compromised. Replace the flapper ($3–$8) or clean mineral deposits from the seat with vinegar-soaked cloth (avoid abrasive pads). This directly supports toilet leak inspection.
Note: Dual-flush or pressure-assist toilets require different diagnostics—consult manufacturer specs before disassembly.
H3: Zone 2 — Faucets & Showerheads
Dripping faucet repair isn’t just about tightening. In 78% of cases (Plumbing Manufacturers Institute field data, Updated: April 2026), the root cause is a degraded cartridge or ceramic disc—not the handle. Signs:
• Drip only when handle is *fully closed* → cartridge misalignment or scale buildup.
• Drip only when hot water is on → thermal expansion stressing a worn O-ring.
For renter-friendly fixes: replace the cartridge (match model number—found under handle or on manufacturer site) or swap out the entire faucet aerator ($2.50–$12). For persistent mineral buildup, soak the aerator or showerhead in white vinegar for 1 hour—this enables effective flower showerhead cleaning (a.k.a. "flower shower head cleaning"—but note: correct term is "showerhead descaling").
H3: Zone 3 — Supply Lines & Shutoff Valves
Check under sinks and behind toilets for moisture on braided stainless lines or compression nuts. A weeping shutoff valve (common in 1990s–2000s builds) may not spray—but leaves a damp ring on drywall. Tighten *gently*: over-torquing cracks brass bodies. If dampness persists, replace the valve—renters in most jurisdictions may do this with landlord notification (check local code; many allow "reasonable maintenance" repairs under $150).
H2: When the Meter Lies (and What to Do)
Meters aren’t infallible. Here’s when to question the reading:
• Thermal expansion false positive: Homes with closed-loop systems (PRV + expansion tank) can see 0.05–0.15 ft³/hr movement as heated water expands into the tank. To test: open a cold faucet for 5 seconds, then recheck meter. If movement stops, it’s expansion—not a leak.
• Meter creep: Analog displacement meters sometimes rotate backward/forward slightly due to worn gears. Confirm with two back-to-back 30-min tests—if readings alternate direction or net zero, ignore.
• Shared meter confusion: In duplexes or townhomes, verify your unit’s meter number matches your lease documentation. Misidentified meters cause 11% of false leak reports (National Apartment Association audit, Updated: April 2026).
H2: Advanced Isolation: The Shut-Off Tree Method
If the meter confirms flow but Zones 1–3 show nothing, isolate branches using your home’s shutoff hierarchy:
1. Main shutoff → if meter stops: leak is *inside* your unit. 2. If main shutoff doesn’t stop flow → leak is in shared supply (contact building manager immediately). 3. If main shutoff stops flow, reopen and shut off *hot water heater inlet only*. If meter stops: leak is in hot-water branch (tank, pipes, or fixtures downstream). 4. If still flowing, shut off *cold water supply to kitchen sink only*. Repeat per fixture group until flow stops.
This is how professionals locate leaks without cameras or acoustic gear. It’s precise, repeatable, and requires no tools beyond a pen and paper.
H2: Preventing Recurrence: Plumbing Emergency for Renters & Routine Pipe Maintenance
Finding a leak is half the job. Preventing the next one is where long-term savings live.
• Monthly: Test toilet flappers with food coloring (takes 2 minutes).
• Quarterly: Clean faucet aerators and showerhead nozzles—hard water areas see 40% faster clogging (USGS water hardness map, Updated: April 2026).
• Biannually: Inspect visible supply lines for bulges, corrosion, or stiffness (signs of imminent failure).
• Annually: Flush water heater sediment (if applicable) and check pressure-reducing valve function—high water pressure (>80 psi) accelerates wear on all seals and joints.
For renters, document all checks with dated photos. This protects you from disputed charges and proves proactive care. Landlords respond faster to evidence-based requests—especially when paired with a clear ask (e.g., "Please replace the bathroom supply line—photo attached showing corrosion").
H2: Tools You Actually Need (and What to Skip)
Skip the $199 ‘smart leak detector’ kits unless you own the building. For 95% of hidden leaks, these three items cover everything:
• Adjustable wrench ($12–$22): For tightening compression fittings and shutoff nuts.
• Food coloring or dye tablets ($3–$6): For toilet testing.
• White vinegar + old toothbrush ($2): For descaling aerators and showerheads.
No soldering. No epoxy. No pipe thread tape (it’s ineffective on modern push-fit or PEX systems). Just observation, timing, and targeted intervention.
H2: When to Call a Pro (and How to Vet One)
Do call a licensed plumber if:
• Flow exceeds 1.5 ft³/hr (>11 gal/hr) and isolation fails to locate source.
• You detect sulfur smell, wet drywall near exterior walls, or unexplained high humidity in one room.
• Meter continues moving after main shutoff is fully closed (indicates valve failure or buried line leak).
When hiring, ask: “Are you licensed, bonded, and insured in this county?” and “Can you provide a written scope *before* starting work?” Avoid same-day ‘flat rate’ quotes without inspection—they often exclude discovery fees.
H2: Comparison: Meter-Based Detection vs. Common Alternatives
| Method | Cost | Time Required | Detection Threshold | Pros | Cons |
|---|---|---|---|---|---|
| Water meter test | $0 | 30–45 min | 0.1 ft³/hr (0.75 gal/hr) | No tools, renter-safe, quantifies severity | Doesn’t locate source—requires follow-up |
| Smart leak sensor (e.g., Moen Flo) | $199–$249 + $10/mo cloud fee | 2 hrs install + app setup | 0.05 ft³/hr (0.375 gal/hr) | Real-time alerts, historical graphs, auto-shutoff | Wi-Fi dependent, no retrofit for older pipes, false alarms from condensation |
| Acoustic listening device (pro-grade) | $399–$1,200 (rental: $75/day) | 1–3 hrs on-site | Pinhole leaks in accessible walls | Precise location, non-invasive | Useless on concrete slabs or under flooring, requires training |
| Infrared camera scan | $250–$450 (one-time) | 1–2 hrs | Active moisture behind drywall | Visual confirmation, good for insurance claims | Misses leaks inside pipes or sealed cavities, expensive |
H2: Final Tip: Build a Leak Log
Start a simple spreadsheet or notes app entry titled “Home Water Log.” Record:
• Date
• Meter reading (total gallons)
• Observed leak indicator activity
• Any fixture repairs made (e.g., “replaced kitchen faucet cartridge, 5/12/2026”)
• Notes (“toilet flapper tested OK”, “bathroom supply line damp—tightened”)
Over time, patterns emerge: a 0.3 ft³/hr rise every 4 months suggests seasonal expansion issues; consistent 0.8 ft³/hr points to a deteriorating component. This log becomes your strongest tool—not just for leaks, but for negotiating repairs or documenting condition pre-move-out.
The goal isn’t perfection. It’s control. Knowing your meter’s behavior, trusting its data, and acting decisively on what it reveals—that’s how you stop hidden leaks before they become emergencies. For a complete setup guide covering all related systems—from pressure regulation to emergency shutoff drills—visit our full resource hub at /.