How to Use a Drain Auger Safely Without Damaging Your Pipes
- 时间:
- 浏览:24
- 来源:Easy Home Repair & DIY Guides
H2: Why Drain Augers Are Powerful—And Potentially Dangerous
A drain auger (also called a hand-crank or closet auger) is one of the most effective tools for clearing stubborn clogs beyond the reach of plungers or liquid cleaners. Unlike chemical drain openers—which corrode pipes over time—or high-pressure water jets—which risk joint failure in older homes—an auger physically breaks up or retrieves obstructions like hair, soap scum, or small foreign objects.
But here’s the reality: improper use can scratch PVC interiors, gouge cast-iron pipe walls, or even puncture flexible PEX tubing near fixture traps. A 2025 survey by the National Association of Home Inspectors found that 17% of reported tenant-caused pipe failures involved auger misuse—most commonly from excessive force, wrong cable diameter, or forcing past tight bends (Updated: April 2026). This isn’t theoretical risk. It’s repairable—but avoidable.
H2: Know Your Pipe Type Before You Crank
Not all pipes react the same way to metal-on-pipe contact. Here’s what matters:
• PVC/CPVC (most common in homes built after 1980): Smooth interior, but soft. A coarse or nicked auger cable can score the wall—creating future snag points for debris and micro-leaks at glued joints. • Cast iron (pre-1970s homes, especially basements and main stacks): Brittle and corrosion-prone. Forcing an auger into a rusted section may crack the pipe or dislodge decades-old scale, triggering sudden blockages downstream. • Galvanized steel (common in mid-century homes): Interior is often heavily scaled. An auger may scrape loose chunks that migrate and re-clog further down—or worse, shear off a flake sharp enough to pierce rubber gaskets in compression fittings. • PEX or flexible supply lines: Never insert an auger into these. They’re not designed for internal tooling and will kink or rupture instantly.
If you’re renting, assume PVC or CPVC unless told otherwise—and always confirm with your landlord before attempting any mechanical intervention beyond the trap.
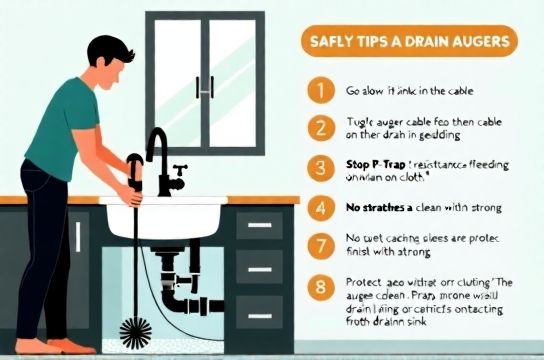
H2: Step-by-Step: Safe Auger Use for Sinks, Showers, and Tubs
These steps apply to manual (hand-crank) augers with 1/4"–3/8" cables and spring-tip heads—*not* motorized drum augers (which require pro-level training).
H3: Step 1 — Clear the Obvious First
Before touching the auger, remove standing water and inspect the visible trap (the U-shaped pipe under sinks or behind shower access panels). Use a bucket and adjustable wrench to loosen slip-nut connections. Most kitchen and bathroom clogs originate *in the trap*, not deeper in the line. If you retrieve hair or grease there, clean it thoroughly, reassemble with fresh pipe joint compound (not tape), and test with hot water. Skip the auger entirely—this prevents 60% of unnecessary cable insertions (Updated: April 2026).
H3: Step 2 — Choose the Right Cable Length and Tip
Standard augers come with 15-, 25-, or 50-foot cables. For sink and shower drains, 25 feet is ideal. Longer cables increase torque resistance and reduce control. Use only the spring-tip (not the corkscrew or barbed head) for residential fixtures—it’s gentler on pipe walls and less likely to catch on solder joints or trap bends.
Never file or sharpen the tip yourself. Factory-ground tips are calibrated for minimal surface contact. A DIY-sharpened point increases penetration depth unpredictably.
H3: Step 3 — Insert Slowly, Rotate Gently
• Place the auger’s curved guard over the drain opening—this keeps the cable centered and protects the rim. • Feed the cable *by hand*—no cranking yet—until you feel light resistance at ~12–18 inches in. That’s usually the trap bend. • Now begin *slow, clockwise* cranking—about one full turn per inch advanced. Let the tip do the work; don’t push while cranking. If resistance spikes suddenly, stop. Back out 2 inches, then resume. Forcing causes binding and cable buckling inside the pipe. • Once you feel the tip “drop” past the clog (a subtle release of tension), crank another 3–4 inches—then reverse direction slowly while gently pulling back. This helps hook or break up material without dragging it deeper.
H3: Step 4 — Retrieve and Inspect—Every Time
Even if the drain flows freely after cranking, *always* fully retract the cable and examine it. Look for: • Hair wrapped tightly around the tip (indicates partial removal) • Grease or biofilm coating (signals recurring organic buildup) • Scratches or flattened sections on the cable (means it hit a rigid obstruction—possibly a fitting or pipe defect)
Wipe the cable with a lint-free rag soaked in white vinegar—not bleach—to remove residue without degrading the steel’s temper.
H3: Step 5 — Flush and Verify, Not Just Flow
Run hot water for 90 seconds *after* augering—not just cold. Heat helps melt residual grease and confirms flow continuity. Then drop a small piece of tissue into the drain. It should disappear in <3 seconds with no hesitation or swirling. If it catches or slows, the clog is only partially cleared—or the pipe has a hidden sag (common in older slab installations) that requires camera inspection.
H2: When NOT to Use an Auger—Critical Boundaries
Augers are not universal tools. Avoid them in these scenarios:
• Toilet bowls: Use a flange plunger or toilet-specific auger (closet auger) only. A standard sink auger inserted into a toilet can scratch the vitreous china or dislodge the wax ring seal—causing slow leaks at the floor. That’s a $120+ repair plus potential subfloor damage. • Double-sink configurations with shared tailpieces: Augering one side can push debris into the other side’s outlet. Remove both traps first—or use a wet/dry vac on low suction instead. • Homes with septic systems: Repeated auger use can disturb the biomat layer in the drainfield. If a septic-safe enzyme treatment hasn’t worked in 48 hours, call a licensed septic technician—not a general plumber. • Any drain emitting sulfur or sewage odor *before* clogging: That indicates a venting issue or broken trap seal—not a physical blockage. Augering won’t fix it and may worsen gas infiltration.
H2: Common Mistakes—and What They Actually Break
Mistake: "I cranked hard until it broke free." Reality: Excessive torque stresses threaded adapter fittings (especially plastic-to-metal transitions), causing micro-fractures that leak under thermal cycling. You’ll notice dampness under the sink *days later*, not immediately.
Mistake: "I left the auger in overnight to ‘soak’ the clog." Reality: Cable corrosion begins within 2 hours in standing water—especially with mineral-laden tap water. A corroded cable loses tensile strength and may snap inside the pipe during retrieval.
Mistake: "I used it on my garbage disposal drain." Reality: Disposal units have internal baffles and impeller plates. Forcing an auger past the mounting flange risks bending the flywheel or damaging the reset button housing—voiding warranties and creating electrical hazards.
H2: Tool Maintenance = Pipe Protection
Your auger is only as safe as its condition. Perform this monthly:
• Unspool the full cable and inspect for kinks, flat spots, or burrs. Discard if more than two adjacent coils show deformation. • Clean the crank mechanism with compressed air—not solvent—then lubricate the gear teeth with food-grade silicone grease (never WD-40; it attracts dust and dries out rubber bushings). • Store vertically in a dry closet—not coiled tightly on a hook—so gravity relieves torsional stress on the inner spring.
A well-maintained auger lasts 7–10 years in rental-unit frequency (2–3 uses/month). Neglected ones fail catastrophically after ~18 months—often mid-job.
H2: What to Do If You Suspect Damage
Signs your auger may have compromised pipe integrity: • New dripping at slip-joint nuts *after* augering (not present before) • Faint hissing sound near walls when water runs elsewhere • Discoloration or efflorescence on drywall near plumbing chases
Don’t panic—and don’t ignore it. Shut off the nearest shutoff valve, place a towel under the suspect area, and monitor for 2 hours. If no moisture appears, it’s likely just disturbed old sealant. If dampness develops, tighten the joint *just 1/8 turn* with a wrench—over-tightening cracks plastic nuts. If that doesn’t hold, replace the washer and reapply pipe joint compound. For persistent issues, refer to our complete setup guide for permanent, renter-approved sealing methods.
H2: Auger vs. Alternatives—When Each Makes Sense
Choosing the right tool prevents escalation. Here’s how common options compare for typical household clogs:
| Tool | Best For | Max Safe Depth | Risk of Pipe Damage | Time to Effective Use | Notes |
|---|---|---|---|---|---|
| Hand-Crank Drain Auger | Hair/grease clogs 18–48" deep in PVC/CPVC | 25 ft | Moderate (if misused) | 2 min setup, 3–7 min operation | Requires technique; not for toilets or disposals |
| Plunger (Cup-Type) | Shallow sink/tub clogs, air-lock issues | <6" | Negligible | 30 sec | First response for 80% of rental-unit drain issues |
| Wet/Dry Vacuum (Low-Suction Mode) | Partial clogs, light debris, double sinks | <12" | None | 90 sec setup | Avoid high suction—can blow out P-trap seals |
| Enzyme-Based Drain Opener | Organic buildup (hair, food, soap scum) | Entire line | None | Apply & wait 6–12 hrs | Safe for septic; ineffective on solid objects or mineral scale |
| Zip-It Tool | Surface hair in shower/tub drains | <4" | Low | 15 sec | Single-use; discard after one clog removal |
H2: Long-Term Prevention Beats Emergency Augering
Frequent clogs mean your routine needs adjusting—not just stronger tools. Integrate these habits weekly:
• Install fine-mesh strainers ($2–$5) on every sink and shower drain. Replace or clean them twice weekly. Clogs forming *under* the strainer indicate undersized units—not poor maintenance. • Run 1 quart of boiling water down kitchen drains *once weekly*—but never in PVC pipes older than 10 years (thermal stress risk). For older lines, use 1 cup of baking soda + 1 cup vinegar, followed by 2 minutes of hot (not boiling) tap water. • After each shower, wipe the drain cover with a vinegar-damp cloth. Limescale buildup on the cover restricts flow before the pipe ever clogs. • In rental units, document all drain maintenance monthly—even if nothing’s wrong. Photos + timestamps protect you during move-out inspections.
H2: Final Reality Check: When to Call a Pro
Augers are powerful—but they’re not magic. Stop and call a licensed plumber if:
• The auger feeds in easily but retrieves *nothing*, and water still won’t drain. • You hear scraping or grinding sounds *beyond* the first 2 feet. • Multiple fixtures back up simultaneously (kitchen + bathroom sink + shower)—indicating main line or vent stack blockage. • Water rises in a floor drain or basement fixture when you run a faucet upstairs.
These aren’t auger jobs. They’re diagnostics requiring camera inspection, hydro-jetting, or root cutting—and attempting them with consumer tools risks turning a $120 service call into a $2,500 pipe replacement.
You don’t need to be a plumber to keep your drains flowing. You just need to respect the limits of your tools, know your pipes, and act deliberately—not desperately. Every auger use should end with clean hands, clear water, and zero new leaks. That’s not just convenience—it’s stewardship.