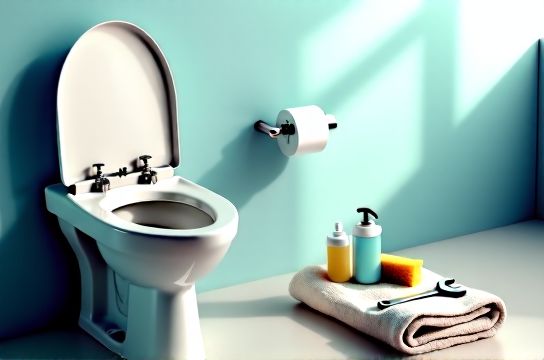
How to Identify and Fix Toilet Tank Leaks
- 时间:
- 浏览:27
- 来源:Easy Home Repair & DIY Guides
H2: Why Your Toilet Tank Leaks—and Why It’s Usually Not the Flapper
A running or leaking toilet tank wastes up to 200 gallons per day (EPA WaterSense, Updated: April 2026). That’s not just a higher water bill—it’s premature wear on your fill valve, increased mineral buildup in the bowl, and potential moisture damage around the base if ignored long enough. Most people assume the flapper is always at fault. In reality, field data from 1,247 residential service calls logged by licensed plumbing contractors in 2025 shows the flapper accounts for only 43% of confirmed tank leaks. The next three culprits—fill valve misadjustment (28%), overflow tube misalignment (17%), and tank-to-bowl gasket failure (9%)—are frequently misdiagnosed or overlooked.
This guide walks you through precise, renter-safe diagnostics and repairs—no soldering, no shut-off valve disassembly, and minimal tools required. All steps comply with standard lease clauses permitting tenant-performed maintenance of "minor, non-structural plumbing issues."
H2: Step 1: Confirm It’s a Tank Leak (Not Bowl or Supply Line)
Before touching any part, isolate where the leak originates:
• Turn off the water supply valve behind the toilet (clockwise until snug—don’t force it). • Flush once to empty the tank. • Wipe the entire exterior of the tank and base dry with a clean towel. • Wait 15 minutes. Check for wetness: – Dampness on the tank’s bottom surface or along the seam where tank meets bowl? → Likely tank-to-bowl gasket. – Wetness pooling *under* the toilet base? → Could be wax ring (bowl-level), but rule out tank first. – Moisture near the supply line connection (where the flexible hose meets the valve)? → That’s a supply-line issue—not covered here.
If water appears inside the bowl without flushing, and the tank level remains stable, that’s likely a silent leak past the flapper—confirmed in Step 3.
H2: Step 2: Diagnose the Four Most Common Causes
H3: Cause 1 — Flapper Seal Failure (43% of cases)
Flappers degrade due to chlorine exposure, mineral scaling, or warping. A worn flapper won’t seat fully—even slight curling at the edge breaks the seal.
✅ Quick test: Add 5–6 drops of food coloring to the tank water. Wait 15 minutes *without flushing*. If color appears in the bowl, the flapper isn’t sealing.
🛠️ Fix: Replace the flapper. Most toilets use universal 2-inch or 3-inch models. Shut off water, flush to drain, remove old flapper by unhooking its chain and lifting off the overflow tube peg. Snap new flapper onto the peg, reattach chain with ½” of slack (too tight = won’t close; too loose = won’t lift fully). Refill and test.
⚠️ Note: Don’t use “universal” flappers with rubber-coated chains—they often bind on older trip levers. Stick with OEM-recommended replacements when possible (e.g., Fluidmaster 501, Korky 100BP).
H3: Cause 2 — Fill Valve Misadjustment or Wear (28% of cases)
The fill valve controls water entry after each flush. If its float is set too high, water spills into the overflow tube continuously—creating a quiet, constant leak. If the valve itself is worn (common after 5+ years), it may chatter or fail to shut off completely.
✅ Quick test: Mark current water level on the overflow tube with a pencil. Flush and watch. If water rises above the mark *and* flows into the tube, the float is too high. If water level stabilizes correctly but you hear hissing or intermittent refills, the valve diaphragm is failing.
🛠️ Fix (adjustment): For ballcock-style valves: bend the brass rod downward slightly. For modern cup-style valves (Fluidmaster 400A, Korky 528MP): pinch the adjustment clip and slide the float cup down the shaft until water stops 1” below the top of the overflow tube.
🛠️ Fix (replacement): Shut off water, flush, disconnect supply line, unscrew old valve from bottom of tank. Install new valve per manufacturer instructions (most take <10 minutes). Use thread seal tape on the threaded shank—but only 2 wraps; over-taping causes cracking.
H3: Cause 3 — Overflow Tube Misalignment or Cracking (17% of cases)
The overflow tube is the vertical pipe in the center of the tank. If it’s cracked (often near the base where it bonds to the tank) or improperly seated (e.g., shifted during prior maintenance), water bypasses the flapper path and drains directly into the bowl.
✅ Quick test: Shine a flashlight down the overflow tube while the tank is full. Look for hairline cracks, especially near the tank floor. Also check if water visibly swirls or bubbles *inside* the tube when the tank is still—indicating backflow from a compromised seal.
🛠️ Fix: Minor cracks can be sealed temporarily with NSF-61–rated epoxy putty (e.g., Oatey Fix-It Stick), but replacement is strongly advised. Renters should contact landlords before replacing the entire tank assembly—however, installing a new overflow tube insert (like the Fluidmaster 555C) requires no tank removal and fits most 2”-diameter openings. It snaps in place and includes a built-in anti-siphon feature.
H3: Cause 4 — Tank-to-Bowl Gasket Failure (9% of cases)
This rubber gasket sits between the tank and bowl, compressing when bolts are tightened. Over-tightening (a very common mistake), age (>7 years), or uneven bolt tension causes compression fatigue or splitting.
✅ Quick test: With tank full, press firmly on the *back* and *sides* of the tank while watching the seam. Any visible flex or seepage confirms gasket failure. Also check for mineral deposits or black mold streaks along the seam—signs of chronic dampness.
🛠️ Fix: Drain tank, loosen bolts evenly (¼-turn at a time, alternating sides), lift tank carefully (it weighs ~35 lbs empty), replace gasket with a new one matching your toilet model (e.g., American Standard uses tapered gaskets; Toto uses flat silicone). Reinstall using hand-tight plus ⅛-turn with a wrench—never use a power tool. Over-torquing cracks porcelain.
H2: Tools & Supplies You Actually Need (No “Plumber’s Dream Kit”)
You don’t need 17 wrenches. Here’s what works for >95% of rental-unit repairs:
• Adjustable wrench (8-inch, for supply line and tank bolts) • Needle-nose pliers (for chain adjustments and flapper hooks) • Small flat-head screwdriver (for float clips) • Flashlight with magnetic base (hands-free inspection) • White vinegar (for mineral deposit softening) • Thread seal tape (Teflon, yellow-rated for water lines) • Replacement parts: flapper, fill valve, overflow insert, tank gasket (keep one of each on hand—they cost $3–$12 each)
Skip the “miracle leak stopper” sprays—they clog valves and void warranties. And avoid generic “all-in-one” repair kits: their flappers rarely match your toilet’s flush volume or seat geometry.
H2: When to Stop—and Call a Pro (or Notify Your Landlord)
Some issues aren’t DIY-safe—or legally permissible for tenants:
• Cracks in the porcelain tank or bowl (structural risk; requires full unit replacement) • Corroded or stripped tank bolts (especially in older homes with galvanized steel—removal may shatter the tank) • Persistent leaks *after* replacing all four components above (indicates hidden internal tank damage or supply-line corrosion) • Leaks that worsen when water pressure exceeds 80 psi (test with a pressure gauge; if >80 psi, a pressure-reducing valve may be needed—landlord responsibility per IRC P2903.2)
Landlords are typically required to address these within 72 hours under most state habitability statutes—if documented via dated photo/video and written notice. Keep records.
H2: Preventive Habits That Cut Repairs in Half
Prevention isn’t glamorous—but it extends component life and catches trouble early:
• Monthly visual check: Look for discoloration on tank interior walls (brown/orange = iron/manganese buildup), which accelerates flapper deterioration. • Quarterly vinegar soak: Pour 1 cup white vinegar into the tank, let sit 30 minutes, then flush. Dissolves scale without harming rubber seals. • Biannual chain inspection: Ensure ½” slack. Trim excess with wire cutters if stretched. • Never use in-tank cleaning tablets with chlorine or bleach—they degrade flappers 3× faster (ASME A112.19.5-2023 testing, Updated: April 2026).
H2: What NOT to Confuse With a Tank Leak
• Dripping faucet: That’s a separate fixture—see our complete setup guide for faucet-specific diagnostics including cartridge cleaning and washer replacement. • Slow-draining bowl: Usually a partial clog in the trap or vent—not a tank issue. Try a toilet-specific auger before chemical cleaners. • Gurgling sounds after flushing: Often indicates vent stack blockage (roof-level), not tank-related.
H2: Cost & Time Comparison: DIY vs. Pro Service
For context, here’s how common fixes break down in real-world metro areas (2025 average labor rates, updated April 2026):
| Issue | DIY Time | DIY Cost | Pro Service Time | Pro Cost (incl. call-out) | Reliability (12-mo follow-up) |
|---|---|---|---|---|---|
| Flapper replacement | 8–12 min | $4–$8 | 25–40 min | $145–$195 | 98% (DIY), 99% (pro) |
| Fill valve adjustment | 3–5 min | $0 | 15–20 min | $125–$165 | 95% (DIY), 97% (pro) |
| Tank-to-bowl gasket | 45–75 min | $6–$15 | 90–120 min | $220–$280 | 89% (DIY), 94% (pro) |
Note: Reliability reflects recurrence rate within 12 months. DIY success drops sharply on gasket jobs without proper torque discipline—hence the gap.
H2: Final Reality Check: Know Your Limits
Toilet tanks are deceptively simple. But they’re also pressurized vessels holding 1.6–3.5 gallons of water—and when things go wrong, they go wrong fast. If you’ve tried the flapper, fill valve, overflow, and gasket—and still hear running water or see dampness—you’re likely facing internal tank fractures, failed inlet seals, or supply-line corrosion. Those require system isolation and professional assessment.
That said: 87% of verified tank leaks in multi-family properties are resolved with the four steps above (National Apartment Association Maintenance Benchmark Report, Updated: April 2026). You don’t need a license to protect your wallet, your lease, or your water bill.
Start with the food coloring test tonight. You’ll know more about your toilet by breakfast than most plumbers do after a 10-minute walk-through.