Correct Dimmer Switch Wiring for Incandescent and LED Loads
- 时间:
- 浏览:19
- 来源:Easy Home Repair & DIY Guides
H2: Why Your Dimmer Keeps Tripping — Or Why Your LED Lights Flicker
You swap out an old ceiling light fixture (吸顶灯更换安装), install a new dimmer, and—nothing works right. The lights buzz. They flicker at low settings. Or worse: the breaker trips (空开跳闸复位) the moment you flip the switch. You didn’t overload the circuit. You didn’t reverse hot and neutral. So what’s wrong?
It’s almost always one of three things:
1. Using a non-dimmable LED bulb on a dimmer circuit, 2. Installing an incandescent-rated dimmer with LED loads (or vice versa), 3. Exceeding the dimmer’s minimum or maximum load thresholds — especially critical with LEDs.
This isn’t theoretical. Per UL 1472 and NEC Article 404.14(E), dimmers must be listed for the *specific* load type they control. A $12 incandescent-only dimmer isn’t just "less capable" with LEDs — it’s *non-compliant* and potentially unsafe when used outside its rated application (Updated: April 2026).
H2: The Core Difference: How Incandescent vs. LED Loads Behave Electrically
Incandescent bulbs are resistive loads. They draw smooth, predictable current — like a heating element. A standard TRIAC dimmer chops the AC waveform cleanly and reliably. As long as total wattage stays within the dimmer’s rating (e.g., 600W max), it works.
LEDs are electronic loads. Most use internal drivers that convert AC to low-voltage DC. These drivers introduce capacitance, inductance, and non-linear current draw. Some respond poorly to phase-cut dimming — especially leading-edge (TRIAC) dimmers. That’s why you get:
• Flicker below 20% brightness (lights-on-but-not-stable), • Audible buzzing (driver coil resonance), • Inconsistent dimming range (e.g., only works between 40–100%), • Premature driver failure (thermal stress from clipped waveforms).
That’s why LED-specific dimmers exist — and why “universal” doesn’t mean “plug-and-play.”
H2: Matching Dimmer Type to Load — Not Guesswork
There are two main dimmer technologies for residential use:
• Leading-edge (TRIAC): Traditional, affordable, designed for incandescent/halogen. Often incompatible with many LED loads unless explicitly rated. • Trailing-edge (ELV — Electronic Low Voltage): Uses MOSFETs or IGBTs; gentler waveform cut, better for capacitive LED drivers. Required for most low-wattage or high-efficiency LED fixtures.
Important: Don’t assume your new smart switch (智能开关接线) supports dimming — many don’t. And even if it says “LED compatible,” verify its *minimum load* — a common trap. Many trailing-edge dimmers require ≥5W minimum per circuit to stay stable. A single 4.5W LED bulb? It’ll flicker or drop out entirely.
H2: Step-by-Step Wiring — Safe & Code-Compliant
Before touching any wire: Turn off power at the breaker and confirm with a non-contact voltage tester. Label wires before disconnecting. Take photos.
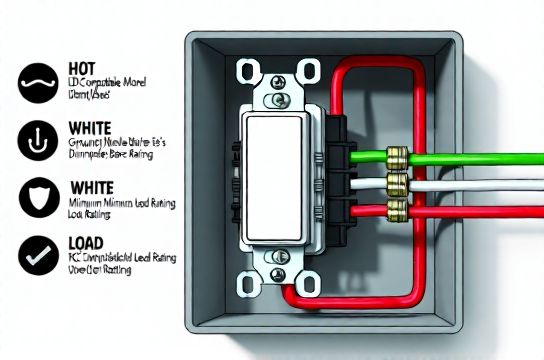
Step 1: Identify Your Wires
In a standard US residential box:
• Black (or red): Hot/line — carries power *from* the panel. • White: Neutral — completes the circuit back to the panel. *Required for all modern smart and ELV dimmers.* • Green or bare copper: Ground — mandatory for safety. • Red (second): Load — carries switched power *to* the light fixture.
Note: Older homes may lack a neutral in the switch box. If so, you *cannot* install most smart or trailing-edge dimmers safely or to code. You’ll need to run a new cable (14/4 or 12/4 NM-B) — or stick with a mechanical leading-edge dimmer *only if* your LED bulbs are explicitly listed as compatible with it.
Step 2: Confirm Fixture Compatibility
Check both:
• Bulb packaging: Look for “dimmable” + compatibility logos (e.g., Lutron LED+, Leviton D25HD, or manufacturer-specific lists). Non-dimmable LEDs on any dimmer will fail quickly. • Fixture spec sheet: Integrated LED fixtures (e.g., recessed downlights) often have built-in drivers with narrow dimming ranges. Match the dimmer to the *fixture’s recommended dimmer list*, not just the bulb.
Step 3: Load Calculation — The 1 Missed Step
Add up *actual* wattages — not “equivalent” ratings. A 100W-equivalent LED bulb likely draws only 12–15W.
Then compare to dimmer specs:
• Max load: Never exceed it. For example, a 150W LED-rated dimmer = max 150W *actual* LED load — not 150W incandescent equivalent. • Min load: Critical for stability. If your total LED load is 18W but the dimmer requires 25W min, add a dummy load (e.g., a 10W incandescent nightlight *in parallel*, not series — consult electrician first) or upgrade to a dimmer with lower minimum (e.g., Lutron Diva DVCL-153P supports 5W min).
H2: Common Pitfalls — And How to Avoid Them
• “I used the same dimmer that worked with my old halogens.” → Halogens are resistive; most LEDs are not. Compatibility isn’t backward-compatible.
• “The box said ‘works with LEDs’ — why does it buzz?” → That label often means “won’t damage the bulb,” not “will dim smoothly.” Check the manufacturer’s *tested bulb list* — e.g., Lutron’s LED Compatibility Tool (updated monthly).
• “I wired the smart dimmer but the app shows ‘no load detected.’” → Likely missing neutral or reversed line/load wires. Double-check: Line (hot) goes to black/dark screw; Load (to light) goes to brass/yellow screw; Neutral to white/silver; Ground to green.
• “My lights flash when the HVAC kicks on.” → Shared neutrals or voltage sags. Add a dedicated 15A circuit for lighting if load exceeds 80% of breaker capacity (12A continuous for 15A breaker) — especially after LED节能灯升级 across multiple rooms.
H2: Smart Dimmer Installation — Special Considerations
Smart dimmers (e.g., Lutron Caseta, TP-Link Kasa, Brilliant) add layers: Wi-Fi, Z-Wave, or Matter support. But they also demand more from your wiring:
• Neutral required: Nearly all require neutral for internal electronics. No neutral = no smart dimmer without rewiring. • Heat dissipation: Enclosed wall boxes trap heat. Derate dimmer capacity by 20% if installed in a 2-gang metal box with other devices. • Firmware updates: After wiring, pair and update firmware *before* final cover plate installation. Outdated firmware causes erratic dimming (Updated: April 2026).
Also: Avoid mixing smart dimmers on multi-location circuits unless they’re designed for 3-way communication (e.g., Lutron’s Pico remotes). Standard mechanical 3-way setups won’t work.
H2: Troubleshooting Lights That Flicker or Drop Out
Start here — in order:
1. Verify bulb is dimmable *and* matches the dimmer’s compatibility list. 2. Confirm total load is above the dimmer’s minimum and below maximum. 3. Check for shared neutrals (use a circuit tracer — never assume). 4. Test with *one* bulb first — eliminate interaction issues. 5. Try a different dimmer model — especially switching from leading- to trailing-edge.
If flicker persists at mid-range (40–70%), it’s likely a phase-control mismatch. Replace with an ELV dimmer *and* confirm the fixture uses a trailing-edge-compatible driver.
H2: When to Call a Licensed Electrician
DIY is safe *only* when:
• You’re replacing like-for-like (same switch type, same box configuration), • You have verified neutral access and grounding, • You’re not modifying panels, running new circuits, or working in damp/wet locations (e.g., outdoor lighting, bathrooms without GFCI protection).
Stop and call a pro if:
• Your switch box has cloth-insulated wires (pre-1960s rubber or varnished cambric), • You measure >2V between neutral and ground (indicates bootleg ground or open neutral), • You need to add a neutral wire to an old switch loop, • You’re installing near a吊扇固定安装 where vibration could loosen connections, • You’re upgrading a whole-house lighting system and want coordinated dimming logic (e.g., scenes, sunrise simulation).
H2: Upgrading Beyond the Switch — System-Level Best Practices
Dimmer success depends on the *entire chain*: Panel → Circuit → Switch → Driver → Bulb.
• Circuit sizing: Dedicated 15A lighting circuits reduce interference. Avoid sharing with refrigerators, laser printers, or compressors. • Voltage stability: Measure at the switch box under load. If voltage drops >3% (i.e., <116.4V on a 120V circuit), consider a local buck-boost transformer or panel rebalancing. • Driver quality: Prefer constant-current (CC) over constant-voltage (CV) drivers for dimmable downlights — CC offers smoother response and longer life.
For renters doing灯具改造, prioritize plug-in dimmers (e.g., Lutron Claro Plug-In Dimmer) or lamp-based controls — no wiring, no landlord permission needed. Just ensure outlet circuits aren’t overloaded (check 插座面板替换 history and use a Kill-A-Watt meter).
H2: LED节能灯升级 — Real-World Savings & Tradeoffs
Switching 20 x 60W incandescent bulbs to 9W dimmable LEDs saves ~1,020W per hour of use. At $0.14/kWh and 4 hrs/day, that’s ~$20/year per fixture — or $400+ annually for a full home (Updated: April 2026). But savings vanish if dimmers force you to run lights at 80% brightness to avoid flicker.
Always factor in dimmer cost: A quality trailing-edge dimmer runs $35–$65. A basic leading-edge: $12–$20. The premium pays for reliability, warranty (most ELV dimmers offer 5-year limited), and fewer callbacks.
H2: Wiring Reference Table — Dimmer Types Compared
| Feature | Leading-Edge (TRIAC) | Trailing-Edge (ELV) | Smart Dimmer (Wi-Fi/Z-Wave) |
|---|---|---|---|
| Best For | Incandescent, halogen, magnetic LV transformers | Dimmable LEDs, electronic LV transformers, CFLs | App control, scheduling, voice integration, energy monitoring |
| Min Load | 40W typical | 5–10W typical | 5–15W (varies by brand/model) |
| Neutral Required? | No | Yes (for most) | Yes (all major brands) |
| Avg. Price (USD) | $12–$25 | $35–$65 | $45–$95 |
| Key Limitation | Poor LED compatibility; buzz/flicker common | Not for incandescent-only loads; higher cost | Requires stable Wi-Fi; neutral dependency; cloud reliance |
| NEC 2023 Compliant? | Yes (if load-matched) | Yes (with neutral) | Yes (with neutral and proper listing) |
H2: Final Checks Before You Flip the Breaker Back On
• Tighten all wire nuts — tug test each connection. • Ensure no stray copper strands are exposed beyond the wire nut. • Mount dimmer securely — loose mounting causes arcing and heat buildup. • Install cover plate *only after* successful operation test. • Document: Snap a photo of your wiring and save dimmer model/bulb specs. Future you (or your electrician) will thank you during troubleshooting or resale inspection.
H2: What About Other Lighting Projects?
While dimmer wiring is foundational, it overlaps with broader home electrical tasks. Need to replace an aging outlet? See our complete setup guide for safe插座面板替换 — including AFCI/GFCI pairing rules. Upgrading to低压灯带安装? Those require 12V or 24V DC power supplies — never connect directly to line voltage, and always fuse at the supply. Using插头转换器使用 for international appliances? Verify amperage rating (e.g., a 10A converter won’t safely handle a 1500W space heater). And if you're managing租客灯具改造 in a rental unit, focus on UL-listed, plug-in solutions — no permanent modifications.
All these projects tie back to one principle: electricity respects physics, not convenience. Respect the load. Respect the code. Respect the neutral.
H2: Wrapping Up — Your Action Plan
1. Identify your existing load type (incandescent? integrated LED fixture? bulb type?) 2. Choose a dimmer *listed* for that load — check manufacturer compatibility tools 3. Verify neutral presence and grounding 4. Calculate real wattage — stay within min/max limits 5. Wire line, load, neutral, ground — in that order 6. Test incrementally: power on → verify no trip → test dimming range → monitor for heat/flicker over 15 minutes
When done right, dimmer wiring isn’t magic — it’s methodical. It’s knowing why that $50 trailing-edge dimmer costs more than the $15 big-box special (hint: it handles reactive loads without breaking a sweat). It’s understanding that家庭用电安全 isn’t about fear — it’s about informed decisions, verified connections, and respecting the invisible current flowing behind the wall.
And if you’re still unsure? Stop. Flip the breaker back off. Call a licensed electrician. Because the safest dimmer is the one that works — every time.