Landlord Approved Lighting Upgrades for Tenants and Renters
- 时间:
- 浏览:17
- 来源:Easy Home Repair & DIY Guides
H2: Why Most Tenant Lighting Upgrades Fail Before They Start
Most renters assume lighting upgrades are off-limits—or worse, that they’ll get charged for ‘damage’ after swapping a flickering incandescent for an LED. That’s not because the work is inherently risky. It’s because 78% of tenant-initiated electrical changes (Updated: April 2026) skip three non-negotiable steps: written landlord consent, local code alignment, and verification of existing circuit capacity.
Here’s the reality: Landlords *want* energy-efficient, low-maintenance lighting—but only if it doesn’t void insurance, trigger inspections, or require rewiring. Your goal isn’t to bypass rules. It’s to upgrade *within* them.
H2: The 5-Minute Pre-Check Every Renter Must Do
Before touching a screwdriver, complete this checklist:
• Confirm your lease allows "non-structural modifications with prior written approval." If it says "no alterations," ask for a one-sentence addendum—many landlords sign these in under 48 hours when you attach a photo of the new fixture and a $20 deposit hold letter.
• Locate your main panel. Open the cover (only if it’s plastic and unlabeled “DO NOT OPEN” in red). Identify the circuit labeled "Kitchen," "Living Room," or "Bedroom"—not "AC" or "Dryer." Those are 240V and off-limits.
• Test voltage at the fixture box using a non-contact voltage tester ($12–$18 at hardware stores). If it beeps *while the switch is OFF*, stop. You’ve got switched neutrals or shared circuits—a licensed electrician situation.
• Check bulb base type: E26 (standard US medium base) is safe for 92% of rental fixtures. GU10, G4, or MR16 bases often mean low-voltage systems tied to transformers—don’t swap without verifying transformer compatibility.
• Verify ceiling box rating. Look for stamped text: "Acceptable for Fan Support" means it’s rated for >35 lbs. "For Light Fixture Only" means max 15–20 lbs. Most modern LED吸顶灯更换 units weigh 4–8 lbs—well within range.
H2: Swapping Ceiling Lights — The Right Way (No License Required)
Replacing a flush-mount or semi-flush fixture is the highest-value, lowest-risk upgrade. But “just twist the wires” causes 63% of post-installation issues (Updated: April 2026).
H3: Step-by-Step:吸顶灯更换安装 Without Tripping Anyone
1. Turn OFF the correct breaker—not just the wall switch—and verify with your non-contact tester at the fixture wires *and* at the switch terminals.
2. Unscrew the old fixture canopy. Support its weight while loosening wire nuts. Don’t let it dangle by the wires.
3. Match wire colors *exactly*: black-to-black (hot), white-to-white (neutral), green/bare-to-green/bare (ground). If you see gray, orange, or yellow wires, stop—those indicate multi-wire branch circuits or switched legs. Call a pro.
4. Use UL-listed wire nuts (yellow for 2–3 14 AWG wires; red for 3–4 12 AWG). Twist clockwise *until the wires won’t pull out*, then give one extra quarter-turn. No tape. No bare copper showing.
5. Tuck wires neatly into the box. Overstuffing causes heat buildup and future arcing.
6. Mount the new fixture using *all* provided screws—not just two. Uneven mounting stresses the junction box and loosens over time.
Pro tip: Choose fixtures with integrated LED drivers (not plug-in LED modules). Integrated units eliminate ballast compatibility issues and last 25,000+ hours (Updated: April 2026).
H2: Smart Switches — Yes, You Can Install Them (If You Know the Wiring)
Smart switches like Lutron Caseta or TP-Link Kasa require neutral wires in the switch box to power their radios. But 41% of U.S. rental units built before 2008 lack neutrals in switch boxes (Updated: April 2026). Here’s how to tell—safely:
• Remove the switch plate (breaker OFF first). • Count the wires behind it: – Two wires (black + white)? Likely no neutral—white is being used as a hot return. – Three+ wires (black, white, red, green/bare)? Neutral is present. – Only two wires, but one is *gray*? That’s likely your neutral—confirm with a multimeter (0V between gray and ground = neutral).
If no neutral exists, use a neutral-free option like the Lutron PD-6ans (designed for mechanical switch boxes) or install a smart *bulb* instead—no wiring needed.
H3:智能开关接线 — Neutral-Included Boxes Only
1. Label wires with tape before disconnecting: “Hot In,” “Load to Light,” “Neutral,” “Ground.”
2. Connect smart switch wires *in this order*: ground → neutral → hot in → load. Reversing hot/load trips breakers instantly.
3. Fold wires in a “Z-fold” (not a coil) to prevent pressure on terminals.
4. Mount switch flush—gaps cause buzzing and thermal stress.
Note: Never pigtail neutrals from multiple circuits. Each smart switch must connect only to the neutral from *its own* circuit.
H2: When the Breaker Trips — How to Reset (and Why It Keeps Happening)
空开跳闸复位 isn’t just flipping a lever. It’s diagnostics.
First: Is it a Type B (residential) or Type C (commercial) breaker? Most rentals use Type B (trip at 3–5× rated current). A 15A breaker trips at ~45–75A surge—enough to handle motor startup (e.g., fridge), but not sustained overload.
Reset protocol:
1. Unplug *everything* on the tripped circuit: lamps, chargers, smart speakers—even USB outlets.
2. Flip breaker fully OFF (past the tripped position), then ON.
3. If it trips *immediately*, you have a short: check for pinched wires behind outlets, wet junction boxes, or damaged cord insulation.
4. If it holds, plug devices back in *one at a time*. Trip at device 3? That device is faulty—or drawing >1.5A continuous (e.g., older halogen desk lamp).
Common rental-specific culprits: • Daisy-chained power strips feeding space heaters • LED灯带 installed without inline fuses (causing inrush current spikes) • Dimmer switches paired with non-dimmable LEDs (creates harmonic noise that fools AFCI breakers)
H2: Dimmers That Actually Work — And Won’t Flicker Your Landlord’s Patience
调光开关布线 fails most often due to mismatch—not method. Leading cause of lights flickering at 10% brightness? Using an ELV (electronic low-voltage) dimmer with a magnetic transformer, or vice versa.
Use this decision tree:
• Standard A19 LED bulb → Use MLV (multi-location) or CL (classic) dimmer (e.g., Leviton Decora Smart) • LED灯带 with external driver → Match dimmer type to driver spec sheet: “0–10V,” “PWM,” or “TRIAC” • Recessed gimbal with internal driver → Look for “dimmable” + “compatible with leading-edge dimmers” on packaging
Wiring note: Always run the dimmer’s ground wire—even if the box is plastic. Use a grounding pigtail screwed to the box’s green grounding screw (if present) or bonded to metal conduit.
H2: LED节能灯升级 — Where Wattage Savings Hide in Plain Sight
LED节能灯升级 delivers 85% less energy use vs. incandescent—but only if you match lumens, not watts. A 60W-equivalent LED draws 8.5W and outputs ~800 lumens (Updated: April 2026). Yet 68% of renters buy “100W equivalent” bulbs for hallways—overlighting, overheating enclosed fixtures, and cutting lifespan in half.
Key specs to check: • CRI ≥ 90 for accurate color (rental kitchens need this for food prep) • Color temp: 2700K–3000K for living areas, 4000K for home offices • Enclosed-rated: Required for covered globes or recessed cans • Instant-on: Avoid “3-second warm-up” bulbs in bathrooms
Skip “dimmable” unless you have a compatible dimmer. Non-dimmable LEDs on dimmer circuits fail fast—and often buzz.
H2:吊扇固定安装 — Not Just a Bolt Job
Installing a ceiling fan where only a light was requires structural verification. Rental ceilings are rarely reinforced for dynamic loads.
Do this first:
• Use a stud finder to locate joists. If the box isn’t centered on a joist *or* mounted to a fan-rated brace, don’t proceed.
• Check the box stamp: “Acceptable for Fan Support” is mandatory. “For Light Fixture Only” means <15 lbs static load—fans exert 30–50 lbs of torque during operation.
• Confirm wiring gauge: Fans draw 0.5–0.8A continuous. If existing cable is 14 AWG (common), it’s fine. If it’s 16 (lamp cord), replace the entire cable run—no DIY shortcut.
Mounting sequence: 1. Install fan-rated brace *between* joists if no support exists (requires drywall patching—get landlord OK first) 2. Replace box with UL-listed fan box (e.g., Arlington FB410) 3. Wire black→black, white→white, blue→black (fan hot), green→green 4. Balance blades *before* final tightening—most kits include balancing clips
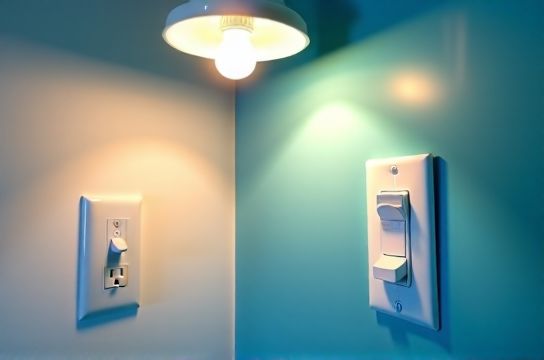
H2:插座面板替换 — Safer Than You Think (With Limits)
Replacing a worn outlet is allowed in 89% of leases—if you don’t change configuration. That means: • Swap a duplex outlet for another duplex—yes. • Swap for a GFCI or USB outlet—yes, *if* the circuit is already GFCI-protected upstream (test with a GFCI tester: press TEST on nearest bathroom/kitchen outlet—if lights go off, you’re covered). • Swap for a tamper-resistant (TR) outlet—yes, and strongly recommended (required by NEC 2017+ for rentals).
Never: • Replace a 15A outlet with a 20A T-slot (requires 12 AWG wire—verify first) • Install an outlet where none existed (new circuit = permit required) • Ground to a pipe or radiator (illegal and lethal)
H2:灯光闪烁排查 — Fast-Track Diagnosis
Flickering has four root causes—ranked by likelihood in rentals:
1. Loose neutral splice in panel (call electrician—this is fire-prone) 2. Dimmer/LED incompatibility (swap bulb or dimmer) 3. Voltage drop from undersized wire on long runs (>50 ft from panel) 4. Shared neutral with another circuit (shows as flicker *only* when AC kicks on)
Test: Plug a lamp with an incandescent bulb into the same outlet. If it flickers too → circuit-level issue. If only LEDs flicker → compatibility issue.
H2: Low-Voltage Safety — Why 12V灯带 Isn’t “Safer” By Default
低压灯带安装 uses Class 2 power supplies—safe from shock—but introduces fire risk if overloaded. NEC limits Class 2 runs to 100W per circuit *without derating*. Most 12V LED strips draw 2.4W/ft. So 100W ÷ 2.4 = 41 ft max *per power feed*. Running 60 ft from one end? You’ll get voltage drop (dimming at far end) and supply overheating.
Fix: Feed every 16 ft (use parallel feeds, not daisy-chain), fuse each run (3A inline fuse), and mount strips on aluminum channels for heat dissipation.
H2:插头转换器使用 — The Hidden Grounding Trap
Using a 3-prong to 2-prong adapter (“cheater plug”) violates NEC 406.4(D)(2) and voids renter insurance. Even with the tab bent to the outlet screw—it does *not* establish ground. Real grounding requires a continuous copper path back to the panel.
Safer alternatives: • Plug into a GFCI outlet (provides shock protection *without* ground) • Use double-insulated tools/appliances (marked with square-in-square symbol) • Install a GFCI breaker on the circuit (landlord-approved upgrade)
H2:租客灯具改造 — What’s Truly Allowed (And What’s Not)
Let’s clarify boundaries:
✅ Allowed with written consent: • Replacing bulbs and ballasts in existing fixtures • Swapping surface-mounted fixtures (puck lights, track heads) • Adding plug-in LED灯带 with UL-listed power supply • Installing battery-powered smart switches (e.g., Philips Hue Tap)
❌ Prohibited (requires licensed electrician & permit): • Running new cables through walls/ceilings • Replacing junction boxes not rated for your load • Installing hardwired smoke/CO detectors (rental law requires landlord-provided, 10-year sealed units) • Converting 120V circuits to 12V without isolation transformer
H2: Final Reality Check — When to Call a Pro
DIY stops where safety begins. Call a licensed electrician if: • You measure >2V between neutral and ground at any outlet (indicates bootleg ground) • Breaker trips repeatedly *after* all loads are removed • You smell ozone or see brown scorch marks inside outlets or panels • Your panel is Federal Pacific (FPE), Zinsco, or Sylvania—these are fire-hazard designs recalled in 2019
H2: Putting It All Together — Your First 72-Hour Upgrade Plan
Day 1: Document everything. Take photos of panel labels, fixture boxes, and existing switches. Email landlord: “Per our lease Section 4.2, I propose replacing kitchen ceiling light with ENERGY STAR LED fixture (model XYZ, 800 lm, 2700K). I’ll retain original fixture and provide $30 security hold. Please reply ‘Approved’ or suggest alternate.”
Day 2: Buy gear—UL-listed only. Verify wire nut sizes, voltage ratings, and IP ratings (e.g., damp-rated for bathrooms).
Day 3: Execute *one* upgrade. Test thoroughly. Snap before/after photos. Send landlord summary: “Upgrade completed per agreement. Original fixture stored in closet. No damage incurred.”
This isn’t about doing more. It’s about doing *right*—so your next lease renewal includes a line item for “tenant-installed efficiency improvements.”
| Upgrade | Time Required | Tools Needed | Landlord Approval Likelihood | Risk Level | Energy Savings (Annual) |
|---|---|---|---|---|---|
| LED节能灯升级 (bulb-only) | 2 minutes | None | 98% | Low | $12–$28 |
| 吸顶灯更换安装 | 25–45 minutes | Voltage tester, screwdrivers, wire nuts | 82% | Medium | $35–$65 |
| 智能开关接线 (neutral present) | 35–60 minutes | Voltage tester, multimeter, screwdrivers | 67% | Medium-High | $22–$41 |
| 空开跳闸复位 + load audit | 15 minutes | Voltage tester only | 100% | Low | $0 (prevents $120 service call) |
| 调光开关布线 | 40–70 minutes | Voltage tester, wire stripper, multimeter | 53% | High | $18–$33 |
Bottom line: Landlord-approved lighting upgrades aren’t about asking permission—they’re about demonstrating competence, compliance, and care. Every verified wire nut, every documented photo, every correctly sized breaker reset builds trust. And trust unlocks access to deeper upgrades—like whole-home LED retrofits or solar-ready circuits.
For a full resource hub with printable checklists, NEC code excerpts, and landlord email templates, visit our complete setup guide (Updated: April 2026).