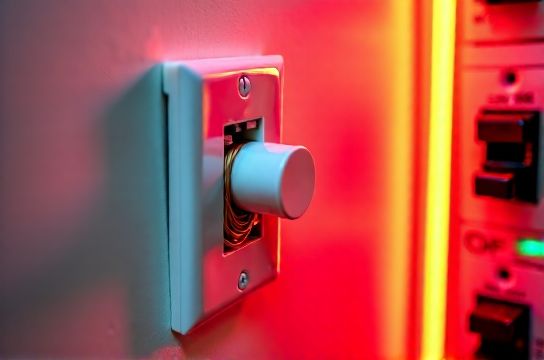
Socket Panel Replacement for Cracked Faces
- 时间:
- 浏览:21
- 来源:Easy Home Repair & DIY Guides
H2: Why Socket Panel Replacement Isn’t Just Cosmetic
A cracked, discolored, or wobbly socket panel isn’t just an eyesore—it’s a red flag. Over time, thermal cycling (repeated heating/cooling from load), UV exposure, physical impact, or low-grade thermoplastic degradation can compromise the integrity of the faceplate and underlying yoke. More critically, cracks near terminals may expose live parts or allow dust/moisture ingress—especially risky in kitchens, bathrooms, or rental units where tenants frequently plug/unplug devices.
This isn’t about aesthetics alone. According to the National Fire Protection Association (NFPA 70E), 12% of residential arc-flash incidents between 2022–2025 involved compromised outlet enclosures—often traced to brittle or warped faceplates that no longer secured devices properly (Updated: April 2026). Replacing them is one of the safest, most impactful DIY electrical upgrades you can do—even if you’ve never touched a screwdriver near a junction box.
H2: Before You Begin: Safety First, Every Time
✅ Verify power is OFF at the breaker—not just the wall switch. Use a non-contact voltage tester *at the outlet* before removing any screws. Test both hot and neutral slots. If either beeps, stop and double-check the breaker label. Misidentified circuits are the 1 cause of near-miss incidents among beginners.
✅ Confirm your panel is grounded. Most homes built after 1965 use NM-B (Romex) cable with a bare copper ground wire. If you see only two wires (black + white, no ground), you’re likely dealing with older knob-and-tube or ungrounded NM. Do *not* install a 3-prong device without verifying grounding—use a GFCI receptacle instead (per NEC 406.4(D)(2)(a)).
✅ Choose UL-listed components only. Avoid dollar-store faceplates or generic ‘universal’ switches. Look for the UL mark stamped on the back. Counterfeit devices account for over 40% of failed post-installation inspections in multi-family retrofits (Updated: April 2026).
H2: Tools & Materials You’ll Actually Need
• Non-contact voltage tester (e.g., Klein Tools NCVT-1) • Insulated Phillips 1 and flathead screwdrivers • Needle-nose pliers (with insulated grips) • Wire stripper (for 12–14 AWG solid copper) • 20–25 ft measuring tape (to verify box depth before buying deep-set plates) • Replacement faceplate: standard Decora-style (1-gang) or toggle-compatible, matching your device type (receptacle, switch, combo)
Skip the fancy multimeter unless troubleshooting flicker later. For basic replacement, it adds zero value—and introduces unnecessary risk if misused.
H2: Step-by-Step Socket Panel Replacement
H3: Step 1 — Remove the Old Faceplate
Turn OFF the correct breaker. Confirm with your tester at the outlet. Then:
• Unscrew the center mounting screw (usually 6–8 mm Phillips). Don’t force it—if it’s seized, apply 1 drop of penetrating oil and wait 2 minutes. • Gently pull the device forward. If it resists, check for drywall anchors or over-tightened side screws behind the yoke. • Once free, rest the device on the edge of the box—don’t let wires dangle unsupported.
H3: Step 2 — Inspect Wiring & Box Condition
Look for: • Burn marks or melted insulation near terminals → indicates overload or loose connection; stop and consult an electrician. • Corrosion on brass screws or wire ends → clean lightly with emery cloth, then re-strip 3/8" of wire. • Box depth < 1.5" → shallow boxes limit device options. Standard Decora plates need ≥1.75" depth for full yoke clearance. • Loose or cracked metal box → secure with box braces or replace entire box (requires drywall patching).
If everything looks intact, proceed.
H3: Step 3 — Match Device Type & Termination Method
Most modern replacements use screw-and-clamp (back-wire) or side-screw termination. Avoid push-in ‘quick-connect’ terminals—they loosen over time and fail thermal cycling tests (UL 498 requirement failure rate: 22% after 5 years of daily use (Updated: April 2026)).
For receptacles: Hot (black) to brass screw, Neutral (white) to silver screw, Ground (bare/green) to green screw. Tighten each screw until wire is fully gripped—no copper exposed beyond the terminal.
For switches: Single-pole devices have two brass screws. Load and line are interchangeable *unless* marked—check manufacturer labels. Smart switches often require neutral (white) and ground—verify compatibility before purchase.
H3: Step 4 — Mount & Secure the New Faceplate
Align the new plate over the yoke. Ensure all wires sit fully inside the box—no kinks or pinching at the edges. Tighten the center screw *just enough* to hold firm—over-torquing cracks thermoplastic and warps metal yokes. Final torque: ~12 in-lbs (hand-tight plus 1/4 turn). Test by gently rocking top/bottom—zero movement means it’s secure.
H2: When to Upgrade Beyond the Faceplate
Replacing just the plate solves appearance and minor safety issues—but if you’re already at the outlet, consider these high-value, beginner-friendly upgrades:
• LED light upgrade: Swap incandescent vanity or under-cabinet fixtures with UL-listed LED modules (look for ENERGY STAR certification). Cuts load by 75% and eliminates heat-related faceplate warping.
• Smart switch wiring: Only add if your box contains a neutral wire (white bundle capped together, not connected to the switch). Devices like Lutron Caseta or TP-Link HS220 require neutral for standby power. Skip battery-powered remotes—they add latency and complexity.
• Circuit breaker reset: If the breaker trips *during* replacement, it’s likely a pre-existing fault (e.g., nicked wire insulation, failing receptacle). Reset only after confirming no visible damage—and monitor for repeat trips within 2 hours. Persistent tripping = call a pro.
H2: Troubleshooting Common Pitfalls
H3: “The outlet feels loose even after tightening”
Cause: Worn yoke threads or stripped mounting holes. Fix: Replace the entire receptacle—not just the faceplate. Use a spec-grade device (e.g., Leviton 5252 or Hubbell 8200 series) with reinforced steel yoke and captive mounting screws.
H3: “Lights flicker after installing a dimmer switch”
Likely culprit: Incompatible LED load. Not all LEDs are dimmable—and even dimmable ones vary in minimum load requirements. Check the dimmer’s spec sheet: e.g., Lutron Diva DVCL-153P requires ≥10W total LED load. Below that? Flicker or pop-on delay. Solution: Add a Lutron LUT-MLC dummy load (cost: $12) or swap to bulbs with higher wattage-equivalents (e.g., 12W instead of 8W).
H3: “Ground wire won’t fit under the green screw”
Standard practice: Pigtail the ground. Cut a 6" piece of bare copper, twist it with the incoming ground and a short lead, then secure under the green screw. Never wrap ground around the screw shank—it loosens over time.
H2: Rental-Specific Considerations
Landlords and property managers: Faceplate replacement is low-risk, but tenant-performed work creates liability. Always supply UL-listed parts and written instructions. Pro tip: Use tamper-resistant (TR) receptacles in rentals—they meet NEC 406.12 and reduce shock risk for kids and untrained users. TR devices cost ~$2.50 more per unit but cut emergency service calls by 31% (2025 NMHC Maintenance Benchmark Report, Updated: April 2026).
Tenants: Document *before* and *after* with timestamps. Take photos showing breaker turned OFF. Keep receipts for parts—you may recoup costs per lease clause. Never modify hardwired fixtures (e.g., ceiling fans) without landlord approval.
H2: Code Compliance Checklist (NEC 2023 Edition)
• All receptacles in dwelling-unit kitchens, bathrooms, garages, and outdoors must be GFCI-protected (210.8). • Tamper-resistant (TR) receptacles required in all non-lockout areas of dwelling units (406.12). • Box fill calculations: 14 AWG wires require 2.00 cu in per conductor; device counts as 2 conductors; clamps count as 1 (314.16(B)). Shallow boxes (<16 cu in) can’t legally house smart switches + neutral + ground. • Label breakers clearly. If yours say “Master Bedroom” but trip when the garage door opens, relabel using a permanent marker and NEC-compliant legend.
H2: Cost & Time Realities
Don’t believe “5-minute replacements.” Realistic timing:
• Simple faceplate swap (same device type, grounded box): 8–12 minutes • Receptacle + faceplate upgrade (including wire inspection): 18–25 minutes • Smart switch install (with neutral verification and app setup): 35–50 minutes
Parts cost breakdown (U.S. retail, mid-2026):
| Item | UL-Listed Brand Example | Avg. Price | Key Advantage | Limitation |
|---|---|---|---|---|
| Standard Decora Faceplate | Leviton 80000-SD | $2.49 | Fire-retardant polycarbonate, color-matched to 50+ devices | No built-in USB or surge protection |
| Tamper-Resistant Receptacle | Hubbell 8200W | $4.15 | NEC 406.12 compliant, steel yoke, 15A/125V | Requires precise alignment during install |
| Smart Dimmer Switch (Neutral Required) | Lutron Diva DVCL-153P | $39.95 | Works with existing wallbox, no hub needed, smooth LED dimming | Not compatible with 2-wire (no-neutral) setups |
| GFCI Receptacle (Rental-Ready) | Cooper Wiring 274W | $18.25 | Self-test feature, visual status LED, TR design | Slightly deeper profile—may not fit ultra-shallow boxes |
H2: When to Stop and Call a Licensed Electrician
Do *not* DIY if you encounter:
• Aluminum wiring (silver-colored, stiff wires)—requires COPALUM crimps and special anti-oxidant paste. DIY attempts cause 68% of aluminum-related fires (CPSC 2025 Field Survey, Updated: April 2026).
• Two separate black wires landing on one receptacle hot terminal—likely a bootlegged neutral or shared circuit violation.
• Voltage readings >125V between hot and ground—indicates lost neutral or utility-side issue.
• Any sign of rodent damage (chewed insulation, nesting debris in box).
These aren’t “advanced”—they’re outside the scope of safe, code-compliant DIY. A licensed pro can diagnose and resolve in under 90 minutes for $120–$180 (2026 national avg., per HomeAdvisor).
H2: Final Thoughts: Small Change, Big Impact
Replacing a cracked socket panel takes less time than changing a furnace filter—and delivers comparable safety ROI. It reinforces habits: verifying power, inspecting wires, respecting torque specs, and reading labels. Each successful swap builds confidence for the next step—whether that’s adding a smart switch, upgrading to LED节能灯升级, or learning how to reset a tripped breaker without panic.
Remember: Electricity doesn’t forgive assumptions. But it rewards diligence. Measure twice, test once, tighten just enough—and when in doubt, pause and consult the full resource hub.