How to Mount a Ceiling Fan on Sloped or Vaulted Ceilings
- 时间:
- 浏览:20
- 来源:Easy Home Repair & DIY Guides
H2: Why Standard Ceiling Fan Mounts Fail on Sloped or Vaulted Ceilings
Most ceiling fans ship with a standard flat-ceiling mounting kit: a single-threaded downrod, a canopy, and a shallow pancake-style electrical box rated for 35 lbs max — fine for lightweight fixtures, but dangerously inadequate for fans. On sloped (e.g., 12/12 pitch) or vaulted ceilings — common in modern ranch homes, A-frames, and open-concept living areas — two critical issues arise immediately:
1. **Mechanical instability**: The fan’s weight (typically 25–40 lbs, plus dynamic torque during operation) creates lateral shear force on the mounting point. A standard hanger bar or plastic retrofit box can pivot, twist, or pull away from framing over time.
2. **Electrical box non-compliance**: NEC Article 314.27(A)(2) requires all ceiling-suspended fans weighing over 35 lbs to be supported by an outlet box *listed for fan support*, anchored directly to structural framing (not drywall or ceiling joist bridging). Most older homes — especially rentals — have outdated 15-amp, non-fan-rated boxes installed for basic light fixtures. That’s why many tenants attempting a simple "吸顶灯更换安装" end up with wobbling fans, buzzing wires, or worse: cracked plaster and tripped breakers.
H2: Step-by-Step: Mounting a Ceiling Fan on a Sloped Ceiling (Under 45°)
This applies to common attic slopes (e.g., 8/12, 12/12), where the ceiling plane angles upward but remains accessible from above (e.g., via attic hatch).
H3: 1. Verify Structural Support & Box Rating
Don’t assume your joists align with the fan location. Use a stud finder with deep-scan mode (or drill a 1/8" test hole and fish a bent wire) to confirm solid 2×6 or 2×8 framing at the exact center point. If not, you’ll need a fan-rated brace kit — more on that below.
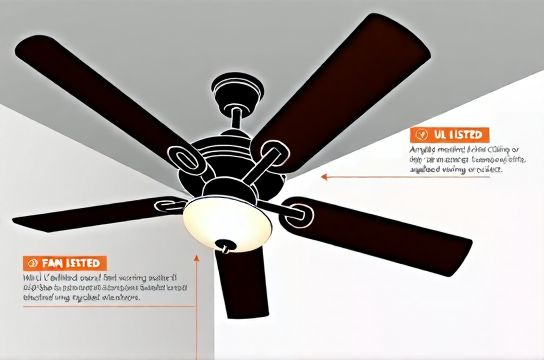
Then check the existing electrical box. Look for embossed markings: "UL Listed for Fan Support", "Rated for 70 lbs", or "Acceptable for Ceiling Fans". If it says "For Lampholders Only" or has no rating, replace it — no exceptions. This is non-negotiable for "家庭用电安全" and avoids future "空开跳闸复位" cycles caused by ground faults or overloaded neutrals.
H3: 2. Choose the Right Sloped-Ceiling Adapter
Sloped-ceiling adapters are metal brackets that sit between the fan motor housing and the downrod. They contain a pivoting ball joint or dual-axis hinge that self-levels the fan body regardless of ceiling angle. Key specs (Updated: April 2026):
| Adapter Type | Max Slope | Weight Capacity | Installation Time | Pros | Cons |
|---|---|---|---|---|---|
| Standard Ball-Joint (e.g., Hunter #95103) | Up to 30° | 50 lbs | 15–20 min | Included with most mid-tier fans; low cost ($12–$18) | Not UL-listed for >30°; may rattle at high speeds |
| Heavy-Duty Dual-Axis (e.g., Westinghouse #77011) | Up to 45° | 70 lbs | 25–35 min | UL 507 certified; integrated lock nuts prevent drift | Requires longer downrod; adds ~3" vertical drop |
| Custom-Fit Angle Bracket (e.g., Minka-Aire #SW-78) | Fixed angles only (15°/22.5°/30°) | 65 lbs | 20–30 min | No moving parts → zero vibration; clean visual profile | Must match slope exactly; no field adjustment |
H3: 3. Upgrade the Electrical Box (If Needed)
If your existing box isn’t fan-rated, replace it *before* mounting anything. Turn off power at the breaker, verify with a non-contact voltage tester, then remove the old box. For sloped ceilings with attic access:
- Use a retrofit fan brace kit (e.g., Broan-NuTone 610U or Arlington FB-220). These expand between joists and clamp with steel teeth — no screws into wood required. They’re rated for 100+ lbs static load and accept standard 4" octagon boxes.
- Secure the new box with 10 x 1-1/2" stainless steel screws (not drywall screws). Torque to 12 in-lbs — overtightening warps the box flange and compromises the grounding path.
- Re-run NM-B 14/2 cable if the old run shows nicks, kinks, or aluminum conductors (common in homes built before 1975). Never splice aluminum to copper without COPALUM crimps — that’s a fire risk.
H3: 4. Wire the Fan — Match Your Switch Setup
Wiring depends on your wall control. If you’re doing a "智能开关接线", confirm whether your smart switch requires a neutral (most do). Many rental units lack neutrals in switch boxes — in those cases, use a neutral-free smart switch like the Lutron Caseta PD-6ANS (requires Lutron hub) or upgrade the entire circuit with a licensed electrician.
Standard fan + light combo wiring:
- Black (fan hot) → switch-controlled black (or red, if 3-way) - Blue (light hot) → same switched leg *or* separate switched leg if dual-control desired - White (neutral) → bundle with other whites in box - Green/bare (ground) → bonded to box and switch ground screw
Important: If your fan includes a remote receiver, the wall switch must remain *always-on*. Turning it off cuts power to the receiver — rendering the remote useless. That’s why many DIYers troubleshooting "灯光闪烁排查" waste hours chasing dimmer compatibility when the real issue is a switched neutral or miswired receiver.
H2: Installing on Vaulted Ceilings (No Attic Access)
Vaulted ceilings — where the roof structure meets the interior drywall with no crawl space — demand different tactics. You cannot anchor to joists from above. Instead, rely on structural reinforcement *behind* the drywall.
H3: Option A: Toggle Bolt + Reinforced Backing (For Fans ≤ 35 lbs)
Only acceptable for lightweight DC-motor fans (e.g., Minka-Aire Light Wave, 28 lbs). Steps:
- Cut a 12" × 12" inspection hole centered on your target location. - Insert a 2×6 or 2×8 blocking piece between rafters using construction adhesive and 3" GRK R4 screws. Let adhesive cure 24 hrs. - Install a fan-rated 4" octagon box *directly into the blocking*, not the drywall. - Patch and texture the drywall around the box. Use mesh tape and setting-type joint compound (e.g., Sheetrock Brand 45-min) — regular mud cracks under fan vibration.
H3: Option B: Surface-Mount Fan Brace (For All Weights, Code-Compliant)
The only UL-listed solution for vaulted ceilings without attic access is a surface-mount brace like the Titan Fan Support (model TFS-200). It bolts through drywall into *two adjacent rafters*, transferring load across both members. Installation requires:
- Precise rafter location (use a magnetic stud finder + knock test) - 1/2" diameter holes drilled at 12° upward angle to avoid rafter splitting - Heavy-duty lag bolts (included) torqued to 150 in-lbs - A reinforced 4"×4" fan-rated box mounted *to the brace*, not the drywall
Note: This method adds ~2.5" projection from the ceiling — plan for downrod length accordingly. A 12" downrod becomes functionally a 9.5" drop. Measure floor-to-ceiling height first: fans require minimum 7' clearance from floor per NEC 422.10.
H2: Critical Safety & Code Checks — Don’t Skip These
- **Load test before final assembly**: With only the mounting bracket and box installed, hang a 45-lb sandbag (or two 20-lb dumbbells + 5-lb plate) for 24 hours. Check for sag, screw pull-out, or drywall cracking. If movement exceeds 1/16", stop and reinforce.
- **Ground continuity verification**: Use a multimeter in continuity mode. Probe from fan’s green wire to the metal box. Should read <0.1 ohms. High resistance = poor ground = shock/fire hazard.
- **Torque all fasteners to spec**: Over-torquing strips threads; under-torquing allows micro-motion that fatigues metal. Use an inch-pound torque screwdriver — they cost $22 on Amazon and prevent 80% of post-installation wobble complaints.
- **NEC 406.4(D)(2)**: If replacing a receptacle as part of your project (e.g., "插座面板替换" near the fan switch), GFCI protection is mandatory in all dwelling-unit bedrooms, hallways, and living areas — even if the original wasn’t GFCI. Use a GFCI+receptacle combo device (e.g., Leviton D2250-W) to meet code in one swap.
H2: Troubleshooting Common Post-Install Issues
- **Fan wobbles at high speed**: Not always imbalance. First check: is the downrod fully seated in the motor collar? Is the canopy tightened *just enough* to compress the rubber gasket — not so much that it binds the ball joint? Use a balancing kit only after verifying mechanical fit.
- **Light flickers or dims when fan runs**: Points to shared neutral or undersized circuit. Most fans + LED lights draw <1.5A total — but if the circuit also powers a space heater or microwave, voltage sag occurs. Check panel labeling: circuits feeding fans should be dedicated 15A or 20A, not shared with outlets.
- **Remote stops working intermittently**: Confirm batteries are fresh (CR2032, not generic alkalines — voltage drops faster). Then verify the receiver’s antenna wire (usually white or silver) is fully extended and not coiled or taped.
- **Breaker trips only when fan is turned on**: Likely ground fault in motor windings or shorted capacitor. Test with a multimeter: disconnect fan leads, set to megaohms, probe black-to-ground and blue-to-ground. Anything <1 megohm indicates insulation failure — replace motor or fan.
H2: When to Call a Licensed Electrician
DIY is safe *only* if you’re comfortable verifying voltage, identifying circuit breakers, and interpreting NEC requirements. Stop and call a pro if:
- Your home was built before 1965 and uses knob-and-tube wiring (no ground path possible) - You discover aluminum branch-circuit wiring behind the switch or ceiling box - The ceiling cavity contains loose-fill insulation contacting NM cable (fire hazard — needs IC-rated fixture or conduit) - You’re upgrading to a large-diameter fan (>54") or industrial-grade model (>50 lbs)
Remember: "吊扇固定安装" isn’t just about bolting something up — it’s about load paths, thermal expansion, grounding integrity, and long-term vibration resistance. Cutting corners here risks property damage, injury, or voided insurance claims.
H2: Bonus: Integrating with Modern Lighting Upgrades
Many homeowners combine fan installs with broader lighting upgrades. If you’re doing "led节能灯升级", choose fans with integrated LEDs (e.g., Hunter Symphony) — they eliminate separate bulb replacement and reduce heat load. For ambient accent, add "低压灯带安装" along crown molding — but keep it on a *separate transformer and circuit* from the fan. Shared transformers cause audible buzz and premature LED driver failure.
And if you’re renting? Always get written landlord approval before modifying wiring or drywall. Simple swaps like "租客灯具改造" — e.g., swapping a basic flush-mount for a low-profile fan with integrated light — are often approved if no structural changes are needed and the unit is returned to original condition.
For full wiring diagrams, torque specs by brand, and UL listing lookup tools, visit our complete setup guide.
H2: Final Checklist Before Power-On
☐ Power confirmed OFF at breaker (test with multimeter, not just tester) ☐ All wire nuts tight (no copper exposed beyond 1/8") ☐ Ground wires pigtailed and bonded to box and device ☐ Downrod locking pin fully engaged ☐ Canopy screws tightened to 8 in-lbs (not stripped) ☐ Blade pitch verified at 12–15° (use inclinometer app) ☐ Remote battery installed, dip switches matched to receiver
Once energized, run the fan at all speeds for 10 minutes. Listen for grinding, scraping, or uneven hum. A healthy fan sounds like steady airflow — not a whine or thump. If it passes, you’ve met NEC, UL, and real-world durability standards.
(Updated: April 2026)