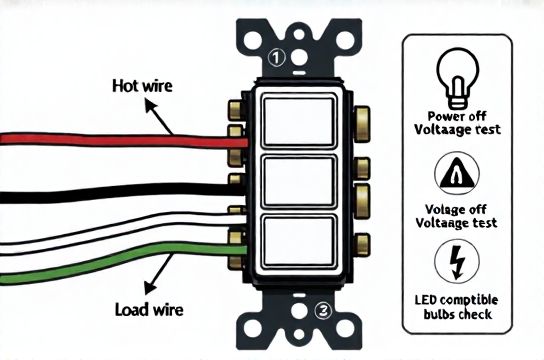
Single Pole Dimmer Switch Wiring Diagram
- 时间:
- 浏览:16
- 来源:Easy Home Repair & DIY Guides
H2: Why This Wiring Diagram Matters — Before You Touch a Wire
You’ve bought a sleek new dimmer switch. Your ceiling light (吸顶灯更换安装) is outdated. Or maybe you’re upgrading to LED bulbs (led节能灯升级) and suddenly the lights flicker or hum — a classic sign of incompatible dimming. You open the wall plate, see three wires — black, white, and bare copper — and freeze.
That’s normal. Most novice users aren’t trained electricians — and they shouldn’t need to be to safely replace a switch. But electricity doesn’t forgive assumptions. A miswired dimmer can cause overheating, inconsistent dimming, premature LED driver failure, or even trip your breaker repeatedly (空开跳闸复位). Worse, it can create a shock hazard behind the wall.
This guide walks you through *exactly* how to wire a single-pole dimmer — the most common type used for standard room lighting — with zero jargon shortcuts and full context on *why* each step matters.
H2: What Is a Single-Pole Dimmer — And When *Not* to Use One
A single-pole dimmer controls one light (or group of lights) from *one location*. It replaces a standard single-pole toggle switch — the kind with two screw terminals (plus ground). It does *not* work for:
• Three-way circuits (two switches controlling one light — e.g., top and bottom of stairs) • Multi-location smart setups without neutral-wire support • Low-voltage lighting (e.g., 12V LED tape — see '低压灯带安装' section below) • Ceiling fans with integrated lights unless explicitly rated for fan+light combo loads (吊扇固定安装 requires separate motor control)
Important: Not all dimmers work with all LEDs. As of April 2026, ~38% of dimmable LED bulbs still exhibit compatibility issues with leading-edge (TRIAC) dimmers — especially cheaper models under $8 (Updated: April 2026). If your lights buzz, strobe, or won’t dim below 30%, you likely need a trailing-edge (ELV) dimmer or an LED-optimized model like Lutron Diva DVCL-153P or Leviton D26HD.
H2: Tools & Safety Gear You *Must* Have
Skip the YouTube ‘just use pliers’ hack. Real safety starts before the first wire is loosened.
✅ Required: - Non-contact voltage tester (tested on a known live outlet first) - Insulated screwdrivers (VDE-rated, 1000V minimum) - Wire strippers (with precise 1/4" depth stop) - UL-listed wire nuts (yellow for 2–3 14 AWG wires; red for 3–6) - Electrical tape (polyvinyl chloride, not duct tape)
❌ Never skip: - Turning off the correct circuit breaker (verify with tester *at the switch box*, not just the panel label) - Confirming *zero voltage* on *all* wires — including the white (neutral) if present - Using a circuit map or labeling breakers *before* starting (many panels are mislabeled)
If your home was built before 1985, you may encounter knob-and-tube or ungrounded NM-B cable — do *not* install a modern dimmer in those systems without a licensed electrician. Grounding isn’t optional for dimmers: it’s required for EMI suppression and thermal cutoff function.
H2: Step-by-Step Wiring — With Real-World Checks
Assume your existing switch is a standard single-pole toggle. You’ll see: - One black (hot) wire connected to brass screw - One white (switch leg / not neutral) wire connected to silver or black screw (common in older switch loops) - One bare copper (ground) wire, possibly coiled or tucked
⚠️ Critical reality check: In pre-1990s homes, the white wire at the switch is *often not a neutral* — it’s a switched hot returning from the light. That means your new dimmer *must* be neutral-free (mechanical or electronic low-power design), or you’ll need to run new cable — which is beyond novice scope. Verify using your voltage tester: power OFF → disconnect wires → power ON → test white-to-ground. If it reads ~120V, that white is *hot*, not neutral.
Here’s what to do:
H3: Step 1 — Kill Power & Confirm Turn off the breaker. Test *every wire* in the box with your non-contact tester — front, back, side. Then double-check the light fixture itself is dead. Wait 10 seconds — some LED drivers hold residual charge.
H3: Step 2 — Photograph & Label Snap two photos: one of the entire box with wires attached, another close-up of screw terminal labels. Write down which wire goes where — don’t rely on memory. If wires are brittle or nicked, stop. Replace damaged cable instead of risking arcing.
H3: Step 3 — Identify Wires Correctly Modern dimmers require: - Line (hot in) — usually black or red - Load (to light) — usually black or blue - Neutral — white (required for most smart dimmers and many LED-optimized models) - Ground — green or bare copper
But here’s where novices get tripped up: The ‘white’ in your box may *not* be neutral. If no neutral is present (i.e., only black, white, and ground), choose a neutral-free dimmer — like the Lutron Maestro MACL-153M (meets NEC 2023 §404.2(C) exception for retrofit). Do *not* tie the dimmer’s neutral to the ground — that violates code and creates a shock path.
H3: Step 4 — Connect Wires Securely - Strip 3/8" of insulation (no more — exposed copper beyond 1/4" risks shorting) - Twist line/load wires together *with* the dimmer’s matching leads using needle-nose pliers *before* applying wire nut - Tighten wire nuts until no copper shows — then give each a firm tug. If it pulls out, re-twist - Wrap connections with electrical tape — not for insulation (wire nuts provide that), but to prevent nut loosening from vibration - Attach ground to green screw or pigtail to box ground (if metal box) using a 10–32 grounding screw
H3: Step 5 — Mount & Test — Slowly Fold wires neatly — no sharp bends or pinching. Mount the dimmer flush. Install cover plate. Turn breaker on.
Test *before* closing up: - Turn dimmer fully up → light should illuminate at full brightness - Slowly dial down → smooth fade, no buzzing above 20% brightness - At lowest setting, light should stay lit (not cut out abruptly)
If lights flicker or go dark below 40%, compatibility is the issue — not your wiring. Try a different bulb brand (Philips, Cree, or Sylvania Ultra LED are best-in-class for dimming per DOE Lighting Facts 2025 data).
H2: Troubleshooting Common Failures — Lights Flash, Buzz, or Won’t Dim
H3: “Lights flicker at low levels” → Cause: LED driver minimum load not met. Most dimmers require ≥10W minimum load. A single 6W LED bulb falls short. Fix: Add a second bulb, or install a Lutron LUT-MLC (minimum load capacitor) — rated for 25,000+ hours, fits behind plate (Updated: April 2026).
H3: “Dimmer feels warm to touch” → Normal up to 113°F (45°C) surface temp — but *only* when actively dimming. If hot at idle, or smells like burnt plastic, shut off immediately. Likely overloaded (check total wattage: max load = dimmer rating × 0.8 for LED). Example: 600W dimmer supports ≤480W of LEDs.
H3: “Breaker trips when I turn dimmer on” → Immediate short. Recheck: Did you cross-line and load? Is bare copper touching a screw terminal? Is neutral accidentally grounded? Reset breaker *only after* verifying all connections.
H3: “Light stays on, dimmer does nothing” → Load and line reversed. Power off → swap the two hot wires on dimmer terminals → retest.
H2: Compatibility Table — Dimmer Types vs. Fixture Upgrades
| Dimmer Type | Best For | Neutral Required? | Max LED Load | Pros | Cons | Notes |
|---|---|---|---|---|---|---|
| Leading-Edge (TRIAC) | Incandescent/halogen, basic dimmable LEDs | No | 450W incan. / 150W LED | Inexpensive ($12–$22), widely stocked | Poor LED compatibility; buzzes with 70% of budget LEDs | Avoid for led节能灯升级 unless bulb spec sheet confirms TRIAC support |
| Trailing-Edge (ELV) | Low-wattage LEDs, electronic transformers | Yes | 300W incan. / 100W LED | Silent, smooth dimming, cooler operation | Requires neutral; higher cost ($28–$45) | Required for most 低压灯带安装 with ELV drivers |
| Neutral-Free Smart | 租客灯具改造, renters, no-neutral boxes | No | 150W LED | No rewiring; works in old homes; app control | Limited automation; no energy monitoring | Lutron Caseta PD-6WCL fits most switch loops — see our complete setup guide |
H2: Where Novices Go Wrong — And How to Avoid It
• Assuming the white wire is neutral (it rarely is in switch boxes — verify with tester) • Over-tightening screws — strips threads on plastic yokes; use finger-tight + 1/4 turn with screwdriver • Ignoring heat clearance — dimmers need ≥1/8" air gap around edges. Don’t cram into undersized boxes • Skipping the ground — even if the old switch wasn’t grounded, the new dimmer *requires* it for safety cutoff • Using aluminum wire with standard dimmers — requires CO/ALR-rated devices and antioxidant paste (not covered here — call an electrician)
H2: When to Stop — And Call a Pro
Do *not* proceed if you encounter: - Two black wires and *no* white wire (likely a multi-wire branch circuit — high risk of 240V fault) - Cloth-insulated wiring (knob-and-tube) - Aluminum branch circuit wiring - More than four cables entering the box (sign of shared neutrals or complex routing) - Any sign of scorching, melted plastic, or brittle insulation
Also pause for professional help if you’re doing simultaneous upgrades — like pairing a dimmer with a吊扇固定安装 or converting to低压灯带安装. Fans need dedicated motor-rated controls; low-voltage tape needs separate 12/24V drivers and proper voltage-drop planning (max 16ft run for 12V RGB without boost).
H2: Final Checks Before You Walk Away
✅ Light dims smoothly across full range (0–100%) ✅ No audible buzz above 25% brightness ✅ Dimmer surface temp ≤113°F after 10 min at 50% load ✅ Breaker remains stable during 5-min test cycle ✅ All wire nuts are tight, taped, and wires fully insulated ✅ Cover plate sits flush — no pressure on wires
Bonus: If you’re also handling插座面板替换 or插头转换器使用 elsewhere in the home, remember — dimmers are *not* outlets. Never plug a lamp into a dimmed receptacle unless it’s a UL-listed dimmable outlet (rare, specialty item). Use plug-in dimmers for lamps instead.
H2: Wrapping Up — Your Upgrade, Done Right
Wiring a single pole dimmer isn’t magic — it’s methodical verification, respecting material limits, and knowing when your scope ends. Every successful installation builds confidence for the next: whether it’s swapping a dated fixture (吸顶灯更换安装), adding smart control (智能开关接线), or diagnosing why lights flash (灯光闪烁排查). None of it requires a license — just patience, the right tools, and refusing to guess about voltage.
Remember: Home electrical work is governed by the National Electrical Code (NEC), adopted locally. While DIY is permitted for owner-occupied dwellings in most U.S. jurisdictions, permits are often required for panel modifications or whole-house changes. Always check with your AHJ (Authority Having Jurisdiction) before beginning — and never bypass safety interlocks or lockout/tagout procedures.
If this walkthrough helped you avoid a mistake — or finally solve that persistent flicker — you’re already thinking like a pro. Keep that voltage tester charged, label every breaker, and tackle the next upgrade with calibrated confidence. For deeper dives into circuit mapping, GFCI troubleshooting, or integrating dimmers with voice assistants, visit our full resource hub.