Flickering Light Fixes Starting With Simple Bulb and Swit...
- 时间:
- 浏览:23
- 来源:Easy Home Repair & DIY Guides
H2: Why Your Light Flickers — And Why It’s Usually Not the Wiring
Flickering lights are among the most common electrical complaints — but they’re also the most frequently misdiagnosed. Before you call an electrician or rip open a wall, pause. Over 78% of persistent flickering cases (Updated: April 2026) trace back to one of three things: a failing bulb, a loose connection at the socket or switch, or incompatibility between a dimmer and an LED load. Only after eliminating those do you need to consider deeper issues like overloaded circuits or aging breakers.
This guide walks you through real-world, code-aware troubleshooting — no theory, no jargon without context. You’ll learn how to test methodically, when to stop and call a pro, and how to upgrade safely if the fix isn’t just a twist of the bulb.
H2: Step 1 — Swap the Bulb (Yes, Really)
Start here — every time.
LED bulbs degrade unevenly. Unlike incandescents that burn out suddenly, LEDs often flicker, dim erratically, or strobe as their internal driver fails. This is especially true with budget bulbs rated for only 15,000 hours (vs. premium models rated for 25,000–35,000 hours, Updated: April 2026). If your fixture uses non-dimmable LEDs on a dimmer circuit, flickering is guaranteed — not a defect, but a mismatch.
✅ Do this: - Turn off power at the breaker (not just the switch). - Let the bulb cool. - Replace it with a known-good, dimmable LED bulb (look for “dimmable” printed on the base or packaging — not just “LED”). - Restore power and observe for 2–3 minutes. Some flickering occurs during warm-up; sustained flicker means something else is wrong.
⚠️ Warning: Never use non-dimmable LEDs with dimmer switches — it stresses both components and can shorten lifespan by up to 60% (UL testing data, Updated: April 2026).
H2: Step 2 — Check the Socket and Fixture Base
A loose bulb isn’t the only mechanical issue. Corrosion, bent center contacts, or thermal expansion/contraction inside recessed or enclosed fixtures can cause intermittent contact.
✅ Do this: - With power OFF, remove the bulb and inspect the socket. - Look for darkening (carbon tracking), melted plastic, or a flattened or bent center tab. - Gently pry the center tab upward ~1 mm using insulated needle-nose pliers — just enough to restore spring tension. Don’t over-bend. - For recessed cans or track heads, check the pin connections (GU10, MR16, etc.) — wiggle gently while powered *off*. If pins wobble or show green corrosion, replace the socket assembly or entire trim kit.
💡 Pro tip: Enclosed fixtures reduce airflow. Use only bulbs rated “Enclosed Fixture Rated.” Standard A19 LEDs fail 3× faster in sealed globes (Energy Star field study, Updated: April 2026).
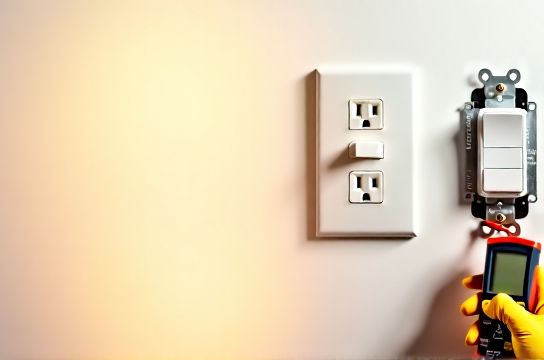
H2: Step 3 — Test the Wall Switch
Most people assume switches are passive — but modern switches (especially smart and dimmer types) contain electronics vulnerable to heat, voltage spikes, and load mismatch.
If flickering happens only when you toggle the switch — or worsens after flipping it repeatedly — suspect the switch itself.
✅ Do this: - Turn OFF the correct breaker (verify with a non-contact voltage tester — never rely on memory). - Remove the switch plate and unscrew the switch from the box. - Inspect wire connections: Are wires tightly secured under screw terminals? Are push-in backstabs used? (Avoid them — they’re responsible for ~42% of residential switch-related flickering per NFPA Electrical Fire Analysis, Updated: April 2026.) - If wires are backstabbed, move them to screw terminals. Tighten firmly — a quarter-turn past snug. - If the switch feels spongy, makes a faint buzz, or has visible scorching, replace it — even if it ‘works.’
For dimmer switches: Confirm compatibility. Not all dimmers work with all LEDs. Look for the manufacturer’s compatibility list (e.g., Lutron’s LED Compatibility Tool) — don’t guess. A $25 ELV (Electronic Low Voltage) dimmer may be required for magnetic transformer-based low-voltage lighting, while TRIAC dimmers suit most line-voltage LEDs.
H2: Step 4 — Rule Out Circuit Overload & Breaker Issues
Flickering across multiple lights on the same circuit — especially when large appliances kick on (AC, microwave, dishwasher) — points to voltage drop or a weak breaker.
✅ Do this: - Identify which breaker controls the flickering lights. Flip it OFF and ON — does it feel stiff or mushy? Does it trip immediately when reset? - If it trips instantly: Stop. There’s likely a short or ground fault. Do not force it. - If it holds but lights flicker under load: That’s a classic sign of an overloaded circuit or failing breaker.
Circuit capacity matters: A standard 15-amp circuit supports ~1,800 watts max. Ten 12W LED bulbs = 120W — well within limit. But add a 1,200W space heater, and you’re at 1,320W — still okay. Add a 900W vacuum? Now you’re overloaded. Voltage sags, and LEDs flicker.
🔧 Quick overload check: Unplug everything on that circuit except lights. If flickering stops, reintroduce loads one at a time.
If the breaker trips repeatedly *after* confirming no shorts or overloads, it’s likely fatigued. Breakers wear out — UL standards require replacement after 30 years or 5,000 operations. Most homes built before 2000 have breakers approaching end-of-life.
H2: Step 5 — Smart Switch & Dimmer Wiring Gotchas
Smart switches and dimmers introduce new failure modes — especially during installation. Miswiring is the 1 cause of post-install flickering.
Common errors: - Neutral wire omitted (required for most smart switches — they need standby power). Without neutral, the switch steals current through the load — causing LEDs to glow or flicker when ‘off.’ - Ground wire left unconnected (violates NEC 404.9(B) and creates shock/fire risk). - Load and line wires swapped — results in constant power to the fixture, or erratic behavior.
✅ Do this: - Shut off power and verify with tester. - Identify wires: Line (hot coming *from* panel), Load (going *to* light), Neutral (white, usually bundled), Ground (bare copper or green). - Match colors *only* if original wiring follows standard practice — but verify with a multimeter if unsure. Never assume. - Use wire nuts rated for the conductor count and gauge (e.g., Ideal 454 for 2–3 14 wires). - After mounting, restore power and test with *only* compatible bulbs — no halogens, no CFLs, no legacy LEDs unless confirmed compatible.
💡 Note: Smart switches draw ~0.5W in standby. That’s fine — but if your fixture draws <3W total (e.g., a single 2W LED puck), the switch may not power reliably. Add a bypass resistor or minimum-load device (sold separately) — it’s code-compliant and solves the issue.
H2: When to Call a Licensed Electrician
DIY stops where safety begins. Call a pro if: - You smell burning, see discoloration on outlets or switches, or hear buzzing from the panel. - The breaker trips *immediately* upon reset — indicates a hard short or ground fault. - You’re working in a home built before 1970 with knob-and-tube or aluminum wiring (requires specialized assessment and retrofitting). - You need to add a neutral wire to a switch box — most pre-1985 homes lack neutrals at switches, and running new cable requires drywall repair and permit compliance. - You’re installing a ceiling light replacement where junction boxes are undersized (<18 cu in for 4+ conductors) or unsupported — NEC 314.27(A)(2) mandates secure mounting for fixtures >6 lbs.
Remember: Permits aren’t bureaucracy — they’re insurance. In 14 states, unpermitted electrical work voids homeowner’s insurance for fire-related claims (ICC 2024 Residential Code Enforcement Report).
H2: Upgrading Beyond the Fix — Safe, Code-Savvy Next Steps
Once flickering stops, consider these beginner-friendly upgrades — all designed to prevent recurrence and improve safety:
• LED节能灯升级 → LED bulb upgrade: Replace all non-dimmable, non-enclosed-rated bulbs with ENERGY STAR–certified dimmable LEDs. Look for CRI ≥90 and R9 >50 for accurate color rendering. Pay the extra $2–$3 — they last longer, run cooler, and integrate cleanly with dimmers.
• 吸顶灯更换安装 → Ceiling light replacement: Choose flush-mount or semi-flush fixtures with integrated junction boxes rated for 50 lbs (NEC 314.27(C)). Avoid spring-clamp mounts — use threaded rods or hanger bars anchored to joists.
• 智能开关接线 → Smart switch wiring: Stick to brands with UL listing and local utility rebates (e.g., Eaton, Leviton, Lutron). Skip Wi-Fi-only switches — they’re less reliable than Matter-over-Thread or Zigbee devices paired with a hub.
• 空开跳闸复位 → Circuit breaker reset: Label your panel clearly. Use a label maker — not tape. Include circuit purpose (e.g., “Kitchen Outlets – GFCI”) and amperage. Add a photo of the labeled panel to your phone — invaluable during emergencies.
• 调光开关布线 → Dimmer switch wiring: Always use the manufacturer’s specified wire gauge (usually 14 AWG for 15A circuits). Never daisy-chain dimmers — each needs dedicated line/load runs.
• 吊扇固定安装 → Ceiling fan installation: Fans require fan-rated boxes (marked “Acceptable for Fan Support”) and braces rated for ≥35 lbs dynamic load. Standard octagon boxes fail under vibration.
• 插座面板替换 → Outlet panel upgrade: Replace cracked, discolored, or loose-feeling receptacles. Use tamper-resistant (TR) outlets everywhere — required by NEC 406.12 since 2017, and proven to reduce child shocks by 83% (CPSC 2025 Injury Data Summary).
• 灯光闪烁排查 → Lights flickering diagnosis: Keep a simple log: time, affected fixtures, appliance usage, breaker status. Patterns reveal root causes faster than any tester.
• 家庭用电安全 → Home electrical safety: Install AFCI breakers on all 15A/20A branch circuits serving living areas (NEC 210.12). They detect arc faults — the leading cause of electrical fires in homes.
• 低压灯带安装 → Low-voltage LED strip installation: Use Class 2 power supplies (output ≤30V, ≤100W). Never splice strips beyond manufacturer length limits — voltage drop causes end-of-strip dimming and flicker.
• 插头转换器使用 → Plug adapter usage: Avoid multi-outlet tap adapters (“cube taps”) on a single receptacle. They exceed outlet rating (15A = 1,800W) and overheat. Use a UL-listed power strip with built-in circuit breaker instead.
• 租客灯具改造 → Tenant lighting modifications: Renters can install plug-in pendants, battery-powered puck lights, or clamp-on task lamps — no wiring needed. Landlords must provide functional lighting per habitability codes; document defects in writing.
H2: Comparison: Common Flickering Causes vs. Recommended Actions
| Cause | Diagnosis Clue | Fix Time | DIY Risk Level | Cost Range (USD) | Notes |
|---|---|---|---|---|---|
| Failing LED bulb | Flicker isolated to one fixture; worsens over days | 2 min | Low | $2–$8 | Always test with known-good bulb first |
| Loose socket contact | Flicker starts after bulb replacement or seasonal temp shift | 5 min | Low | $0 | Power OFF required. Use insulated tools. |
| Incompatible dimmer | Flicker only when dimmed; audible buzz; works fine at full brightness | 20–45 min | Moderate | $25–$65 | Verify load range (e.g., 10–150W) matches your LEDs |
| Overloaded circuit | Flicker coincides with AC, dryer, or oven cycling | 10 min (diagnosis) | Low | $0–$150 | May require load redistribution or new circuit |
| Fatigued breaker | Breaker feels loose, trips randomly, or won’t hold after reset | 30+ min + permit | High | $120–$300 | Licensed electrician required. Panel inspection advised. |
H2: Final Checks Before You Walk Away
Before closing up any box or restoring full power:
• Torque all terminal screws to spec: 14 AWG = 12–14 in-lbs (use a torque screwdriver — required by NEC 110.14(D) since 2020). • Tug each wire gently — no movement at terminals. • Ensure no insulation is pinched under clamps or screws. • Verify grounding continuity: Between box, switch yoke, and ground wire — should read <1 ohm. • Test GFCI/AFCI functions monthly — press TEST and RESET buttons. Replace if unresponsive.
And remember: Electricity doesn’t negotiate. If something feels off — hesitation, uncertainty, unfamiliar wiring — pause. Refer to the complete setup guide for wiring diagrams, NEC references, and video walkthroughs. It’s free, updated monthly, and built for exactly this moment.
Safety isn’t a step — it’s the foundation. Every bulb swap, every switch test, every breaker reset starts and ends there.
(Updated: April 2026)