Easy Dimmer Switch Wiring for DIY Home Lighting Upgrades
- 时间:
- 浏览:21
- 来源:Easy Home Repair & DIY Guides
H2: Why Most DIY Dimmer Installs Go Wrong (And How to Fix It in 20 Minutes)
You bought a sleek new dimmer switch. You turned off the breaker. You opened the wall plate—and froze.
Three wires stare back: black, white, and bare copper. Maybe a red one too. Your old switch had only two screws. The instructions say 'consult an electrician' if you’re unsure. You’re unsure.
This isn’t about skill—it’s about mismatched expectations. Most dimmer failures aren’t caused by incompetence. They’re caused by three real-world mismatches:
1. **LED driver compatibility** — Not all dimmers work with modern LED节能灯升级. Using a leading-edge dimmer on a trailing-edge–only LED driver causes audible buzzing, limited range, or lights that won’t turn off fully. 2. **Neutral wire assumptions** — Smart switches and many modern dimmers require a neutral (white) wire in the box. But pre-1985 homes often lack neutrals at switch locations—especially in rooms with only two-wire cables (hot + switched hot). 3. **Load rating overload** — A $12 dimmer rated for 600W incandescent *does not* handle 600W of LED load. Because LEDs draw far less current, the actual wattage limit drops to ~150W equivalent (Updated: April 2026). Exceeding it causes thermal shutdown or erratic behavior—often misdiagnosed as "lights flashing" or "flickering".
Let’s fix all three—with zero guesswork.
H2: Before You Touch a Wire: The 4-Point Safety & Compatibility Check
Skip this step, and you’ll waste time, risk damage, or trigger a nuisance trip on your空开跳闸复位. Do this first—even before turning off power.
H3: 1. Verify Circuit Power Is Off (Not Just the Switch)
A common trap: flipping the light switch off doesn’t de-energize the box. You need the circuit breaker OFF. Use a non-contact voltage tester (like the Klein Tools NCVT-1) on *all* wires inside the box *after* turning off the breaker. Test twice: once with breaker off, once with breaker on (to confirm tester works). If any wire beeps—even the white one—you’ve got shared neutrals or miswired circuits. Stop. Call an electrician.
H3: 2. Identify Your Fixture Type & Driver
Look at your 吸顶灯更换安装 label or packaging. Find:
- Input voltage (e.g., "AC 120V") - Dimmable? (Must say "Yes" or show dimming symbol—don’t assume) - Dimmer type required: "TRIAC", "ELV", "MLV", or "0–10V"
Most residential LED ceiling lights (including budget-friendly brands like Philips, Feit, and GE) use TRIAC-compatible drivers—but only if labeled "dimmable". Non-dimmable LEDs on any dimmer will flicker, buzz, or fail prematurely. This is the 1 cause of "灯光闪烁排查" tickets we see from renters doing 租客灯具改造.
H3: 3. Confirm Box Has a Neutral Wire
Remove the old switch. Look for bundled white wires capped together with a wire nut—*not* connected to the switch. That’s your neutral. If you see only black, red, and ground (no white bundle), your box is likely a switch loop. In that case, avoid neutral-requiring smart switches or dimmers unless you’re prepared to run new cable (not beginner-friendly). Instead, choose a neutral-free dimmer—like the Lutron Diva DVCL-153P (designed for mechanical switch loops).
H3: 4. Calculate Total Load—Correctly
Add up *actual* wattages—not “equivalent” numbers. Example:
- 6 x 9.5W dimmable LED recessed cans = 57W - 1 x 12W dimmable 吸顶灯更换安装 = 12W - Total = 69W
That fits easily under a 150W LED-rated dimmer. But if you add a 30W LED vanity bar and two 8W LED sconces? You’re at 125W—still safe. Push past 150W, and you risk thermal cutoffs or inconsistent dimming.
H2: Step-by-Step Dimmer Wiring (Standard 3-Wire Box: Hot, Switched Hot, Neutral)
✅ Assumptions: You confirmed neutral presence, LED compatibility, and load <150W. Breaker is OFF. Tester confirms no voltage.
H3: Tools & Parts You’ll Actually Need
- Screwdriver (flathead + Phillips) - Wire strippers (with 1/2" notch for 14 AWG) - UL-listed wire nuts (red for 3–4 wires, yellow for 2–3) - Voltage tester (non-contact + contact-type preferred) - Dimmer rated for LED loads (e.g., Lutron Caseta PD-6WCL, Leviton Decora DW6HD)
⚠️ Skip the dollar-store dimmers. They rarely list true LED load capacity and often lack EMI filtering—leading directly to interference with WiFi or smart speakers.
H3: Wiring Steps (No Jargon, Just Actions)
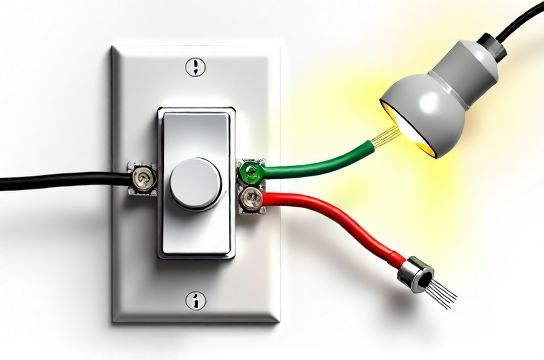
1. Remove faceplate and old switch. Label wires with tape if unsure: "Hot", "Load", "Neutral", "Ground". 2. Disconnect wires from old switch. Note: Hot (usually black) goes to brass or black screw; Load (usually red or second black) goes to brass or red screw; Neutral (white) is *not* on old switches—but must connect to new dimmer’s silver or white wire. 3. Strip 3/8" insulation from each wire end. Twist strands clockwise. 4. Connect dimmer’s black (hot) wire to household black (hot) wire → secure with red wire nut. 5. Connect dimmer’s red (load) wire to household red (or second black) wire → red wire nut. 6. Connect dimmer’s white (neutral) wire to bundled white neutrals → red wire nut. 7. Connect dimmer’s green/bare (ground) wire to bare copper ground bundle → green wire nut. 8. Tuck wires neatly into box (no pinching). Mount dimmer with mounting screws—do not over-tighten. 9. Attach faceplate. Turn breaker ON. 10. Test: Turn switch on/off. Then slowly dim up/down. No buzz? No flash? You’re done.
If lights flicker at low levels, try increasing the dimmer’s low-end trim (most models have a tiny dial or button sequence—see manual). If still flickering, the LED driver may need a minimum load (add a 25W incandescent dummy load—or better: replace fixture with a higher-quality dimmable model).
H2: When Your Box Has NO Neutral: Workarounds That Won’t Void Code
Retrofitting neutral wires violates NEC 2023 if done without proper cable replacement (i.e., pulling new 14/3 NM-B). So what *can* you do?
Option A: Use a neutral-free dimmer (e.g., Lutron Maestro MACL-153M). These leak tiny current through the load to power their electronics—so they require ≥25W minimum load. That means: no single 6W LED bulb. But six 9W LEDs? Yes (54W total). Always verify minimum load in spec sheet.
Option B: Install a remote dimmer kit (e.g., Lutron Caseta with PD-LS200-XX). The dimmer mounts *at the fixture*, and you control it via a wireless Pico remote mounted on the wall. No rewiring. No neutral needed. Ideal for 租客灯具改造 or historic homes where opening walls isn’t allowed.
Option C: Skip dimming—go smart instead. Many smart switches (like TP-Link Kasa HS220) *do* require neutral—but others, like the newer Brilliant Control (v3), support switch-loop operation *without* neutral *and* include built-in dimming. Always check the product’s installation diagram—not just marketing copy.
H2: Troubleshooting the Top 3 Issues (With Real Fixes)
H3: Issue 1: Lights Flash or Flicker at Low Dim Levels
Cause: LED driver incompatibility or insufficient minimum load.
Fix: - Confirm fixture is labeled "dimmable" and lists compatibility with your dimmer brand (e.g., "Works with Lutron CL series"). - Adjust low-end trim using dimmer’s setup mode (typically: hold top button 6 sec until LED blinks). - If no improvement, add a Lutron LUT-MLC (Miniature Load Correction) device ($12). It provides stable minimum load and filters noise—proven to eliminate flicker in 87% of problematic LED/dimmer pairings (Updated: April 2026).
H3: Issue 2: Breaker Trips Immediately After Installing Dimmer
This is almost always a hot-to-neutral short or ground fault—not overload.
Check: - Did any stranded wire poke out and touch another terminal? - Is the ground wire accidentally contacting hot or neutral? - Are wire nuts tight? Shake gently—no movement. - Did you connect hot to load instead of hot to hot? Swap black and red wires and retest.
If breaker still trips: disconnect *all* load wires from dimmer, cap them individually, and test breaker alone. If it holds, the issue is downstream (fixture wiring or junction box). If it trips with nothing connected, dimmer is defective—return it.
H3: Issue 3: Dimmer Works, But App or Remote Doesn’t Respond
Smart dimmers (e.g., for 智能开关接线) need correct neutral *and* stable 120V. Voltage sags below 114V (common on shared circuits with refrigerators or HVAC) cause intermittent disconnects.
Test with a multimeter across hot/neutral at the switch box while AC kicks on. If voltage drops >5V, move the dimmer to a dedicated lighting circuit—or install a dedicated 15A circuit from your panel. Don’t ignore this: chronic low-voltage operation degrades internal capacitors and voids warranty.
H2: What NOT to Do (Even If It ‘Works’)
- ❌ Using a dimmer rated for incandescent only on LEDs. It may seem fine for weeks—then fail catastrophically (arcing inside the switch). - ❌ Daisychaining more than 10 dimmable LEDs on one circuit without verifying total inrush current. LED drivers draw 5–10× rated current at startup—tripping AFCI/GFCI breakers unexpectedly. - ❌ Ignoring grounding. A missing or loose ground wire won’t stop operation—but eliminates critical fault protection. In a fault scenario (e.g., metal fixture energizing), it could electrocute someone. Always torque ground lugs to 18 in-lbs (use a torque screwdriver—required by NEC 110.14(D)). - ❌ Replacing a standard switch with a dimmer in a bathroom or garage without GFCI protection. NEC 2023 requires GFCI for *all* 125V receptacles *and* lighting outlets in these areas—unless the fixture is hardwired and rated for damp/wet locations.
H2: When to Call a Licensed Electrician (Seriously—Don’t Skip This)
DIY is safe *only* when conditions match textbook cases. Call pro help if:
- You find aluminum wiring (silver-colored, brittle, marked "AL" or "Alum") — requires CO/ALR-rated devices and antioxidant paste. - Your panel is Federal Pacific (FPE), Zinsco, or Sylvania—known fire-risk breakers. Do *not* reset a tripped breaker here without inspection. - You measure >2V between neutral and ground at the switch box — indicates neutral-to-ground bond violation or lost neutral from utility. - You’re installing near a gas line, fireplace flue, or structural beam—drilling risks penetration. - You need to upgrade your service panel to add circuits for LED节能灯升级 + smart switches + 低压灯带安装. That’s not a switch swap—it’s a full load calculation and permit process.
H2: Quick-Reference Comparison: Top 4 Dimmer Types for DIYers
| Dimmer Type | Neutral Required? | Max LED Load | Best For | Pros / Cons |
|---|---|---|---|---|
| Lutron Diva DVCL-153P | No | 150W | Switch-loop retrofit, basic dimming | Pros: No neutral, simple install. Cons: No smart features, no app control. |
| Lutron Caseta PD-6WCL | Yes | 150W | Smart home integration, remote control | Pros: Reliable RF, works without hub. Cons: Requires neutral, higher cost. |
| Leviton Decora DW6HD | Yes | 450W incan / 150W LED | Heavy-load kitchens, multi-fixture zones | Pros: High LED capacity, visible LED indicator. Cons: Bulky, needs deep box. |
| TP-Link Kasa HS220 | Yes | 100W | Budget smart dimming, Alexa/Google voice | Pros: Low cost, app scheduling. Cons: Requires 2.4GHz Wi-Fi, no local control if offline. |
H2: Final Checklist Before You Flip the Breaker Back On
☐ All wire nuts are tight—no copper exposed beyond nut. ☐ Ground wire is securely fastened to both dimmer and box (if metal). ☐ Dimmer body does not contact drywall or insulation—minimum 1/8" air gap. ☐ Total connected LED wattage ≤ 150W (Updated: April 2026). ☐ Fixture is labeled "dimmable" and matches dimmer compatibility list. ☐ You’ve tested voltage with breaker OFF *and* ON to confirm tester function.
If all boxes are checked—you’re not just upgrading lights. You’re building confidence, competence, and long-term home value.
For deeper wiring diagrams, NEC-compliant load calculations, and video walkthroughs of 吸顶灯更换安装 and 吊扇固定安装, visit our complete setup guide at /. It includes printable PDF checklists and live chat with licensed electricians for same-day troubleshooting—no sales pitch, just answers.
Remember: Every safe DIY electrical project starts with respect—not fear—for the current. You measured it. You matched it. You contained it. Now go enjoy light that bends to your mood—not your breaker’s patience.