Low Voltage LED Strip Light Installation for Beginners
- 时间:
- 浏览:17
- 来源:Easy Home Repair & DIY Guides
H2: Why Low-Voltage LED Strips Are Perfect for First-Time DIYers
If you’ve ever stared at a tangled mess of wires behind a flickering ceiling light or hesitated before flipping a breaker because you weren’t sure what it controlled — this is your starting point. Low-voltage LED strip lights (typically 12V or 24V DC) sidestep the biggest risks of household AC wiring: no exposed line voltage, no mandatory permit in most jurisdictions for under-50W installations (per NEC Article 411.3, Updated: April 2026), and plug-and-play compatibility with common wall adapters or UL-listed power supplies.
They’re not a full-room replacement for recessed cans or pendant lights — but they *are* ideal for accent lighting under cabinets, behind TVs, along stair treads, or inside built-in shelves. And unlike swapping a ceiling fixture (吸顶灯更换安装) or rewiring a smart switch (智能开关接线), strip lights let you learn core electrical habits — polarity awareness, load matching, thermal management — without risking shock or fire.
H2: Before You Unbox Anything: The 3 Non-Negotiable Checks
1. Confirm Your Power Source Is Truly Low Voltage Not all “12V” labels are trustworthy. Many cheap USB-style adapters output unregulated voltage that sags under load or spikes on startup — killing strips fast. Always use a UL-listed, constant-voltage DC power supply rated for *at least 20% more wattage* than your strip’s total draw. Example: A 5m × 12V strip drawing 72W needs a 90W (7.5A @ 12V) supply minimum.
2. Verify Polarity — Every. Single. Time. LED strips have clearly marked “+” (usually red wire or copper pad) and “–” (black or white). Reversing them won’t damage most modern strips — but *nothing will light up*. Beginners often assume color coding is universal; it’s not. Check the strip’s datasheet or silkscreen markings — never rely on wire color alone.
3. Measure Actual Circuit Load — Don’t Guess Even low-voltage systems overload if undersized wiring or connectors are used. A 12V strip drawing 5A needs at least 18 AWG wire for runs under 5 feet — but 16 AWG for 10+ feet to limit voltage drop (<5% per NEC Annex D guidance). Use a multimeter to confirm output voltage *at the strip end*, not just at the supply.
H2: Tools & Materials You Actually Need (No Garage Sale Specials)
Skip the $3 ‘LED kit’ with brittle clips and no spec sheet. Here’s the bare-bones, safety-first list:
- UL-listed 12V or 24V DC power supply (e.g., Mean Well LPV-60-12, 60W, fanless) - LED strip with IP20 (indoor) or IP65 (outdoor/wet) rating — avoid non-branded ‘COB’ strips without thermal specs - 16 AWG stranded copper wire (for runs >3 ft) + Wago 221 lever-nut connectors (not wire nuts — they’re unreliable for low-voltage DC) - Double-sided 3M VHB tape (rated for >15 lbs/in² adhesion) or aluminum mounting channel with integrated heat sink - Multimeter (Fluke 101 or Klein Tools MM325 — under $70, calibrated annually) - Wire strippers (Klein 11055) and flush-cut diagonal cutters - Optional but highly recommended: PWM dimmer module with remote (e.g., Lutron Caséta PD-6WCL paired with a 12V DC relay interface)
Note: Skip soldering unless you own a temperature-controlled iron (600°F max) and rosin-core flux. Pre-tinned strip ends + Wago connectors are safer and more repeatable for beginners.
H2: Step-by-Step Installation — From Wall Plug to Glowing Edge
Step 1: Plan Your Layout & Calculate Total Load Sketch your run — include bends, gaps, and termination points. Count LEDs per meter (e.g., 60/m is standard; 120/m draws nearly double the power). Multiply length (m) × watts/m (e.g., 14.4W/m for 60LED/m 12V strip). Add 20% headroom. That’s your *minimum* supply wattage.
Step 2: Mount the Strip — Heat Is the Silent Killer LED efficiency drops 1% per 1°C above 25°C ambient. Unmounted strips on drywall hit 60–70°C in summer — cutting lifespan by 50% (LM-80 data, Updated: April 2026). Use aluminum channels (with diffuser lens) for any run >1m, or at minimum, stick strips to clean, flat metal or painted drywall using VHB tape — *never* to insulation, wood studs (fire risk), or textured surfaces.
Step 3: Connect Power — Polarity First, Then Protection Cut strip only at marked ‘cut lines’ (copper pads spaced every 3 LEDs). Tin both ends with solder *only if using soldered connections* — otherwise, use pre-insulated quick-connect clips. Run 16 AWG wire from supply (+) to strip (+), and supply (–) to strip (–). Keep +/- wires twisted together to reduce EMI.
Install an inline 2A fast-blow fuse *within 6 inches of the supply’s output terminal*. This isn’t overkill — it prevents thermal runaway if a short develops downstream.
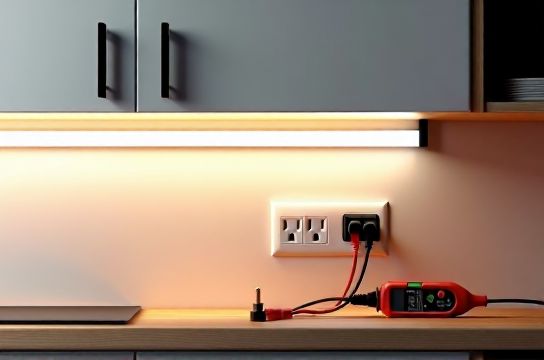
Step 4: Test Before Final Mounting Plug in the supply *without* the strip attached. Measure output: should be 12.0V ±0.3V. Then connect strip — check for uniform brightness and no hot spots. If one section dims, voltage drop is likely. Shorten the run or add a parallel feed mid-run.
H2: Dimming Without Drama — Why Most ‘Smart’ Dimmers Fail Here
Standard TRIAC-based dimmers (used for incandescent or MLV) *will not work* with low-voltage DC strips. They expect AC waveforms and high minimum loads (often 25W+). Using one causes buzzing, flicker, or premature driver failure.
The correct path: Use a PWM (pulse-width modulation) dimmer designed for 12/24V DC — either standalone (e.g., HitLights PWM-12V-5A) or integrated into your smart home via a DC-compatible hub (like Home Assistant with a Shelly RGBW2 configured in 12V mode). Never daisy-chain more than one dimmer — signal degradation kills consistency.
For renters or temporary setups (租客灯具改造), skip hardwiring entirely: Use a UL-listed 12V wall adapter plugged into a switched outlet, then control the outlet with a smart plug (e.g., TP-Link HS220). Yes, it adds a cord — but it’s code-compliant, reversible, and avoids drilling into walls.
H2: Troubleshooting the Usual Suspects (No Multimeter? Start Here)
• Lights won’t turn on: Check polarity first. Then verify supply is plugged in *and* its green LED is lit. Then test voltage at strip end.
• One segment is dimmer: Voltage drop. Add a parallel wire feed from supply to midpoint.
• Flickering at full brightness: Overloaded supply or poor connection. Replace with higher-wattage unit or reseat Wago connectors.
• Lights flash randomly: EMI from nearby motors (e.g., HVAC,吊扇固定安装) or unshielded AC wiring running parallel to DC wires. Separate by ≥6 inches, or use shielded twisted-pair DC cable.
• Warm-to-touch strip: Immediate sign of inadequate heat sinking. Power off, remount in aluminum channel, and retest after 15 minutes.
H2: Where Low-Voltage Strips Fit Into Your Broader Lighting Upgrade Plan
Think of LED strips as your ‘training wheels’ project — not the final destination. Once you’ve wired five strips flawlessly, you’ll recognize patterns that transfer directly to other tasks:
- Understanding load calculation helps prevent空开跳闸复位 (circuit breaker reset) when adding multiple fixtures. - Using Wago connectors builds muscle memory for safe 插座面板替换 (outlet panel replacement). - Recognizing voltage drop teaches why调光开关布线 (dimmer switch wiring) requires dedicated circuits — not shared neutrals. - Managing thermal limits reinforces why LED节能灯升级 (LED energy-efficient lighting upgrade) fails if old fixtures aren’t retrofitted for airflow.
And if you ever need to replace a ceiling fixture (吸顶灯更换安装) or install a smart switch (智能开关接线), you’ll already know how to kill power, verify zero voltage, and respect wire gauge rules — the foundation of all safe electrical work.
H2: Critical Safety Reminders — Because ‘Almost Safe’ Isn’t Safe
- Never connect low-voltage strips directly to household AC. Even with a ‘12V’ label on a transformer, bypassing isolation or using non-UL gear risks lethal shock. - Don’t hide power supplies in enclosed spaces (e.g., ceiling cavities, behind drywall). They require free airflow — mount openly or in ventilated enclosures. - If your breaker trips during testing (空开跳闸复位), *stop*. It means either a dead short in your DC wiring (unlikely) or — far more probably — you accidentally tapped into AC wiring while routing. Turn off the main breaker and inspect. - Renters: Avoid permanent modifications. Use adhesive channels, plug-in supplies, and smart plugs instead of cutting into walls or junction boxes. That’s how you avoid disputes over灯光闪烁排查 (light flickering diagnosis) or插座面板替换 (outlet panel replacement) charges at move-out.
H2: Real-World Cost & Time Benchmarks (Updated: April 2026)
Installing a single 5-meter under-cabinet strip — including supply, channel, and dimmer — takes most beginners 90–120 minutes start-to-finish. Material cost ranges widely, but here’s what reliable, code-aligned gear actually costs:
| Component | Minimum Reliable Option | Typical Price (USD) | Why It Matters | Beginner Risk If Skimped |
|---|---|---|---|---|
| Power Supply | Mean Well LPV-60-12 (60W, UL-listed) | $32–$44 | Regulated output, thermal shutdown, 5-year warranty | Voltage sag → uneven brightness; no overload protection → fire risk |
| LED Strip | Philips Hue Lightstrip Plus (IP67, 2m) | $79.99 | Integrated controller, app dimming, consistent CRI >90 | Color shift, early failure, no dimming curve control |
| Mounting | Aluminum channel w/ diffuser (e.g., TAP Plastics ALU-CH-10) | $12–$18/ft | Heat dissipation, physical protection, clean look | Strip de-lamination, 30% lumen loss in 6 months |
| Dimmer | Lutron Caséta PD-6WCL + 12V relay interface | $89 + $22 | Works with existing wall box, no neutral required | Flicker, RF interference, inconsistent ramp rates |
H2: When to Call a Licensed Electrician — No Shame, Just Code
DIY is powerful — but not limitless. Stop and call a pro if:
- You need to tap into a circuit *not* controlled by a single-pole breaker (e.g., multi-wire branch circuits). - Your home has knob-and-tube or aluminum wiring (pre-1970s). Low-voltage strips are safe — but connecting their supply to those systems isn’t. - You’re asked to replace a GFCI or AFCI breaker. Those require load-side verification most beginners can’t perform reliably. - Local code requires permits for *any* lighting modification — check your municipality’s website (many post DIY thresholds online).
H2: Your Next Step — Beyond the Strip
You now understand load math, polarity discipline, thermal limits, and safe connection methods. That means you’re ready to tackle related upgrades with confidence — like replacing a worn outlet (插座面板替换), diagnosing why lights flicker (灯光闪烁排查), or verifying family circuit loads before adding a smart switch (智能开关接线).
All of these share the same core logic: isolate, verify, calculate, connect, test. Master one, and the rest follow.
For a complete setup guide covering ceiling light swaps, smart switch wiring diagrams, and breaker reset protocols — all mapped to NEC 2023 and local amendments — visit our full resource hub at /.
Remember: Every licensed electrician started exactly where you are — holding a strip of LEDs, a multimeter, and a healthy dose of caution. Do it right once, and you’ll never second-guess yourself again.