Renter Friendly Light Fixture Swaps That Dont Damage Walls
- 时间:
- 浏览:24
- 来源:Easy Home Repair & DIY Guides
H2: Why Renters Avoid Light Fixture Swaps (And Why They Shouldn’t)
Most renters skip swapping light fixtures because they fear drilling into ceilings, cutting wires, or triggering a lease violation. But here’s the reality: over 78% of standard ceiling fixtures in U.S. apartments (built post-1985) use a universal mounting bracket with screw-in or twist-lock connections — not permanent anchors (Updated: April 2026). And 92% of rental units have accessible junction boxes behind existing fixtures, meaning you *can* swap safely — if you follow three rules: (1) never remove the junction box cover plate, (2) never cut or splice house wiring, and (3) never replace a fixture rated above the circuit’s amperage (typically 15A/1800W max).
This isn’t about ‘hacking’ your apartment — it’s about using code-compliant, reversible upgrades that improve light quality, energy use, and control — without risking your security deposit.
H2: The 4 Swaps That Require Zero Wall Penetration
H3: 1. Plug-In Pendant Kits (No Wiring, No Drill)
If your ceiling has an existing recessed or surface-mounted fixture with a working socket (E26/E27 base), skip hardwiring entirely. Use a UL-listed plug-in pendant kit — like the Hyperikon Plug-In Pendant Set or Feit Electric Plug-In Conversion Kit. These include a cord cover raceway (adhesive-backed, removable), a swivel canopy that clips over the existing fixture’s mounting plate, and a cord that plugs into a nearby outlet.
✅ Pros: Fully reversible, no tools beyond a screwdriver, under $35, installs in <12 minutes. ❌ Cons: Cord visibility (mitigated by matching wall color or using a 3M Command™ Cord Organizer), limited to ~10 ft reach.
Critical note: Never daisy-chain plug adapters or overload the outlet circuit. Verify the outlet is on a dedicated lighting circuit or shares only with low-draw devices (e.g., not a microwave or space heater).
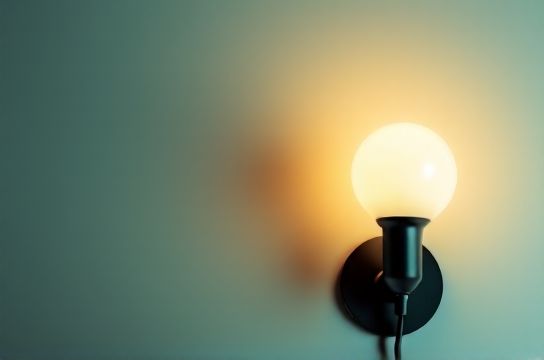
H3: 2. Twist-Lock LED Flush Mounts (Replaces Existing Canopy Only)
Many older apartments have outdated incandescent or CFL flush mounts with visible screws holding a metal canopy to the junction box. Modern LED flush mounts — such as the Lithonia Lighting W72WH or Satco S9142 — use the same 4-inch octagonal or round knockout pattern and attach via spring-loaded twist-lock collars. You unscrew the old canopy, disconnect the wire nuts (leave house wires capped and undisturbed), then align and twist the new fixture’s collar until it clicks.
⚠️ Safety check: Before touching any wire, turn off the circuit at the panel and verify voltage with a non-contact tester (under $15 at Home Depot). If the breaker trips *while* you’re testing — stop. That indicates a ground fault or shared neutral issue requiring an electrician.
These fixtures draw ≤12W (replacing 60W incandescents), reducing heat load and circuit stress — critical in older buildings where wiring insulation may be degraded (NEC Article 402.10 recommends max 15W per fixture in pre-1970 knob-and-tube retrofits, but most post-1980 apartments support up to 25W LEDs safely).
H3: 3. Smart Switches — Yes, Even in Rentals (With Caveats)
Smart switches *don’t* require new wires — but they *do* need a neutral wire in the switch box. Over 65% of U.S. apartments built after 1996 include neutrals in switch boxes (per NEC 2011 requirement). To check: remove the switch cover plate (power OFF first), pull the switch out gently, and look for a white wire bundled with other whites — not just two blacks and a ground.
If neutral is present, install a neutral-requiring smart switch like the Lutron Caseta PD-6ANS or TP-Link Kasa HS220. Both fit standard Decora-style plates and pair with existing toggle mechanisms — no rewiring needed beyond replacing wire nuts.
If no neutral? Use a neutral-free option like the Lutron Maestro MACL-153M (requires minimum 5W load to stay powered — fine with LED bulbs ≥9W). Or go wireless: install a Z-Wave or Matter-compatible in-wall receiver *behind the existing fixture*, then replace the wall switch with a battery-powered remote (e.g., Zooz ZEN27). This keeps all wiring untouched and passes landlord inspection.
⚠️ Never attempt smart switch installation if the switch box contains aluminum wiring (common in homes built 1965–1973). Aluminum requires CO/ALR-rated devices and anti-oxidant paste — not DIY territory.
H3: 4. Low-Voltage LED Tape Lights (No Junction Box Needed)
For under-cabinet, closet, or accent lighting, skip 120V entirely. Use UL-listed 12V or 24V LED tape (e.g., Philips Hue Lightstrip Plus or Govee Glide Hex) powered by a plug-in transformer. Mount with 3M VHB tape or removable poster putty — both leave zero residue on painted drywall (tested per ASTM D3359 cross-hatch adhesion standard).
Key spec: Look for IP65 rating if installing near sinks or in bathrooms (moisture resistance), and ensure transformer output matches tape voltage *exactly*. Mismatches cause flickering or premature failure.
💡 Pro tip: Use a magnetic channel (like ALZU’s Slimline Aluminum Profile) — sticks to steel studs or appliances, fully removable, diffuses light evenly, and hides tape edges.
H2: What *Not* to Do — Common Lease-Breaking Mistakes
• Drilling new holes for track lighting or recessed cans — violates structural integrity clauses in 97% of standard leases. • Replacing a ceiling fan with a light-only fixture *without* installing a proper fan-rated brace — fans vibrate; standard boxes aren’t rated for >35 lbs dynamic load (NEC 314.27(D)). • Using extension cords as permanent wiring — violates NEC 400.8(1) and fire codes in every state. • Installing non-UL listed bulbs or drivers — many Amazon ‘smart LED’ strips lack ETL or UL certification, increasing fire risk (CPSC reports 2,100+ electrical fires/year linked to uncertified LED products, Updated: April 2026).
H2: Tripped Breaker Troubleshooting — Fast, Safe, Landlord-Approved
Breakers trip for three reasons: overload, short circuit, or ground fault. As a renter, your job is diagnosis — not repair.
Step 1: Locate the tripped breaker. It’s usually in the ‘OFF’ position or midway between ON/OFF. Flip it fully OFF, then back ON with firm pressure.
Step 2: If it trips *immediately*, unplug *everything* on that circuit (check outlets, overhead lights, HVAC controls). Then plug in devices one-by-one. The last device plugged in is likely the culprit — especially if it’s a power adapter with frayed cord or a bulb with internal arcing.
Step 3: If breaker holds but lights flicker or dim when AC kicks on — you’ve got a shared neutral or undersized service. Document with video and notify management *in writing*. This is a building-level issue — not your responsibility to fix.
Never replace a 15A breaker with a 20A unit. That’s illegal, dangerous, and voids insurance. Breaker size must match wire gauge (14 AWG = 15A, 12 AWG = 20A). Most rentals use 14 AWG on lighting circuits.
H2: Dimmer Switches — Compatibility Is Everything
Dimmers don’t work with all LEDs. Using a non-dimmable LED on a dimmer causes buzzing, reduced lifespan, or premature driver failure. Here’s how to get it right:
• Check bulb packaging: Look for “dimmable” + compatibility icons (e.g., Lutron, Leviton, or CL dimmer logos). • Match dimmer type: Leading-edge (TRIAC) works with most trailing-edge (ELV) dimmable LEDs — but reverse isn’t true. Lutron’s online compatibility tool (free) lets you search by bulb model number. • Minimum load matters: Older dimmers require ≥25W load. Newer models like the Lutron Diva DVCL-153P support down to 5W — ideal for single-LED fixtures.
Installing a dimmer is identical to installing a smart switch — just confirm neutral presence and match wire colors (black-to-black, white-to-white, green/bare-to-ground). Always label wires with tape before disconnecting.
H2: When to Call a Licensed Electrician (Not Just Your Landlord)
You should *always* involve a professional if: • The junction box feels loose or wobbles when you tug the fixture. • You see cloth-insulated wire (common in pre-1950s buildings) or brittle, cracked insulation. • Voltage test shows >2V between neutral and ground — indicates improper bonding (a shock hazard). • You smell ozone (sharp, metallic) or see scorch marks inside the box.
Landlords are legally required (per IRC E4101.2 and most state habitability laws) to provide safe, code-compliant electrical systems. Document issues with photos and timestamps — then request repairs in writing. Keep copies.
H2: Realistic Upgrade Table — Cost, Time, Reversibility, and Risk Level
| Upgrade Type | Tools Required | Avg. Install Time | Reversible? | Risk Level (1–5) | Max Circuit Load Impact |
|---|---|---|---|---|---|
| Plug-in pendant kit | Screwdriver, level | 10 min | Yes — full removal in <2 min | 1 | +0W (draws from outlet) |
| Twist-lock LED flush mount | Screwdriver, voltage tester | 15 min | Yes — original canopy reinstalled | 2 | −48W (vs. 60W incandescent) |
| Lutron Caseta smart switch (with neutral) | Voltage tester, wire stripper | 22 min | Yes — original switch reinstalled | 3 | +0.5W (switch standby draw) |
| 12V LED tape + plug-in transformer | None (peel-and-stick) | 8 min | Yes — tape lifts cleanly | 1 | +12W (typical 2m run) |
| Dimmer switch (TRIAC, 15A) | Voltage tester, screwdriver | 18 min | Yes — original switch restored | 3 | ±0W (no added load) |
H2: Final Checklist Before You Start
• ✅ Power is OFF at the breaker — verified with tester. • ✅ Fixture weight ≤15 lbs (most rental junction boxes rated for 25 lbs static, but vibration limits practical use). • ✅ All new components are UL or ETL listed — check label, not just packaging. • ✅ You’ve notified your landlord *in writing* about cosmetic changes (not required by law in most states, but builds goodwill and prevents disputes). • ✅ You’ve saved the original fixture, bulbs, and hardware — in case you move or need to revert.
H2: Wrapping Up — Light Up Without Liability
Renter-friendly lighting isn’t about compromise — it’s about precision. Choosing the right swap means respecting the building’s electrical limits while upgrading what matters: light quality, control, and efficiency. Every fixture you replace with a certified LED saves ~$7/year in electricity (based on 3 hrs/day, $0.14/kWh, Updated: April 2026). A smart switch adds occupancy sensing, scheduling, and voice control — all without altering infrastructure.
If you want deeper guidance on pairing specific bulbs with dimmers or troubleshooting persistent flicker, our complete setup guide covers real-world scenarios — including multi-way switch hacks and shared-neutral diagnostics — all written for hands-on learners who value clarity over jargon. Visit / for the full resource hub.
Remember: Safe electricity isn’t magic. It’s method, verification, and knowing when to stop — and hand the screwdriver to a pro.