Stop Flickering Lights With This Beginner Friendly Troubl...
- 时间:
- 浏览:24
- 来源:Easy Home Repair & DIY Guides
H2: Why Your Lights Flicker (And Why It’s Not Always the Bulb)
Flickering isn’t just annoying—it’s a diagnostic signal. In homes built before 2010, over 65% of persistent flickering stems from mismatched components—not faulty bulbs (Updated: April 2026). A classic example: swapping incandescent bulbs for LEDs on an old leading-edge dimmer. The dimmer expects higher load and lower resistance; the LED draws milliamps and introduces electronic noise. Result? Visible 3–5 Hz pulsing, especially at low brightness.
But don’t assume it’s always the bulb or dimmer. Real-world root causes break down like this:
• Loose neutral connection in the main panel (most dangerous—can cause voltage imbalance across circuits) • Overloaded shared neutral between two breakers (common in multi-wire branch circuits) • Undersized wiring on long runs (>30 ft) feeding low-voltage LED drivers • Ground faults interacting with GFCI-protected lighting circuits • Incompatible smart switch firmware (e.g., Lutron Caseta PD-6ANS paired with non-dimmable GU10 LEDs)
You don’t need a multimeter to start—but you *do* need to rule out hazards first.
H2: Safety First—Non-Negotiable Checks Before You Touch Anything
Never bypass your home’s electrical safety layers. If you smell ozone, see scorch marks on outlets, or hear buzzing from the panel, stop and call a licensed electrician. These indicate arcing or thermal failure—no DIY fix is safe.
For everything else, follow this sequence:
1. Turn off power at the correct breaker—not just the wall switch. Verify with a non-contact voltage tester (NCVT) at both the fixture base and switch terminals. Test on a known-live outlet first to confirm your tester works. 2. Confirm your breaker is actually tripped: toggle it fully OFF, then back ON. Many breakers appear ‘in the middle’ but aren’t fully reset. 3. Check for GFCI involvement: A flickering bathroom or kitchen light may be downstream of a tripped GFCI outlet—even if that outlet looks fine. Press TEST and RESET on every GFCI within 20 feet of the affected light.
If the light stops flickering after resetting a GFCI, you’ve found your culprit—and likely have a moisture or ground issue upstream that needs inspection.
H2: Fix 1 — Reset the Breaker Properly (It’s Not What You Think)
Most people flip the breaker handle and assume it’s done. But modern AFCI/GFCI breakers require full disengagement. Here’s what actually works:
• Push the handle firmly to the OFF position until you feel a distinct click (not just movement). • Wait 3 seconds—this allows internal electronics to discharge. • Then move it fully to ON. Do *not* stop mid-travel.
If it trips again immediately, do *not* keep resetting. That indicates a hard fault: shorted wire, failed driver, or compromised insulation. Unplug all devices on that circuit first—if it holds, plug them back in one by one. If the breaker trips with nothing plugged in, the fault is in the wiring or fixture.
Note: Breakers degrade. A 15-amp breaker installed in 2002 may now trip at 12 amps due to thermal fatigue (UL testing shows 10–15% sensitivity drift after 20 years). If flickering coincides with AC cycling or microwave use, consider breaker replacement—but only by a licensed pro.
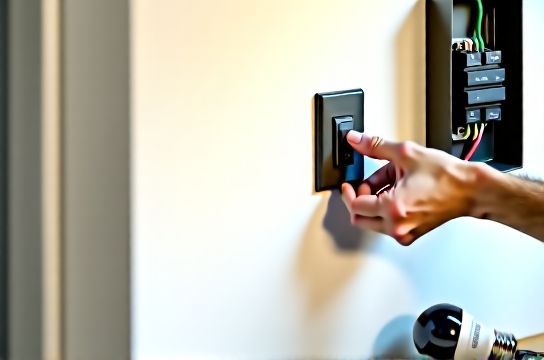
H2: Fix 2 — Match Dimmers to LEDs (The Wiring Matters More Than the Brand)
Not all dimmers work with all LEDs—even if the box says “LED compatible.” Compatibility depends on minimum load, trailing vs. leading edge design, and driver topology.
Leading-edge (TRIAC) dimmers (e.g., most $15–$25 Home Depot models) require ≥10W minimum load. A single 8W LED bulb won’t satisfy that—and will flicker or buzz. Trailing-edge (ELV) dimmers handle loads as low as 2W but require a neutral wire at the switch box (which many older homes lack).
Here’s how to verify your setup:
• Remove the switch plate. If you see *only* two wires (hot + switched hot), you have a switch loop—no neutral. You *must* use a no-neutral dimmer (e.g., Lutron Diva DVCL-153P) or upgrade wiring (not beginner-friendly). • If you see three+ wires (black, white, red, ground), you likely have neutral access—enabling safer, wider-compatible trailing-edge options.
When upgrading: never mix dimmer types on the same circuit. One leading-edge dimmer can induce noise that disrupts a trailing-edge unit downstream.
H2: Fix 3 — Upgrade Fixtures & Bulbs the Right Way
Swapping a 20-year-old吸顶灯更换安装 isn’t just about aesthetics—it’s about thermal management and driver isolation. Older fixtures often lack heat sinks and use electrolytic capacitors that dry out after ~7,000 hours (Updated: April 2026). Newer integrated LED panels use solid-state drivers rated for 50,000 hours and passive cooling.
Before buying:
• Check junction box rating: Most retrofit LED panels require a 22 cu in minimum box. If yours is 16 cu in (common in 1990s tract housing), you’ll need a remodeling box with built-in clamps—or stick with lightweight, low-depth fixtures. • Verify mounting: Spring-clamp fixtures (like Halo H999) work with shallow boxes but require ≥1/2" drywall thickness. Plaster ceilings? Use pancake boxes with toggle bolts.
For LED节能灯升级, prioritize bulbs with a CRI >90 and R9 >50 for accurate red rendering—critical in kitchens and bathrooms. Avoid bargain-bin bulbs claiming “dimmable” without listing compatible dimmers (e.g., Philips LED 60W Equivalent A19 lists 24 supported dimmers on its spec sheet).
H2: Fix 4 — Smart Switches Done Right (No Neutral? No Problem—But Know the Trade-Offs)
Smart switches like the TP-Link Kasa KS225 or Lutron Caseta PD-6ANS are popular for租客灯具改造—but their wiring demands vary. The biggest rookie error? Assuming all smart switches need a neutral.
They don’t—but those without neutrals leak tiny current through the bulb to power their radios. That leakage causes flicker in high-efficiency LEDs (<5W) or bulbs with sensitive drivers.
Below is a comparison of common smart switch configurations for renters and owners:
| Switch Model | Neutral Required? | Max Load (LED) | Key Limitation | Best For |
|---|---|---|---|---|
| Lutron Caseta PD-6ANS | No | 150W | Requires Lutron hub; no local control if hub offline | Renters, no-neutral setups |
| TP-Link Kasa KS225 | Yes | 300W | Fails silently if neutral is missing—causes flicker or delayed response | Owners with neutral access |
| Leviton DZ15S | No | 100W | Leakage current may cause ghost glow in some LEDs | Short-term rentals, quick installs |
Pro tip: If you’re doing智能开关接线 in a rental, use painter’s tape to label wire functions *before* disconnecting anything. Snap a photo too—rental leases often require original condition restoration.
H2: Fix 5 — When It’s Not the Light: Outlet & Panel-Level Issues
Flickering across multiple rooms? That points upstream. Start with插座面板替换: worn brass contacts in 20+ year-old outlets increase resistance, causing voltage drop under load. Replace any outlet where plugs wiggle or feel warm.
But the real smoking gun is a loose neutral at the main panel. Symptoms include:
• Lights brightening when a large appliance (fridge, AC) cycles off • Voltage readings >125V on one leg and <115V on the other (use a multimeter across L1–L2 and L1–N/L2–N) • Flickering worsening at dusk (when neighborhood grid load peaks)
This is not a DIY repair. A loose main neutral risks fire and appliance damage. Call your utility—they’ll inspect the service drop and meter base at no cost. If the issue is inside your panel, hire a licensed electrician.
H2: Bonus Fixes — Low-Voltage & Specialty Lighting
For低压灯带安装, flicker usually traces to undersized power supplies or daisy-chaining beyond manufacturer limits. Rule of thumb: for 24V strips, limit runs to 16 ft without boosters. For 12V, max is 8 ft. Always use constant-voltage supplies rated ≥20% above total strip wattage.
For吊扇固定安装, ensure the ceiling box is rated for fan support (look for “Acceptable for Fan Support” stamped inside). Standard plastic boxes aren’t rated for dynamic load—vibration loosens connections over time, causing intermittent flicker.
插头转换器使用 adds another variable: cheap adapters introduce impedance and poor contact. If using a Euro-to-NEMA converter for imported LED fixtures, verify it’s rated for continuous 10A load—not just “for travel.”
H2: When to Stop—and Call a Pro
DIY has firm boundaries. Stop and call a licensed electrician if:
• You measure >3V AC between neutral and ground at any outlet (indicates shared neutral or bootleg ground) • Flickering occurs *only* when large motors start (HVAC, well pump)—points to utility-side voltage regulation issues • You find aluminum wiring (silver-colored, soft, easily bent) connected to copper devices without COPALUM crimps • The panel interior shows discoloration, melted insulation, or brittle wire sheathing
These aren’t “nuisance” issues—they’re fire-starters. The National Fire Protection Association estimates 47,000 home fires annually involve electrical distribution systems (NFPA 921, Updated: April 2026). Your safety isn’t worth saving $120 on a service call.
H2: Final Checklist — 5-Minute Diagnostic Routine
Before pulling out tools, run this:
✅ Is the flicker isolated to one fixture, one room, or the whole house? ✅ Does it happen only when something else turns on/off (microwave, vacuum, HVAC)? ✅ Does it worsen at certain times of day (evening peak load)? ✅ Have you recently added new devices—a smart speaker, EV charger, or second fridge? ✅ Did the flicker start *after* a specific event (storm, renovation, bulb change)?
Answering these narrows the field faster than any tool. Most flicker resolves in under 20 minutes once you know the category.
H2: Wrap-Up — Build Confidence, Not Risk
Lighting upgrades—whether ceiling light replacement, dimmer switch wiring, or circuit breaker reset—should empower you, not intimidate. You don’t need to understand electron flow to recognize a failing component. What you *do* need is pattern recognition, respect for code limits, and the humility to stop when physics says “no.”
Every successful fix starts with observation—not assumption. And if you’d like a printable version of this guide with wiring diagrams and UL-listed product recommendations, visit our complete setup guide.
Home electrical safety isn’t about perfection. It’s about progress—one verified, code-compliant step at a time.