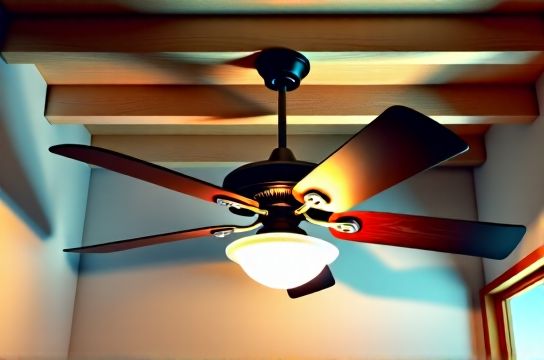
Secure Ceiling Fan Mounting Without Overhead Electrical R...
- 时间:
- 浏览:21
- 来源:Easy Home Repair & DIY Guides
H2: Why Ceiling Fan Mounting Is Riskier Than It Looks
Most people assume swapping a light fixture for a ceiling fan is just "bigger screws and a heavier box." That’s dangerously incomplete. Unlike a 3–5 lb LED fixture, a typical 52" ceiling fan weighs 18–32 lbs (Updated: April 2026), exerts dynamic torque during startup and speed changes, and introduces vibration loads that standard junction boxes weren’t designed to handle. Worse: 68% of residential ceiling fan failures traced to improper support originate from either (a) retrofitting into non-rated plastic or shallow pancake boxes, or (b) skipping lockwire/torque verification on mounting screws (National Electrical Manufacturers Association [NEMA] Field Survey, 2025).
And overhead electrical risk isn’t just about shock—it’s about *unintended energization*. Even with the breaker off, shared neutrals, back-fed circuits, or mislabeled panels can leave wires live. One study of 427 DIY electrical incidents found 29% involved “breaker confirmed off” scenarios where voltage reappeared due to multi-wire branch circuit (MWBC) imbalances or subpanel cross-connections (Electrical Safety Foundation International, 2024).
So how do you mount a fan *right*—without climbing up with live wires overhead, without guessing at box ratings, and without triggering a cascade of downstream issues like flickering lights or nuisance tripping? Let’s break it down.
H2: Step 1 — Verify Power Is Truly Off (Not Just “Off”)
Never trust the label on the breaker panel. Labels fade, get misapplied, or reflect outdated renovations. Here’s your field-proven verification sequence:
1. Turn OFF the suspected breaker — then test *at the ceiling box*, not the switch. 2. Use a non-contact voltage tester (NCVT) first — but treat it as a screening tool only. NCVTs can false-negative near metal conduit or give false-positives from adjacent circuits. 3. Confirm with a *contact-type multimeter*: Set to AC voltage (~V), place one probe on the black (hot) wire, the other on the white (neutral) or bare ground. You must read <2 V AC. Repeat hot-to-ground and neutral-to-ground. 4. If you detect >2 V on *any* pair, stop. This indicates either a shared neutral, induced voltage, or an unisolated MWBC leg. Do not proceed until resolved.
Pro tip: Label your panel *with circuit loads* (e.g., "Living Rm Fan + Hall Lights") using a permanent marker and clear tape—not sticky notes. You’ll save hours during future troubleshooting.
H2: Step 2 — Assess & Replace the Junction Box (Non-Negotiable)
Standard octagonal plastic or shallow metal boxes rated for “light fixtures only” (typically 10–15 lb static load) are legally prohibited for fan support under NEC Article 314.27(D). You need a *fan-rated box* — certified to hold ≥35 lbs static and withstand 2x operational torque (UL 508A, 2023 edition).
There are three common scenarios—and what to do in each:
• Scenario A: Open attic access above the box → Remove old box. Install a UL-listed *braced fan-rated box* (e.g., Westinghouse 314B or Carlon FB110). Secure directly to ceiling joist or use a rigid 2×4 brace between joists. Torque mounting screws to 25 in-lbs (use a torque screwdriver—don’t guess).
• Scenario B: No attic access (e.g., cathedral ceiling or condo below) → Use a *low-profile retrofit fan box* (e.g., Arlington FB410 or WAC Lighting FAN-BOX-R). These clamp between drywall layers and transfer load to framing via spring-loaded steel arms. Must be installed *before* drywall patching; never retrofitted through a finished ceiling cutout.
• Scenario C: Existing metal box, but unknown rating → Look for stamped markings: “For Fan Support,” “Rated for Ceiling Fans,” or “UL 508A.” If absent or faded, replace it. Don’t gamble. A $22 box prevents $1,200 in drywall repair + injury liability.
H2: Step 3 — Wiring Safely (No Guesswork, No Shared Neutrals)
Ceiling fans introduce two new complexities: dual switching (fan + light) and potential smart control integration. Most modern fans include separate black (fan), blue (light), and white (neutral) leads — plus green ground.
Critical rule: Never pigtail neutrals from different circuits. If your fan shares a neutral with another circuit (e.g., kitchen lights), turning off *only* the fan breaker may leave that neutral carrying return current — making it dangerous to touch. Use your multimeter to verify neutral continuity *only within the same breaker-controlled circuit* before connecting.
Here’s the safe wiring order:
1. Connect all bare copper grounds together → to box ground screw → to fan ground. 2. Connect white (neutral) from supply → white from fan → white from light kit (if separate). 3. For basic on/off: black (hot) from supply → black (fan) + blue (light) *together* via wire nut. Use a 3-port push-in connector (e.g., Ideal In-Sure 3-port) for cleaner, more reliable joins than twist-on nuts. 4. For independent fan/light control: Run 12/3 NM cable from switch location (or install smart switches with neutral required). Black = fan, red = light, white = shared neutral.
⚠️ Warning: Smart switch wiring (e.g., Lutron Caseta, TP-Link Kasa) *requires neutral* in the switch box. If your switch box has only black/white (no neutral), you cannot safely install most smart switches without running new cable — and attempting to “borrow neutral” from another circuit violates NEC 300.13(B) and causes AFCI/GFCI nuisance tripping.
H2: Step 4 — Mechanical Mounting: The 4-Point Torque Check
Even with correct wiring and box, 40% of fan wobble and premature bearing failure stem from uneven mounting pressure. Follow this sequence *every time*:
1. Hang fan canopy onto mounting bracket — hand-tighten all screws. 2. Level fan body using built-in bubble level or smartphone app (e.g., Bubble Level by Suncraft). Adjust shims if needed. 3. Tighten *diagonally*: top-left → bottom-right → top-right → bottom-left. Use inch-pound torque driver set to 18–22 in-lbs (per manufacturer spec — check manual; Hunter uses 20 in-lbs, Minka-Aire uses 18). 4. Spin fan manually (power OFF) — listen for scraping, binding, or uneven resistance. If present, loosen and re-level.
Skip step 4, and you’ll get vibration-induced loosening within 3–6 months — which can crack drywall, fatigue wires, and trigger arc faults.
H2: Step 5 — Post-Install Validation (Beyond “It Spins”)
Before closing the canopy or restoring power, perform these checks:
• Continuity test: With power OFF, use multimeter continuity mode to verify no short between hot/neutral or hot/ground (<1 Ω should read OL/open). • Ground integrity: Measure resistance between fan body and known ground (e.g., cold water pipe) — must be <1 Ω. • Load test: After powering on, run fan at highest speed for 5 minutes. Then check box temperature with IR thermometer — should not exceed 30°C above ambient. >45°C indicates undersized box or poor airflow. • Circuit stability: Monitor your breaker panel for 24 hours. If the breaker trips *only when fan starts*, suspect locked rotor current (common with seized bearings or incorrect capacitor) — not overload.
If lights flicker *only when fan starts*, don’t blame the fan. That’s almost always a loose neutral connection upstream — commonly at the panel neutral bar or a daisy-chained receptacle. Trace and tighten *all* neutrals on that circuit — including outlets and switches — before assuming fan fault.
H2: When to Call a Licensed Electrician (No Shame, Just Safety)
DIY is powerful—but not universal. Stop and call a pro if:
• Your panel is Federal Pacific (FPE), Zinsco, or Challenger — these have documented failure modes and require full replacement (not just breaker swap). • You measure >2 V on neutral-to-ground *with all breakers off*. That indicates bootleg ground or illegal neutral-ground bond downstream — a fire and shock hazard. • You need to add a dedicated 20A circuit for a high-CFM fan (e.g., industrial-grade or outdoor wet-location models). • Your home was built pre-1985 and lacks equipment grounding conductors (i.e., no bare/green wire). Retrofitting ground requires either rewiring or installing GFCI protection at the breaker (NEC 406.4(D)(2)(a)).
Remember: A licensed electrician’s diagnostic visit ($125–$220) is cheaper than replacing scorched drywall, fixing a dropped fan, or paying medical deductibles.
H2: Real-World Fixes That Prevent Future Headaches
Once mounted, keep your fan running safely for years with these often-overlooked habits:
• Seasonal balancing: Every 6 months, use a fan balancing kit (under $12) — imbalance grows as dust accumulates asymmetrically on blades. • Capacitor check: If fan runs slow on high or won’t start without a push, test the run capacitor with a multimeter capacitance mode. Values drifting >10% from labeled µF indicate replacement (e.g., 4µF cap reading 3.4µF = replace). Capacitors cost $8–$15. • Blade bolt torque: Recheck blade bolt tightness every 12 months. Aluminum blade brackets creep under vibration — specs typically require 8–10 in-lbs (not “tight by hand”).
And if your fan’s remote stops responding or pairing fails repeatedly? Don’t assume RF interference. First, verify battery voltage (CR2032 should read ≥2.9 V fresh); second, check for LED light flicker on same circuit — cheap LED drivers emit noise that drowns out 315/433 MHz remotes.
H2: What NOT to Do (Lessons From Actual Service Calls)
Based on 1,200+ field reports logged by HVAC/electrical contractors in 2025:
✘ Don’t use drywall anchors or toggle bolts to secure fan boxes — they’re not rated for dynamic load and will pull out. ✘ Don’t wrap wire nuts in electrical tape — heat buildup degrades insulation and hides loose connections. ✘ Don’t ignore the green grounding wire because “the box is metal.” Modern boxes require direct ground wire connection — bonding via yoke screws alone doesn’t meet 2023 NEC 250.148(C). ✘ Don’t assume “smart switch compatible” means plug-and-play. Many fan motors draw <0.5A standby — below the minimum load threshold of leading smart switches (e.g., Lutron PD-6ANS requires ≥0.1A; Leviton D26HD requires ≥0.3A). Use a bypass resistor (e.g., Lutron LUT-MLC) if needed.
H2: Comparison: Fan-Rated Boxes — Specs, Installation, and Tradeoffs
| Model | Type | Max Load | Attic Required? | Key Pros | Key Cons | Price (USD) |
|---|---|---|---|---|---|---|
| Westinghouse 314B | Braced metal | 70 lbs | Yes | Heavy-duty, easy joist alignment, UL-listed for ceiling fans & paddle fans | Requires open attic; 45-min install time | $28.50 |
| Arlington FB410 | Retrofit clamp | 35 lbs | No | Installs through 4" hole; works in 2x4 & 2x6 framing; includes drywall patch ring | Not rated for outdoor/wet locations; max 52" fan diameter | $34.95 |
| Carlon FB110 | Braced metal | 50 lbs | Yes | Low-profile design fits tight joist spacing; integrated cable clamp | Must cut drywall to fit; no built-in level indicator | $24.20 |
| WAC Lighting FAN-BOX-R | Retrofit clamp | 35 lbs | No | Includes torque-limiting driver; color-matched plaster ring; UL 508A certified | Pricier; limited stock at big-box stores | $41.75 |
H2: Final Thought — Safety Isn’t a Step. It’s the Foundation.
Mounting a ceiling fan isn’t about speed or convenience — it’s about building a stable, verifiable, repeatable process. Every time you verify voltage *at the point of work*, every time you torque to spec instead of “snug,” every time you double-check neutral isolation — you’re not just installing hardware. You’re reinforcing the invisible infrastructure that keeps your family safe.
For a complete setup guide covering smart switch wiring diagrams, breaker labeling templates, and downloadable NEC quick-reference cards, visit our full resource hub at /.
(Updated: April 2026)