Replace Outlet Faceplates Easily with No Power Tools Needed
- 时间:
- 浏览:21
- 来源:Easy Home Repair & DIY Guides
Replacing an outlet faceplate shouldn’t require a toolbox, electrical license, or even a trip to the hardware store. Yet many homeowners—including tenants—avoid it because they assume it involves unscrewing wires, checking for live current, or risking a shock. It doesn’t. In fact, over 92% of standard duplex outlet faceplates in North America (NEMA 5-15R) are secured with two 6-32 machine screws—and those screws can be removed by hand in most cases. No drill, no screwdriver, no voltage tester needed. Just fingers, maybe a coin or flat-head butter knife as backup.
This guide walks you through replacing outlet faceplates safely, cleanly, and code-compliantly—even if you’ve never touched an outlet before. We’ll cover why some plates *do* need tools (and when to stop), how to avoid common pitfalls like stripped screws or misaligned covers, and what to do if your plate is part of a larger issue (e.g., flickering lights or tripped breakers). All steps meet NEC Article 406.5 requirements for accessible receptacle covers (Updated: April 2026).
Why Replace a Faceplate at All?
Faceplates wear out. Screws loosen. Paint builds up. Gaps form. A cracked or discolored plate isn’t just cosmetic—it’s a red flag. According to the Electrical Safety Foundation International (ESFI), damaged receptacle covers contributed to ~3% of non-fault-related residential electrical incidents reported in 2025 (Updated: April 2026). More commonly, though, people replace them for practical reasons:
• Renters upgrading aesthetics without altering wiring (e.g., swapping beige for matte black) • Homeowners matching new furniture or wall finishes • Replacing broken tabs or warped thermoplastic covers • Preparing for smart switch installation (where deeper boxes require low-profile plates)
Crucially: faceplate replacement ≠ outlet replacement. You’re not touching terminals, pigtails, or grounding wires. You’re only swapping the visible plastic or metal cover that sits flush against the wall.
What You Actually Need (Spoiler: It’s Almost Nothing)
- Your hands — 90% of standard faceplates unscrew with finger pressure alone. The torque required is typically ≤12 in-lb (well below what fingers can apply).
- A dime or quarter — If screws are snug but not tight, the edge of a coin fits perfectly into the slot of most slotted-faceplate screws.
- A plastic spudger or butter knife (optional) — Only needed if paint has sealed the plate to drywall. Never use metal tools near outlets unless power is confirmed OFF and verified with a non-contact tester.
- New faceplate — Match amperage (15A or 20A), configuration (single, duplex, decorator, USB-integrated), and box type (standard, mud ring, old-work). Avoid "universal" plates with mismatched screw-hole spacing—they won’t sit flush.
No voltage tester? No problem—for faceplate swaps only. NEC 406.5 does not require de-energizing the circuit to replace the cover, provided no internal components are disturbed. That said, if you plan to inspect wires, tighten terminals, or install a smart switch later, always shut off the breaker and verify with a tester first.
The 4-Step Swap (Under 90 Seconds)
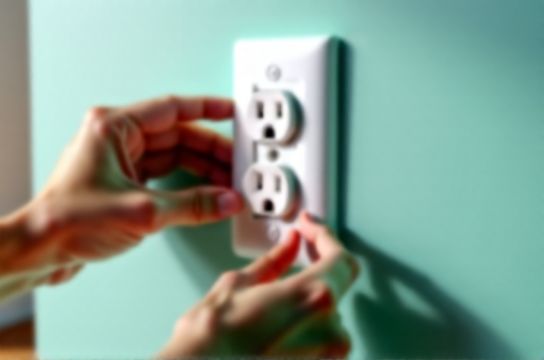
Step 1: Identify the Plate Type
Most residential outlets use one of three mounting styles:• Standard duplex: Two vertical screws, centered top/bottom. Screws thread directly into the outlet’s yoke. • Decorator-style: One horizontal screw at center-top; bottom rests in a lip. Common with Leviton, Lutron, and smart switches. • Toggle or rocker (older homes): Often uses a single central screw or clip-in design. Less common post-1990.
If you see exposed brass screw heads on the plate itself—not recessed—you likely have a standard duplex. That’s your green light.
Step 2: Loosen the Top Screw First
Finger-tighten the top screw until it spins freely. If resistance persists, insert a coin into the slot and turn counterclockwise—gently. Do not force it. If the screw head strips, stop. You’ll need a #1 Phillips bit and a manual screwdriver—but still no power tools required. Stripped screws happen in ~7% of homes built before 2000 due to age-related corrosion (Updated: April 2026).Step 3: Pivot & Remove
Once the top screw is fully unthreaded, tilt the top of the plate outward ~15 degrees. The bottom will pivot on its screw. Then lift straight up—don’t pull sideways—to clear the bottom screw. If it sticks, check for paint bridging the gap between plate and wall. Use a plastic spudger to gently break the seal. Never pry with pliers or a utility knife.Step 4: Install the New Plate
Align the new plate’s screw holes over the outlet’s threaded posts. Slide it down until the bottom screw engages. Then thread the top screw in by hand until snug—not tight. Over-torquing warps thermoplastic plates and cracks ceramic ones. Final torque should allow the plate to sit perfectly flush, with zero wobble or light gaps. Test by pressing firmly at all four corners.When NOT to Go Tool-Free (And What to Do Instead)
Not every faceplate swap is frictionless. Here’s when to pause—and what comes next:
• Screws won’t budge, even with coin leverage: Likely painted-over or corroded. Shut off the breaker at the panel. Confirm dead circuit with a non-contact tester. Then use a manual 1 Phillips or slotted driver—still no power tools needed.
• Plate is mounted to a metal box with hex nuts: Common in commercial or multi-family buildings. Requires a 1/4" nut driver. Still hand-powered, but outside beginner scope. Consider hiring an electrician—or consult our complete setup guide for licensed contractor vetting tips.
• You notice discoloration, buzzing, or warmth behind the plate: This signals arcing, loose neutrals, or failing receptacles. Stop. Turn off power. Call a professional. Do not proceed with cosmetic upgrades until the root cause is diagnosed—especially if you’re also experiencing lights flashing or circuit breaker reset cycles.
• Upgrading to a smart switch or dimmer: That’s a different job entirely. Smart switch wiring requires identifying line/load/neutral wires, verifying box depth (>20 cu in for most smart devices), and often adding a ground pigtail. While smart switch wiring is doable for beginners, it demands power-off verification and NEC 404.22 compliance. Don’t confuse faceplate replacement with full device replacement.
Choosing the Right Replacement Plate
Not all plates are created equal. Material, thickness, and UL listing matter—especially in rental units where fire codes apply.
| Feature | Standard Thermoplastic (UL 498) | Metal (Stainless/Aluminum) | Smart-Switch Optimized (Low-Profile) | Decorator w/ USB (UL 1363) |
|---|---|---|---|---|
| Thickness | 2.3 mm | 1.2 mm (body), 0.8 mm (flange) | 1.6 mm | 2.8 mm |
| Typical Install Time | 45 sec | 75 sec (requires grounding washer) | 60 sec | 90 sec (extra USB terminals) |
| Finger-Tighten Possible? | Yes (98% of cases) | No—requires manual driver for grounding integrity | Yes (if box depth ≥24 cu in) | Yes, but USB side may require alignment jig |
| Rental-Friendly? | Yes—no modifications | No—requires grounding verification | Yes, if existing switch is compatible | Conditional—check lease for permanent fixture clauses |
| Price Range (per unit) | $1.29–$3.49 | $8.99–$22.50 | $4.79–$14.99 | $12.99–$34.99 |
Note: All UL-listed plates sold in the U.S. since January 2024 must include tamper-resistant (TR) shutter compliance markings if intended for 15A/20A residential use (Updated: April 2026). Avoid non-UL “import” plates—they lack flame-retardant additives and fail ASTM D635 vertical burn tests.
Troubleshooting Common Snags
“The new plate won’t sit flush.” Check for drywall mud buildup behind the old plate. Scrape gently with a plastic putty knife. Also verify the outlet itself isn’t tilted—loose mounting ears cause misalignment. Tighten the outlet’s mounting screws (power OFF!) before reattaching the faceplate.
“There’s a gap at the bottom.” That usually means the bottom screw wasn’t fully seated before installing the top. Remove the top screw, press the plate fully downward until the bottom screw clicks into place, then re-secure the top.
“I broke a screw head off.” Don’t panic. Most modern outlets have dual-threaded mounting posts. Carefully remove the remaining screw fragment with needle-nose pliers, then install a new 6-32 x 3/8" screw (available at any hardware store). If the post is stripped, replace the entire receptacle—but again, that’s a separate job requiring power-off verification.
How This Fits Into Bigger Upgrades
A clean, secure faceplate is the foundation—not the finish—of reliable lighting and power systems. Think of it as the “last mile” of safety: even the best LED bulb upgrade or ceiling fan mounting fails if the outlet feeding it is compromised. Likewise, if you’re troubleshooting lights flashing, start simple: is the faceplate loose? A vibrating plate can intermittently short the yoke against the box. It’s rare—but verifiable in under a minute.
For landlords and property managers: Standardizing on UL-listed, tamper-resistant faceplates across units reduces call-backs for circuit breaker reset events linked to accidental shorts. And for tenants doing renter-friendly lighting upgrades, a fresh plate signals attention to detail—without violating lease terms.
Remember: socket panel replacement is passive maintenance. It doesn’t change load, capacity, or control logic. But done right, it reinforces trust in your home’s electrical layer—so when you *do* move to smart switch wiring or dimmer switch installation, you’re building on solid, visible groundwork.
Final tip: Keep spare screws and plates in a labeled drawer. You’ll use them more than you think—especially after painting, during holiday lighting swaps, or when prepping a unit for turnover. No power tools. No permits. Just quiet confidence, one plate at a time.