Upgrade to Energy Efficient LED Bulbs Without Rewiring
- 时间:
- 浏览:14
- 来源:Easy Home Repair & DIY Guides
H2: You Don’t Need an Electrician to Cut Your Lighting Bill by 75%
Most homeowners assume upgrading lighting means tearing open walls, pulling new cable, or hiring a licensed electrician. That’s outdated—and often unnecessary. Today’s LED bulbs, compatible fixtures, and retrofit smart switches let you cut lighting energy use by up to 75% (Updated: April 2026) with zero rewiring. This guide walks through real-world, code-compliant upgrades—designed for people who’ve never held a voltage tester.
We focus on three practical categories: swapping existing fixtures (like ceiling lights and fan-light combos), installing smart switches safely, and troubleshooting common issues like breaker trips or flickering—without touching your home’s main panel wiring.
H3: Why Rewiring Is Rarely Required for LED Upgrades
LED technology has matured to the point where compatibility is now the rule—not the exception. Most standard E26/E27 screw-base sockets, GU10 and MR16 halogen replacements, and even older fluorescent troffers accept direct LED retrofits. The key isn’t voltage or wattage alone—it’s thermal management, driver compatibility, and dimmer matching.
For example: • A 60W incandescent equivalent LED bulb draws only 8–9W and runs cool enough for enclosed fixtures rated for 40W max. • Modern LED drivers are built to handle standard 120V AC line voltage—no low-voltage transformers needed unless you’re installing dedicated 12V LED tape. • UL-listed LED bulbs and integrated fixtures carry full safety certification for residential use—including damp-rated options for bathrooms and covered porches.
That said: never force-fit a bulb. If your existing socket is corroded, cracked, or shows signs of arcing (blackening around contacts), replacement—not retrofit—is the only safe path. We’ll cover how to spot those signs and replace them correctly.
H2: Swapping Fixtures Safely—Especially Ceiling Lights & Fan-Light Combos
H3: Replacing a Ceiling Light (吸顶灯更换安装)
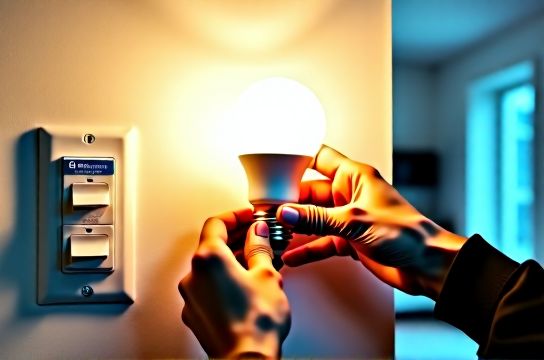
This is the most common upgrade—and the safest place to start. You’re not changing circuitry; you’re swapping one UL-listed fixture for another.
Step-by-step: 1. Turn off power at the breaker—not just the wall switch. Verify with a non-contact voltage tester (test both black and white wires inside the junction box). 2. Unscrew mounting bracket, lower old fixture, and disconnect wires (black-to-black, white-to-white, bare/green-to-ground). Note wire nut condition—if brittle or cracked, replace with new UL-listed wire nuts (e.g., Ideal Twister 77). Do not reuse old ones. 3. Mount new fixture bracket using the same screws (or upgrade to toggle bolts if drywall is thin or old). Ensure it’s level and secure—no wobble. 4. Connect wires in the same order. Tighten wire nuts until no copper is visible. Tug gently on each wire to confirm grip. 5. Tuck wires neatly into box, mount fixture, install bulbs *after* power is restored.
Critical note: If your ceiling box is plastic and lacks a grounding screw or green wire, it’s likely ungrounded—a known issue in homes built before 1985. In that case, do *not* install a metal fixture unless you add a grounding pigtail to a grounded metal box nearby (requires professional evaluation). Use only double-insulated (Class II) LED fixtures marked “No Ground Required”.
H3: Installing a Ceiling Fan with Light Kit (吊扇固定安装)
Ceiling fans add airflow *and* light—but require more structural support. Most retrofit kits include a reinforced mounting bracket designed to attach directly to your existing electrical box—*only if* that box is rated for fan support (look for “Acceptable for Fan Support” stamped on the metal or listed in the manufacturer’s specs).
If your current box isn’t rated, you’ll need a retrofit fan brace (e.g., Westinghouse Safe-T-Brace). It installs between joists without attic access—takes ~25 minutes with a drill and stud finder. No drywall patching required.
Always balance the fan before turning it on. Unbalanced fans vibrate, loosen connections, and cause premature LED driver failure—especially in integrated light modules.
H2: Smart Switches Without Opening Walls (智能开关接线)
H3: What You *Can* Install Yourself—And What You Can’t
Smart switches fall into two categories: • Load-neutral switches (require neutral wire in the switch box) • No-neutral switches (use tiny leakage current through the load to power themselves)
As of NEC 2011 (and enforced nationwide by 2023), all new switch boxes must include a neutral conductor. But many older homes—especially those with switch loops—don’t. So first: open your switch plate (power OFF!) and look inside.
✅ Safe to proceed if you see: - Black (hot), white (neutral), bare/green (ground), and red (traveler, if 3-way) ❌ Stop and consult an electrician if you see: - Only black and white wires capped together (a switch loop—no neutral present) - Two black wires and no white wire in the box
For no-neutral smart switches (e.g., Lutron Caseta PD-6ANS, Brilliant Control), you *must* pair them with a minimum load—typically 5W or more. That means: no single 4W LED bulb on that circuit. Add a second bulb, or use a dummy load (e.g., Lutron LUT-MLC). Skipping this causes erratic behavior or switch failure.
H3: Dimmer Compatibility Is Non-Negotiable (调光开关布线)
Not all LEDs dim. Not all dimmers work with LEDs. And mixing incompatible models causes buzzing, limited range, or premature LED failure.
Use this checklist before buying: • Confirm your LED bulb is labeled “Dimmable” (not just “LED”) • Check the bulb’s packaging or spec sheet for compatible dimmer brands/models (e.g., “Works with Lutron CL series”) • Choose a dimmer rated for *LED load*, not incandescent (e.g., a 150W LED dimmer handles ~15W actual draw—not 150W of heat)
If your existing dimmer buzzes or cuts out below 30%, replace it—even if it “sort of works.” The cost of a quality LED dimmer (e.g., Leviton D26HD, $28) pays back in reliability and bulb life within 12 months.
H2: Breaker Trips, Flickering & Other Real-World Glitches (空开跳闸复位, 灯光闪烁排查)
H3: When Your Breaker Trips—And How to Reset It Safely
A tripped breaker is a safety feature—not a defect. But repeated trips mean something’s wrong.
First, reset: 1. Flip the breaker fully OFF (past the tripped position), then ON. 2. If it trips again immediately: unplug *everything* on that circuit, then reset. Plug devices back in one at a time. 3. If trip persists with nothing plugged in: suspect a faulty switch, loose connection in a junction box, or damaged cable (e.g., nail puncture in wall).
Common lighting-related causes: • Overloaded circuit: More than 12–14 total LED fixtures (assuming 9W each) + other loads (outlets, HVAC control) on a 15A circuit (1,800W max). Yes—LEDs reduce load, but outlets on the same circuit still count. • Shared neutral issues: In multi-wire branch circuits (MWBC), an overloaded leg can cause backfeed and nuisance tripping. Requires professional diagnosis. • Moisture ingress: Outdoor or bathroom fixtures with failed gaskets cause ground faults—especially after rain or steam buildup.
Never bypass or “upgrade” a breaker to a higher amperage. That risks fire. If your panel is full or outdated (e.g., Federal Pacific or Zinsco), call a licensed electrician.
H3: Why Lights Flicker—and How to Fix It
Flickering falls into two buckets: whole-house vs. single-fixture.
Whole-house flicker (especially when large appliances kick on): points to utility-side issues—loose neutral at the meter or transformer. Contact your utility *before* calling an electrician.
Single-fixture flicker: usually one of four things: 1. Loose bulb—tighten firmly (but don’t overtighten—LED bases strip easily) 2. Incompatible dimmer (see above) 3. Failing LED driver (common after 3–5 years in cheap bulbs; replace bulb) 4. Voltage drop from undersized wire over long runs (>50 ft from panel)—rare in standard homes, but possible in workshops or garages
Pro tip: Use a Kill-A-Watt meter ($25) on the circuit’s outlet to log voltage over 24 hours. Consistent readings between 114–126V are normal. Anything below 110V or above 127V warrants investigation.
H2: Renter-Friendly Upgrades That Won’t Get You Evicted (租客灯具改造)
You don’t own the property—but you *can* improve lighting safely and reversibly.
Do: • Replace bulbs with ENERGY STAR–certified LEDs (look for “Renter Friendly” packaging—no adhesive, no tools) • Use plug-in smart bulbs (e.g., Philips Hue White A19) in existing lamps • Install battery-powered smart switches (e.g., Aeotec NanoMote Quad) that sit *over* your existing switch—no wiring • Add under-cabinet LED tape with peel-and-stick backing (12V, powered via included plug-in adapter)
Don’t: • Drill into ceilings or walls without written permission • Replace hardwired fixtures unless explicitly allowed in lease • Use extension cords as permanent wiring (violates NEC 400.8)
All rental upgrades should be fully removable—bulbs go back in original packaging, switches detach cleanly, tape leaves no residue (3M VHB tape is best for clean removal).
H2: Low-Voltage Lighting Done Right (低压灯带安装)
LED tape (aka strip) lighting is popular—but miswired low-voltage systems cause more fires than people realize.
Key rules: • Never connect >16.4 ft (5 m) of 12V tape in series—voltage drop causes overheating at the start and dimming at the end. • Always use a UL-listed Class 2 power supply rated for *at least 20% more* than your tape’s total wattage (e.g., 24W tape → 30W+ supply). • Mount tape on aluminum channel—not wood or drywall—for heat dissipation. Ambient temps above 131°F (55°C) cut LED lifespan in half (Updated: April 2026). • Avoid daisy-chaining multiple power supplies. Run separate feeds from a central distribution block instead.
H2: Small Fixes, Big Impact—Outlets, Adapters & Safety (插座面板替换, 插头转换器使用, 家庭用电安全)
H3: Replacing an Outlet Faceplate or GFCI (插座面板替换)
GFCI outlets protect against shock—required in kitchens, bathrooms, garages, and outdoors since 1975. If yours doesn’t test/reset properly (press TEST → should click; press RESET → should stay in), replace it.
Steps: 1. Shut off correct breaker (verify with tester) 2. Remove faceplate, unscrew outlet, pull out 3. Note LINE (incoming power) vs LOAD (downstream protection) terminals—mixing these disables protection 4. Match wire colors: black→brass (hot), white→silver (neutral), bare→green (ground) 5. Use screw terminals—not push-in holes—for lasting reliability
Replace standard outlets with tamper-resistant (TR) models ($2.50–$4.50). They’re now NEC-mandated for all new/replacement outlets in homes—and prevent kids from inserting objects.
H3: When & How to Use Plug Adapters (插头转换器使用)
Plug adapters (e.g., NEMA 5-15 to 5-20, or EU to US) are fine for *temporary* use—like charging a laptop during travel. But they’re unsafe for high-load, continuous-duty devices: • Space heaters (1,500W+) • Refrigerators • Power tools
Why? Adapters bypass the outlet’s built-in overload protection and often lack proper grounding paths. Instead: install a properly rated outlet or use a UL-listed power strip with surge protection and internal breaker.
H2: Final Reality Check—What Requires a Licensed Electrician
DIY lighting upgrades are powerful—but have firm boundaries. Call a pro if you encounter: • Aluminum wiring (common in homes built 1965–1973)—requires COPALUM crimps, not wire nuts • Panels with Federal Pacific (FPE) or Zinsco breakers—known failure modes • Any need to add a new circuit, move a panel, or run cable through finished walls/ceilings • Whole-house flickering, burning smells, or warm outlets/switches
These aren’t “just to be safe”—they’re legal requirements in most jurisdictions. Insurance may deny claims if unpermitted work causes damage.
H2: Comparison: LED Retrofit Options at a Glance
| Upgrade Type | Time Required | Tools Needed | Cost Range (USD) | Pros | Cons | Code Compliance Notes |
|---|---|---|---|---|---|---|
| LED Bulb Replacement | 2–5 min per bulb | None | $2–$12/bulb | No tools, instant savings, fully reversible | Doesn’t fix outdated fixtures or poor light distribution | UL-listed bulbs meet NEC 110.3(B); no permit needed |
| Ceiling Fixture Swap (吸顶灯更换安装) | 25–45 min | Voltage tester, screwdriver, wire nuts | $35–$180 (fixture) | Better light quality, modern aesthetics, longer life | Requires accessible junction box; grounding check essential | Must match box rating (e.g., fan-rated); no splicing in box |
| No-Neutral Smart Switch (智能开关接线) | 30–50 min | Voltage tester, screwdriver, optional multimeter | $25–$75 | No new wires; works in older homes; app control | Requires minimum load; may not work with very low-wattage LEDs | Must be UL 2011 listed; no neutral = no AFCI/GFCI combo |
| Low-Voltage LED Tape (低压灯带安装) | 45–90 min | Wire strippers, soldering iron (optional), measuring tape | $15–$60 (5m roll + power supply) | Flexible placement, cool operation, design versatility | Requires correct power supply sizing; aluminum channel recommended | Must use Class 2 power supply; no field splices beyond manufacturer spec |
H2: Wrapping Up—Your First Three Actions Tonight
1. Grab a non-contact voltage tester ($12–$18) and test *one* switch plate tonight. Confirm presence of neutral—or absence. That single test tells you which smart switch path is open to you. 2. Replace your five most-used bulbs with ENERGY STAR A19 LEDs (look for 2700K CCT, ≥90 CRI, and “dimmable” label). That’s under $30 and cuts ~350 kWh/year off your bill. 3. Download or bookmark our complete setup guide—covering torque specs for wire nuts, NEC 2023 fast-reference tables, and printable wiring diagrams. It’s free, updated monthly, and built for real homes—not lab conditions.
You don’t need permission to make lighting safer, smarter, or more efficient. You just need the right facts—and the confidence to act on them. Start small. Verify voltage. Tighten connections. And when in doubt, stop and ask. That’s not caution—it’s competence. (Updated: April 2026)