Diagnose and Fix Intermittent Light Flickering Yourself
- 时间:
- 浏览:20
- 来源:Easy Home Repair & DIY Guides
H2: Why Your Lights Flicker—And Why It’s Usually Not Magic
Intermittent flickering isn’t mysterious—it’s a symptom. Most often, it’s a warning sign of something physically wrong in your lighting circuit: a loose wire, an overloaded dimmer, or a failing driver in an LED fixture. Less commonly, it points to voltage fluctuations from the utility or shared neutral issues—but those are rare in stable residential grids (Updated: April 2026).
Flickering that happens only when you turn on the AC, run the microwave, or start the garage door opener? That’s likely a shared circuit or undersized wiring—not a fixture failure. Flickering that occurs *only* with certain bulbs, or only when using a wall dimmer? That’s almost always compatibility or load-related.
Important: If flickering is accompanied by buzzing, burning smells, warm faceplates, or sparks—stop. Turn off the circuit at the panel and call a licensed electrician. Safety isn’t optional; it’s code-mandated.
H2: Step 1 — Isolate the Source (Before You Touch a Wire)
Don’t assume the bulb is broken. Start simple:
• Swap the bulb into a known-working fixture. If it flickers there too → bulb issue (common with low-cost non-dimmable LEDs on dimmer circuits). • Try a different bulb in the same socket. If it’s steady → original bulb was faulty or incompatible. • Test adjacent fixtures on the same circuit. If multiple lights flicker simultaneously when a large appliance kicks on, suspect circuit overload or panel-level issues (e.g., loose neutral at main lug).
If only *one* fixture flickers—and only intermittently—the problem lives in that fixture, its switch, or its junction box.
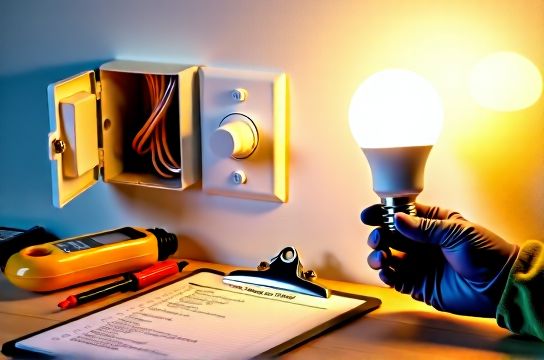
H2: Step 2 — Check the Bulb & Fixture Compatibility
Modern LED bulbs draw far less power than incandescents—but they’re pickier. Here’s what breaks them:
• Non-dimmable LEDs on dimmer switches: Causes visible flicker, especially at low brightness. Dimmable LEDs must be explicitly labeled as compatible with *your* dimmer model (e.g., Lutron Caséta, Leviton Decora Smart). Check the manufacturer’s compatibility list—not just the packaging.
• Under-loaded dimmers: Many trailing-edge (ELV) dimmers require a minimum load (e.g., 10W–25W). A single 8W LED bulb may fall below that threshold, causing instability. Solution: Add a second bulb, use a dimmer rated for low-wattage loads (e.g., Lutron PD-6WCL), or install a dummy load (not recommended for beginners).
• Heat buildup in enclosed fixtures: LEDs fail faster when trapped in recessed cans or sealed globes. Look for bulbs rated “Enclosed Fixture Rated” (check spec sheet—not just the box).
H2: Step 3 — Inspect the Switch & Wiring
Most DIYers overlook the switch—but it’s the 2 culprit behind persistent flicker.
First, confirm it’s not a smart switch misbehaving. Smart switches (like those used in smart home setups) require a neutral wire in most US homes built after 1985. If yours lacks one—or if the neutral is loosely landed—the switch may reboot mid-cycle, causing brief blackouts or flicker. Verify neutral continuity with a multimeter (0.5Ω max resistance between neutral bundle and switch neutral screw) before assuming the switch is faulty.
For traditional or dimmer switches:
• Turn OFF power at the breaker. Verify with a non-contact voltage tester *at the switch terminals*—not just the toggle. • Remove the cover plate and unscrew the switch. Gently pull it out. • Check all wire connections: Are wires tightly secured under screws (not backstabbed)? Are stranded wires twisted clockwise and capped with wire nuts before termination? Backstab connections fail over time—especially with aluminum or mixed copper/aluminum wiring (rare in post-1975 homes but still present in some rentals). • Look for discoloration or pitting on brass terminals—signs of arcing or overheating. Replace the switch if found.
H2: Step 4 — Examine the Fixture Junction Box
This is where most renter-friendly upgrades go sideways. In apartments or older homes, junction boxes are often shallow, overcrowded, or mounted to drywall without proper support—causing vibration-induced loosening.
With power OFF:
• Unscrew the fixture canopy. Support the fixture while removing mounting screws. • Pull the fixture down gently. Don’t yank—wires may be stapled or strained. • Inspect wire nuts: Are they snug? Do wires protrude >¼ inch? Are all conductors fully twisted *before* capping? Loose neutrals here cause erratic behavior across multiple lights. • Check ground continuity: Bare copper or green wire must connect to fixture ground screw *and* to the box (if metal) or grounding pigtail (if plastic box with grounding clip). • If replacing a fixture (e.g., upgrading to a modern ceiling light replacement), match wire gauge: 14 AWG for 15A circuits, 12 AWG for 20A. Never mix gauges under one wire nut.
H2: Step 5 — Rule Out Panel & Circuit Issues
If multiple lights on the same circuit flicker together—or if resetting the breaker doesn’t hold—look upstream.
• Open your service panel (only if comfortable and trained). Look for signs: scorch marks around breakers, warm breakers, or breakers that feel loose in the rail. • Test breaker tension: A properly seated 15A or 20A breaker should snap firmly into place. If it wobbles, the bus bar may be worn—call an electrician. • Check neutral bar: All white wires must be tightly secured. A loose neutral causes voltage swings that make LEDs strobe—even if the breaker hasn’t tripped. • Load balance: In split-phase panels, heavy 240V loads (e.g., EV chargers, heat pumps) can unbalance legs if improperly distributed. Use a clamp meter to measure current on each leg (target <10A difference). This is advanced—leave to pros unless you own a calibrated meter and understand NEC Article 210.11.
H2: When to Reset a Tripped Breaker (Safely)
Tripped breakers cause total outage—not flicker—but repeated tripping *can* precede flickering as insulation degrades or contacts wear. To reset:
1. Unplug or turn off all devices on the affected circuit. 2. Flip the breaker fully OFF (past the tripped position), then ON. 3. If it trips again immediately: short circuit or ground fault. Do not retry. 4. If it holds, add load gradually: plug in one device, wait 30 seconds, then next. If flicker returns with a specific device (e.g., laser printer), that device is likely faulty or drawing surge current.
Note: AFCI/GFCI breakers trip on arc faults or ground leakage—not overloads. If yours trips repeatedly with no obvious cause, inspect outlets and switches downstream for damaged insulation or moisture ingress.
H2: Upgrading Smart Switches & Dimmers—What You Need to Know
Smart switch wiring isn’t harder—it’s *different*. Most require:
• Line (hot in) • Load (hot to light) • Neutral (for internal electronics) • Ground (mandatory)
No neutral? You’ll need a switch that harvests power through the load (e.g., Lutron Caséta PD-6ANS) or retrofit a neutral—*not* a DIY project unless you’re rewiring the entire switch loop.
Dimmer switch wiring adds complexity: mismatched phase-control types (leading-edge vs. trailing-edge) cause audible buzz and premature LED failure. Leading-edge (TRIAC) dimmers work with incandescents and some LEDs—but not all. Trailing-edge (ELV) dimmers are quieter and better for LEDs but demand compatible transformers/drivers.
Always verify compatibility *before* purchase. Lutron’s online tool lists >1,200 tested LED models (Updated: April 2026). Don’t guess.
H2: LED节能灯升级 Done Right
LED upgrades save ~75% energy versus incandescents—but only if done correctly. Avoid these pitfalls:
• Using 120V line-voltage bulbs in 12V low-voltage track or landscape systems (requires matching transformer). • Ignoring CRI (Color Rendering Index): <80 CRI makes skin tones look flat; aim for ≥90 for kitchens and bathrooms. • Skipping thermal management: In recessed IC-rated housings, use only LEDs rated for “Insulated Contact” and pair with airflow-rated trims.
For renters: Stick with plug-in LED lamps or temporary adhesive-backed LED strips (low-voltage lamp strip installation). Avoid hardwired changes without landlord approval.
H2: What NOT to Do (The Landlord & Code Trap)
• Don’t bypass a GFCI or AFCI outlet to “stop flickering.” It’s illegal and dangerous. Those devices exist because your bathroom or kitchen circuit *needs* ground-fault protection.
• Don’t replace a standard switch with a dimmer on a circuit feeding smoke alarms, refrigerators, or sump pumps. NEC 210.12 prohibits dimming life-safety or critical-load circuits.
• Don’t use plug adapters or extension cords as permanent fixes. UL 498 and NEC 400.8 prohibit cord-and-plug connections for fixed lighting—except listed portable luminaires.
• Don’t ignore labeling. If your panel isn’t clearly marked, spend $12 on a label maker and map each circuit *before* troubleshooting. It saves hours later.
H2: Quick-Reference Troubleshooting Table
| Issue | Likely Cause | DIY Fix | When to Call Pro |
|---|---|---|---|
| Flicker only at low dimmer setting | Under-loaded dimmer or non-dimmable LED | Swap bulb for dimmable model; verify min-load spec | If dimmer is >10 years old and flicker persists after bulb swap |
| Flicker across multiple rooms | Loose main neutral or utility voltage fluctuation | Check panel neutral bar tightness (power OFF) | If neutral feels loose or shows corrosion—immediate pro call |
| Fixture buzzes + flickers | Failing magnetic transformer or incompatible ELV dimmer | Replace transformer with LED-rated electronic type | If buzzing comes from inside wall or ceiling cavity |
| Light flickers only when HVAC starts | Circuit overload or shared neutral | Move HVAC to dedicated circuit (pro job) | Any time motor load exceeds 50% of circuit rating |
H2: Final Safety Checklist Before You Begin
• Power OFF at breaker—verified with tester *at point of work*. • Use insulated tools rated for 1000V CAT II (e.g., Klein Tools 70023). • Wear safety glasses—wire nuts can pop and send shards flying. • Keep one hand in your pocket when probing live panels (reduces shock path across chest). • Never work alone if climbing ladders near ceilings or panels. • Document everything: take photos before disconnecting wires. Label wires with tape if needed.
H2: Where to Go Next
You’ve now diagnosed and resolved the most common causes of intermittent flickering—without touching a utility meter or opening a main lug. For full wiring diagrams, NEC-compliant junction box fill calculations, and step-by-step video walkthroughs for ceiling light replacement or smart switch wiring, visit our complete setup guide. All resources reflect 2023 NEC updates and include printable checklists (Updated: April 2026).