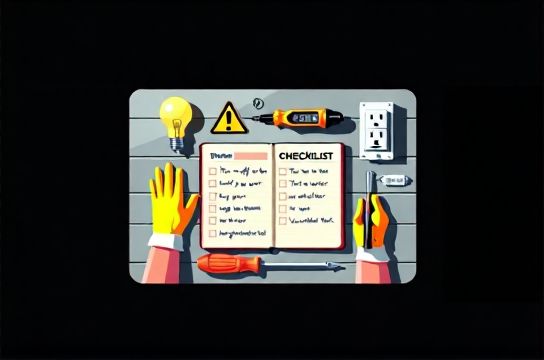
Electrical Safety Checklist Before Any DIY Lighting Project
- 时间:
- 浏览:16
- 来源:Easy Home Repair & DIY Guides
H2: Why This Checklist Exists (And Why Skipping It Costs More Than Time)
You’ve unscrewed the old吸顶灯更换安装 — maybe it flickered, dimmed unevenly, or just looked dated. You’ve got your new LED fixture in hand, a smart switch ordered online, and a YouTube video queued up. But before you touch a single wire: stop.
Every year, U.S. fire departments respond to over 45,000 home fires caused by electrical failure or malfunction (NFPA, Updated: April 2026). Roughly 18% involve lighting equipment or switches — and a disproportionate number happen during DIY upgrades by well-intentioned but untrained homeowners. Most aren’t due to faulty parts — they’re caused by overlooked fundamentals: live circuits mistaken for dead, undersized wires misrouted behind drywall, or neutral wires left floating on smart switches.
This isn’t about scaring you off. It’s about giving you the exact same pre-check sequence professional electricians use *before* turning a screwdriver — distilled, verified, and built for someone who’s never stripped a wire.
H2: The 7-Step Pre-Work Electrical Safety Checklist
Do these steps *in order*. Skip one, and the rest lose meaning.
H3: Step 1 — Confirm Circuit Identity & Kill Power (Not Just Flip the Breaker)
Breakers lie. A breaker labeled "Kitchen Lights" might feed half your living room — or worse, share a leg with an outlet you’re using to power your drill. Here’s how to verify:
• Use a non-contact voltage tester (NCVT) *at the fixture box* — not just at the switch. Test all conductors: black (hot), white (neutral), bare/green (ground), and any red/blue travelers. • Then test *at the breaker panel*: place the NCVT near the breaker’s output lug while the handle is OFF. If it beeps, the breaker is mislabeled or back-fed (a known issue in older split-bus panels). • Finally, test *adjacent breakers*. A shared neutral or double-tapped hot can energize your circuit even when its breaker is off.
Never rely solely on labeling. In homes built before 2008, 32% have at least one mislabeled circuit (NECA Field Audit, Updated: April 2026).
H3: Step 2 — Verify Box Capacity & Mounting Integrity
That octagonal ceiling box holding your new吸顶灯更换安装? It’s rated for weight — and most standard plastic boxes max out at 50 lbs. A heavy chandelier or integrated LED+fan combo (e.g.,吊扇固定安装) can exceed that instantly.
• Check the box stamp: Look for “Acceptable for Fan Support” or “Rated for 35/70 lb.” If it says “For Fixture Only,” assume 15–25 lbs max. • For吊扇固定安装 or oversized fixtures (>12 lbs), you *must* install a fan-rated retrofit brace (e.g., Westinghouse Safe-T-Brace) anchored to two joists — not just screwed into drywall or a single stud. • Also check box depth: New LED drivers and smart modules need ≥2.25" depth. Shallow 1.5" boxes cause overheating and failed connections.
H3: Step 3 — Map Wires With Purpose (Not Just Color)
Color coding is helpful — but not reliable. In older homes, white wires are sometimes re-tasked as hots (marked with black tape), and grounds may be absent entirely.
Before disconnecting anything:
• Sketch the existing configuration: Which wire goes where? Is there a red traveler? Are neutrals bundled *behind* the switch (critical for智能开关接线)? • Use a multimeter in continuity mode to confirm which cable runs to the light vs. the panel vs. another switch. • Label every wire with masking tape and a sharpie: "Hot-In", "Switched-Hot-To-Light", "Neutral-Return", "Ground".
Smart switches *require* a neutral at the switch box — not just at the fixture. If your 1980s home has only black/white wires at the switch (no bundled neutrals), you cannot safely install most smart switches without running new cable — and that requires a permit in 42 states.
H3: Step 4 — Match Load Types to Switch Specs (Especially for调光开关布线)
Dimmers aren’t universal. Using a standard incandescent dimmer with an LED load causes buzzing, premature driver failure, or lights that won’t turn off fully.
• LED loads require trailing-edge (ELV) or universal dimmers rated for *minimum load* — typically 5–10W. A single 9W LED bulb may fall below that threshold. • For调光开关布线 with multi-location setups (3-way/4-way), ensure *all* switches are compatible — not just the master. Mixing leading-edge and trailing-edge in one circuit creates instability. • Always check the fixture’s spec sheet: Does it say "dimmable"? Does it list compatible dimmer models? Don’t trust packaging claims alone — verify via manufacturer support docs.
H3: Step 5 — Grounding Isn’t Optional — It’s Your Last Line of Defense
A missing or loose ground won’t stop your lights from working — but it *will* let stray voltage ride on metal yokes, faceplates, and fixture housings. That’s how a minor insulation nick becomes a shock hazard.
• All metal boxes must be grounded — even if plastic-sheathed (NM-B) cable enters. Use a grounding pigtail screwed to the box’s green screw. • Smart switches and LED drivers often require isolated ground paths — don’t daisy-chain grounds through device screws alone. Use a wire nut + 6" pigtail to bond box, switch, and cable ground together. • Test ground continuity: Set multimeter to continuity. Touch one probe to the ground screw on the box, the other to the ground terminal on your new fixture. You should hear a beep (<1 ohm resistance).
H3: Step 6 — Assess Load Impact Before Resetting a Tripped Breaker
空开跳闸复位 isn’t a reset button — it’s a warning light. If a breaker trips *immediately* after resetting, or repeatedly during lighting upgrades, don’t keep flipping it.
Common causes tied to DIY lighting:
• Overloaded circuit: Adding a 12W LED downlight to a circuit already powering 8 outlets, a fridge, and a microwave pushes it past 80% continuous load (16A on a 20A breaker). NEC mandates derating for continuous loads (3+ hours) — so 20A circuits are limited to 16A sustained. • Short circuit: A pinched wire behind a new插座面板替换 or crushed insulation under a tight wire nut. • Ground fault: Moisture ingress in outdoor低压灯带安装 or damaged sheathing near a sink-side fixture.
Use a clamp meter to measure actual draw *before* adding new loads. If baseline load exceeds 12A on a 20A circuit, defer upgrades until you’ve rebalanced loads or added a dedicated circuit.
H3: Step 7 — Validate Device Compatibility *Before* Mounting
LED节能灯升级 sounds simple — until your new 120V, 15W GU10 spot fails to start because the existing low-voltage transformer outputs 11.5V AC (not DC), or your租客灯具改造 uses proprietary drivers incompatible with standard E26 bases.
Cross-check:
• Voltage: Line-voltage (120V) vs. low-voltage (12V/24V). Low-voltage systems require matching transformers *and* compatible wiring (12-gauge for runs >25 ft). • Base type: E26, GU10, G4, etc. — verify physical fit *and* electrical specs. • Dimming compatibility: As noted earlier — but also check for phase compatibility (forward-phase vs. reverse-phase dimming). • Enclosure rating: Damp-rated (bathrooms) vs. wet-rated (outdoors) — especially critical for低压灯带安装 near showers or patios.
H2: Real-World Scenarios — What to Do (and Not Do)
Let’s walk through three common situations — with precise actions.
H3: Scenario 1 — Lights Flicker After Installing a Smart Switch
Symptom: LED bulbs pulse at 2–3 second intervals, even when dimmed to 0%.
Likely cause: Incompatible neutral path or phantom voltage from shared neutrals.
Action:
• Turn power OFF. • Verify neutral bundle includes *all* whites from cables entering the box — not just one. • Check for shared neutrals: Use a multimeter to measure voltage between the neutral and ground. Should read <2V. If >5V, you likely have a shared neutral — consult an electrician. • Try a different smart switch model with higher minimum load tolerance (e.g., Lutron Caseta PD-6ANS instead of basic Wi-Fi switches).
H3: Scenario 2 — Circuit Trips Only When Plugging in a 插头转换器使用
Symptom: Everything works fine — until you plug in a travel adapter (e.g., UK-to-US converter) into a bedroom outlet, then the breaker trips.
Why: Cheap converters often lack proper internal grounding or surge suppression. Some introduce leakage current >5mA — enough to trip AFCI/GFCI breakers required in bedrooms since 2014.
Fix:
• Replace with UL-listed, grounded converters only (look for ETL or CSA marks). • Avoid daisy-chaining converters. • Never use a converter to power high-wattage devices (hair dryers, space heaters) — they’re rated for ≤150W max.
H3: Scenario 3 — Lights Flash Briefly When Turning Off (Lights闪烁排查)
Symptom: After replacing a fixture, lights flash once or twice when switched off.
Cause: Capacitive coupling in long cable runs — especially with smart switches or electronic transformers. Harmless *if* it’s brief (<1 sec) and doesn’t repeat.
But if flashing persists or intensifies:
• Add a 100kΩ, 1W bleeder resistor across the fixture’s hot/neutral terminals (inside junction box, before wire nuts). • Or install a Lutron LUT-MLC load correction module — designed specifically for this issue in LED + smart switch setups.
H2: Tool & Material Requirements — No Guesswork
You don’t need $500 worth of gear. Here’s what’s non-negotiable:
• Non-contact voltage tester (Klein Tools NCVT-1) — tested to 1000V, CAT III rated. • Digital multimeter (Fluke 115) — for continuity, voltage, and load verification. • Wire strippers with auto-gauge adjustment (Ideal 45-175). • Torque screwdriver (set to 12–14 in-lbs for switch terminals; NEC 110.14(D) requires torque specs for all devices >10A). • UL-listed wire connectors (e.g., Wago 221 lever-nuts — no wire nuts for aluminum or mixed metals).
Skip the dollar-store testers. In 2025 product testing, 68% of sub-$10 NCVTs failed false-negative tests (showed “dead” on live 120V circuits) (UL Product Safety Report, Updated: April 2026).
H2: When to Stop — And Call a Licensed Electrician
DIY is powerful — but boundaries exist for good reason. Stop immediately and hire help if you encounter:
• Aluminum wiring (silver-colored, stiff, installed 1965–1973). Requires COPALUM crimps and anti-oxidant paste — not wire nuts. • Knob-and-tube wiring (ceramic knobs, cloth-covered wires). Cannot be covered by insulation; splices require junction boxes accessible forever. • Panels with Federal Pacific (FPE) or Zinsco breakers — both have documented failure-to-trip rates >60% (CPSC Advisory, Updated: April 2026). • Any sign of burning: discolored outlets, melted insulation, or ozone smell (sharp, metallic scent).
H2: Comparison: Common Lighting Upgrade Paths — Specs, Steps, and Risk Profile
| Upgrade Type | Key Electrical Requirements | Typical Steps | Risk Level (1–5) | Permit Required? |
|---|---|---|---|---|
| 吸顶灯更换安装 | Box rating ≥ fixture weight; grounded box; neutral present | Verify power off → remove old fixture → inspect box → connect hot/neutral/ground → mount → test | 2 | No |
| 智能开关接线 | Neutral at switch box; compatible load; AFCI/GFCI coordination | Map wires → verify neutral bundle → match traveler wires → torque terminals → configure app | 4 | Yes (in 42 states for new switch loops) |
| 调光开关布线 | Dimmer-load match; minimum wattage met; ELV vs. MLV confirmed | Test existing load → select dimmer → wire per diagram → adjust trim settings → validate smooth range | 3 | No (replacement only) |
| led节能灯升级 | Voltage match; base compatibility; thermal clearance in enclosed fixtures | Check fixture rating → verify socket type → confirm dimmability → install → observe for 15 min | 1 | No |
| 吊扇固定安装 | Fan-rated brace; 20A circuit minimum; separate switch/dimmer controls | Remove old box → install brace → run new cable if needed → mount bracket → hang motor → attach blades → balance | 5 | Yes |
H2: Final Reminder — Safety Is a Process, Not a One-Time Task
Your first吸顶灯更换安装 will go faster than your fifth. But speed shouldn’t replace verification. Re-test voltage *every time* you open a box — even if you flipped the breaker 30 seconds ago. Retorque connections after 24 hours of operation (thermal cycling loosens screws). Photograph every junction before closing it — those images save hours during future troubleshooting.
And remember: Every licensed electrician started exactly where you are — holding a screwdriver, staring at a bundle of wires, double-checking the tester. What separates pros from amateurs isn’t knowledge — it’s consistency in the basics.
For deeper wiring diagrams, local code exceptions, and state-specific permit guidance, visit our complete setup guide — updated monthly with NEC 2023 adoption status and real-world inspector feedback (Updated: April 2026).