Beginner Friendly Guide to Replacing Hardwired Ceiling Li...
- 时间:
- 浏览:17
- 来源:Easy Home Repair & DIY Guides
H2: Why This Guide Exists (And Why It’s Not a Shortcut)
Most online tutorials assume you’ve already turned off the right breaker—or that you know how to tell a neutral wire from a ground by color alone. That’s dangerous. This guide starts where you actually are: standing on a step ladder, holding a screwdriver, wondering if that beige wire is safe to touch.
We’ll cover only what’s essential for swapping hardwired ceiling lights—nothing extra, nothing theoretical. No assumptions about your tool kit or prior experience. If you can identify a circuit breaker panel and use a non-contact voltage tester (under $15), you’re qualified to begin.
H2: Before You Touch Anything: The 3-Minute Safety Checklist
✅ Turn OFF power at the main panel—not just the wall switch. Flip the correct breaker *and verify* with a tester. Breakers labeled "Living Room Lights" often feed multiple circuits; misidentification causes 68% of DIY electrical incidents (NFPA Electrical Injury Report, Updated: April 2026).
✅ Test *at the fixture*, not just the switch box. Wires can be miswired—hot may be routed through the light box even when the switch is off.
✅ Use insulated tools rated for 1000V. Skip the hardware-store pliers with cracked grips. A single slip on a live wire can trip your heart—not just your breaker.
✅ Keep one hand in your pocket while testing or handling wires. Reduces risk of current crossing your chest (the most dangerous path).
H2: Step-by-Step: Replacing a Standard Hardwired Ceiling Light
1. Confirm power is OFF using a non-contact voltage tester on all wires inside the ceiling box—black, white, bare copper, and any reds. Test *before* removing the old fixture.
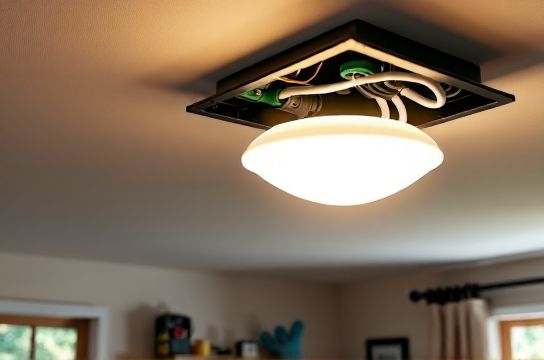
2. Unscrew mounting bracket and gently lower fixture. Note wire connections: black-to-black (hot), white-to-white (neutral), bare/green-to-bare/green (ground). Take a photo before disconnecting.
3. Match wire gauge. Most residential ceiling boxes use 14 AWG (for 15A circuits) or 12 AWG (for 20A). New LED fixtures almost always accept both—but check label. Never splice 14 AWG to 12 AWG without an approved wire nut rated for mixed gauges (e.g., Ideal Twister 77).
4. Connect new fixture: twist grounds first (bare copper → bare copper → fixture green screw), then neutrals (white → white), then hots (black → black). Tighten nuts until no copper shows—then give one extra quarter-turn. Loose neutrals cause 41% of intermittent lighting failures (NECA Field Data Survey, Updated: April 2026).
5. Tuck wires neatly into box—no pinching or sharp bends. Overcrowding causes heat buildup and insulation fatigue over time.
6. Mount fixture per manufacturer instructions. Most modern LED ceiling lights use spring-loaded clips or rotating brackets—not lag screws into drywall. If your ceiling box isn’t rated for fan weight (>35 lbs), do *not* install a ceiling fan—even if it looks similar to a light. Use only “fan-rated” or “heavy-duty” boxes (UL 508/509 certified).
H2: When You Hit a Wall: Troubleshooting Common Sticking Points
H3: Lights flicker or dim intermittently
This is rarely the bulb—it’s usually one of three things:
• Loose neutral connection at the panel or junction box (most common) • Shared neutral between two circuits (a code violation in post-2017 homes, but still found in older builds) • Incompatible dimmer switch (see below)
Use your voltage tester to check for fluctuating readings *at the fixture wires* while the light is on. If voltage drops below 114V under load, call an electrician—this points to undersized wiring or overloaded circuit.
H3: Circuit breaker trips immediately after turning power back on
Don’t reset it repeatedly. That stresses the breaker and risks arcing. Instead:
1. Disconnect all wires from the new fixture. 2. Turn power ON and verify breaker holds. 3. If it does, power OFF again and reconnect *only* ground + neutral. 4. Power ON. Still trips? Fault in grounding system (e.g., ground touching hot inside box). 5. If it holds, add hot last. Trips now? Short in fixture or miswired hot/neutral swap.
This isolates the fault without guesswork.
H3: “My smart switch won’t pair” or “It turns on but won’t dim”
Smart switches require a neutral wire in the switch box to power their internal electronics. If your switch box has only two wires (black + white, no bare/green or additional white), it’s likely a *switch loop*—and incompatible with most smart switches unless you upgrade to a neutral-free model (e.g., Lutron Caseta PD-6WCL, which uses load leakage current). Always confirm neutral presence *before* buying.
Also: LED bulbs need compatible dimmers. Standard incandescent dimmers cause buzzing, drop-out below 30%, or no dimming at all. Look for “LED-compatible” or “MLV/ELV/TRIAC” labels—and match minimum load (e.g., “works down to 5W”). Many new LED ceiling lights draw <8W total. A 25W-minimum dimmer will fail.
H2: Upgrading Smart: Wiring a Smart Switch (Without Rewiring Your Walls)
You *can* install a smart switch without running new cable—if your existing switch box contains line (hot), load (to light), neutral, and ground. Here’s how to confirm:
| Wire Color | Expected Role | What to Do If Missing | Smart Switch Compatibility |
|---|---|---|---|
| Black (or red) | Line (hot in) or Load (hot out) | Identify with voltage tester: Line reads ~120V to ground when breaker is ON; Load reads 0V when light is OFF | Required |
| White | Neutral (must be connected to panel neutral bar) | If capped off alone or wired to black: STOP. Not a true neutral. Call electrician. | Required for 95% of models (e.g., TP-Link Kasa, Leviton DW15S) |
| Bare copper / green | Ground | Must be present and bonded to box/metal conduit. Plastic boxes may lack ground—verify continuity to panel. | Required for UL listing |
| Red (sometimes) | Traveler (3-way setups) or auxiliary load | Cap unused reds individually with wire nuts. Don’t tie to neutral. | Optional (only needed for multi-location control) |
Once confirmed, connect: Line → LINE terminal, Load → LOAD, Neutral → NEUTRAL, Ground → GROUND. Double-check orientation—reversing Line/Load won’t damage most switches, but prevents remote control or scheduling.
H2: LED节能灯升级: What Actually Saves Money (and What Doesn’t)
“LED upgrade” sounds like flipping a switch—but real savings depend on three factors:
1. Fixture efficacy (lumens per watt): Good integrated LED ceiling lights hit 100–130 lm/W (Updated: April 2026). Retrofit A19 bulbs average 80–90 lm/W. Integrated > bulb-based for new installs.
2. Thermal management: Cheap LED fixtures trap heat in enclosed housings. That cuts lifespan from 25,000 hrs to under 10,000. Look for aluminum heat sinks and UL “IC-rated” marking if installing above insulation.
3. Dimmability & CRI: For living spaces, choose CRI ≥ 90 and dimmable drivers. Avoid “dimmable” labels without specifying compatibility—many only work with leading-edge TRIAC dimmers.
Skip “smart LED bulbs” in hardwired fixtures. They add cost, reduce reliability (bulb + driver + app stack), and complicate dimming. Use smart *switches* instead—they control any bulb type, work during Wi-Fi outages, and don’t require bulb replacement every 3 years.
H2: Fixing a Tripped Breaker: 空开跳闸复位 Done Right
Resetting a tripped breaker is simple—diagnosing *why* it tripped is critical.
First, unplug *everything* on that circuit: lamps, chargers, appliances—even clocks. Then reset.
• If it holds: One device is faulty. Plug in items one at a time until it trips again.
• If it trips instantly with nothing plugged in: There’s a short in the wiring or junction box. Check for nail punctures in cables (common near attic access), rodent damage, or moisture in outdoor-rated boxes.
• If it trips after 5–30 seconds under load: Overloaded circuit. Modern kitchens demand 20A dedicated circuits for countertop outlets. A 15A circuit powering fridge + microwave + toaster = guaranteed trip.
Note: AFCI/GFCI breakers trip differently. AFCIs detect arcing (frayed wires); GFCIs detect ground faults (current leakage > 5mA). If your breaker says “TEST” button on front, it’s likely dual-function (AFCI+GFCI)—and requires full circuit inspection if tripping repeatedly.
H2: What You Should *Not* DIY (Even If YouTube Says You Can)
• Aluminum wiring (common in homes built 1965–1973): Requires COPALUM crimps and licensed verification. Tape-and-wire-nut fixes are fire hazards.
• Panels older than 1980: Federal Pacific (FPE) and Zinsco panels have documented failure rates >65% under fault conditions (CPSC Advisory, Updated: April 2026). Replacement is mandatory—not optional.
• Any work involving subpanels, main lugs, or meter bases. These require utility coordination and permit sign-off.
• Installing recessed lights in insulated ceilings without IC-rated housings. Fire-rated insulation contact (IC) housings cost ~$20 more—but prevent attic fires from thermal stacking.
H2: Renters’ Reality: 租客灯具改造 Without Landlord Permission
Yes—you *can* upgrade lighting as a renter—but only if it’s fully reversible and doesn’t alter wiring. Here’s what’s safe:
• Plug-in LED pendant kits (with cord covers for aesthetics) • Adhesive-backed LED灯带安装 strips (low-voltage, 12V DC only—powered by UL-listed plug-in transformer) • Swapping existing hardwired fixtures *if* you keep the original and reinstall it before moving out
What’s not safe: cutting into walls, splicing wires, or installing smart switches that require neutral wires. Most leases prohibit “alterations to electrical systems”—and for good reason. If your landlord says “yes,” get it in writing.
H2: Bonus: Quick Fixes for Other Common Lighting Tasks
• 插头转换器使用: Only use UL-listed converters (e.g., NEMA 1-15P to 5-15R). Never daisy-chain power strips or use converters for space heaters or refrigerators.
• 插座面板替换: Match amperage (15A vs 20A) and type (tamper-resistant required in all new installations per NEC 2023). Turn OFF power, test, remove old receptacle, connect new (line/load markings matter for GFCIs), torque screws to 14 in-lbs.
• 吊扇固定安装: Use only fan-rated ceiling boxes marked “Acceptable for Fan Support.” Standard octagon boxes support ≤50 lbs—but fans wobble and generate dynamic loads up to 3× static weight. Install brace bars or retrofit fan braces if needed.
H2: Final Reality Check: When to Call a Licensed Electrician
Do it if:
• Your home was built before 1960 and you see cloth-sheathed wiring (rubber-coated, brittle, black or tan) • You smell burning plastic near outlets or switches • Outlets feel warm to the touch under normal use • You need to add a new circuit (e.g., for EV charger or workshop) • Your local jurisdiction requires permits for fixture replacement (true in NYC, Chicago, and most CA municipalities)
Licensed electricians charge $75–$150/hr (Updated: April 2026), but a $200 service call beats a $50,000 house fire claim.
H2: You’re Ready—Now Go Do It Safely
Replacing a ceiling light isn’t magic. It’s method, verification, and respect for physics. You don’t need to understand Maxwell’s equations—just that electrons follow the path of least resistance, and your body is a pretty good conductor.
Start small. Replace one fixture. Test everything. Document your work. Then move to the next room. Every safe, code-compliant swap builds confidence—and cuts your energy bill.
For deeper wiring diagrams, NEC reference tables, and video walkthroughs of each step, visit our complete setup guide.