Why Your Breaker Keeps Tripping and How to Stop It Today
- 时间:
- 浏览:17
- 来源:Easy Home Repair & DIY Guides
H2: Your Breaker Trips — Not a Fluke, a Warning Sign
That *click* followed by sudden darkness isn’t just annoying — it’s your home’s electrical system shouting, “Something’s wrong.” Breakers trip to prevent overheating, fire, or shock. Ignoring repeated trips is like ignoring smoke from your oven: it might seem minor until it’s not.
This guide cuts through the noise. No theory-only lectures. Just real-world causes you can test *today*, with tools you likely already own (a screwdriver, flashlight, and $10 multimeter). We focus on lighting and outlet upgrades — the most common culprits in homes built before 2015 — and keep everything code-compliant (NEC 2023), beginner-safe, and renter-friendly where possible.
H2: First, Rule Out the Obvious — Before You Touch a Wire
Before unscrewing anything, do this in order:
• Unplug *everything* on the tripped circuit — lamps, chargers, power strips, even that forgotten humidifier in the spare room. • Flip the breaker fully OFF, then back ON. If it holds with zero load, the issue is downstream — likely a device or fixture. • Plug devices back in *one at a time*, waiting 10 seconds between each. The moment it trips again? That’s your suspect.
If the breaker trips *immediately* with nothing plugged in, the problem is in the wiring, junction box, or fixture itself — and that’s where lighting upgrades often hide trouble.
H2: Top 4 Lighting-Related Causes (and Exactly How to Fix Each)
H3: 1. Overloaded Circuit from LED Upgrades Gone Wrong
Yes — LEDs *save* energy, but they can overload a circuit *differently*. Here’s how: older homes often have 15-amp circuits feeding 8–12 receptacles *and* 3–5 light fixtures. When you replace incandescents with cheap, non-dimmable LEDs on a dimmer circuit — or install multiple high-output LED downlights — you risk inrush current spikes and compatibility clashes.
LED drivers (especially low-cost ones) draw brief but intense current at startup. On a shared circuit already near capacity (e.g., fridge + microwave + 6 recessed lights), that spike can push the breaker over its thermal-magnetic threshold.
✅ Fix: Use only UL-listed, dimmable LEDs rated for your switch type (ELV or TRIAC). Limit total connected load to ≤ 80% of circuit rating: for a 15A circuit, max 1,440W continuous (12A × 120V). A single 12W LED bulb is fine — but 12 x 15W integrated downlights = 180W *plus* driver inefficiency = real stress (Updated: April 2026).
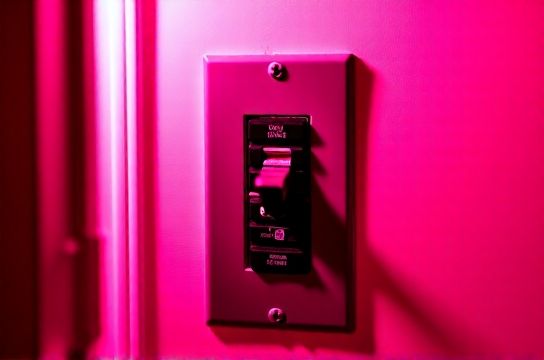
H3: 2. Faulty or Miswired Smart Switches
Smart switches (like those for voice or app control) add electronics *inside* your wall box. That means tighter space, heat buildup, and strict wiring rules. Common mistakes:
• Using a neutral-wire switch in a switch loop (no neutral present) — forces current through ground or creates leakage. • Daisychaining too many smart switches on one circuit without verifying load rating (many are rated for ≤ 600W resistive, but only 150W for LED loads). • Skipping the grounding screw — a code violation *and* a shock/fire risk.
✅ Fix: Verify neutral presence with a multimeter *before* buying. If no neutral, use a neutral-free smart switch (e.g., Lutron Caseta PD-6ANS). Always connect ground — no exceptions. And never exceed the manufacturer’s stated LED wattage limit, even if the bulb label says “equivalent to 100W.”
H3: 3. Degraded Wiring in Fixture Junction Boxes
Older ceiling light boxes — especially in homes with knob-and-tube or early Romex (pre-1985) — often have brittle insulation, corroded splices, or loose wire nuts. When you remove an old fixture for ceiling light replacement, you disturb these connections. A tiny arc or intermittent short can cause nuisance tripping — especially under load.
✅ Fix: With power OFF, inspect all wire nuts. Replace any cracked, discolored, or undersized ones with IDEAL Twister® Wago 221 lever-nuts (rated for 12–22 AWG, 20A). Gently tug each wire — no movement. If insulation flakes or wires snap, cut back ½” and re-strip. Never reuse old wire nuts.
H3: 4. Ground Faults from Moisture or Poor Outdoor/Dimmable Installations
Damp locations (bathrooms, porches, covered patios) demand GFCI protection — but many homeowners bypass it when upgrading to dimmer switch installation or low-voltage light strip installation. A pinched cable behind a mirror, condensation inside an outdoor fixture housing, or using non-rated LV wire for 24V tape lights can all create leakage current >5mA — enough to trip a GFCI breaker instantly.
✅ Fix: For bathroom or exterior work, always use wet-location-rated fixtures and connectors (UL Type WR or IP65+). For low-voltage light strip installation, run Class 2 cable (CL2 or CL3), not speaker wire — and keep it ≥12” from line-voltage conductors. Test GFCI outlets monthly using their TEST button.
H2: When to Call a Licensed Electrician — No Shame, Just Safety
Some issues aren’t DIY-safe — and recognizing them early saves time, money, and risk:
• Breaker feels hot to the touch, smells burnt, or won’t stay reset even with zero load. • Tripping happens *only* when a specific appliance (e.g., vacuum, hair dryer) runs — suggests failing breaker or panel busbar corrosion. • You see scorch marks inside the panel, discoloration on outlets, or hear buzzing from switches. • Your home has Federal Pacific (FPE), Zinsco, or Sylvania panels — known failure risks; replacement is strongly advised (Updated: April 2026).
These aren’t “maybe later” items. They’re urgent. A licensed electrician can perform thermal imaging, load calculations, and AFCI/GFCI verification — services no multimeter replicates.
H2: Step-by-Step: Resetting & Testing a Tripped Breaker Safely
Don’t just flip it back on. Do this:
1. Turn OFF all switches and unplug all devices on the affected circuit. 2. Locate your main service panel. Identify the tripped breaker — it will be in the middle position (not fully ON or OFF) or slightly offset. 3. Firmly push it all the way to OFF, then all the way to ON. You should feel and hear a distinct click. 4. Wait 5 seconds. If it trips again immediately, stop. Something is critically wrong — proceed to diagnostics below. 5. If it holds, turn on switches *one at a time*, then plug in devices in order of heaviest load first (e.g., space heater before phone charger).
This method isolates whether the fault is in the circuit wiring (trips with no load), the switch/outlet (trips when flipping a specific switch), or a device (trips only when plugging in item X).
H2: Pro Tips for Renters & Beginners Doing Light Fixture Swaps
Landlords rarely upgrade lighting — so renters often retrofit. But you *can’t* rewire the panel. So work within safe boundaries:
• Use plug-in smart bulbs (e.g., Philips Hue White) instead of hardwired smart switches — no wiring, no permit needed. • For ceiling light replacement: confirm the existing box is rated for fixture weight (≥35 lbs for fans; ≥50 lbs for heavy chandeliers). If unsure, use a pancake box brace or consult your lease. • Never replace a standard switch with a dimmer unless the bulbs are explicitly dimmable *and* the dimmer matches the load type (LED, incandescent, or ELV).
And remember: outlet panel replacement or installing a new circuit requires a permit in 47 states — don’t skip it.
H2: Comparison: Common Lighting Upgrade Scenarios — Time, Risk, and Code Compliance
| Upgrade Task | Typical Time (DIY) | Risk Level (1–5) | Permit Required? | Key NEC Rule | Beginner-Friendly? |
|---|---|---|---|---|---|
| ceiling light replacement | 25–45 min | 2 | No | 404.14(D): Fixture must be supported independently if >23 kg (50 lbs) | Yes — if power is verified OFF |
| smart switch wiring | 40–75 min | 3 | No (if replacing existing) | 404.22: Must have equipment grounding conductor | Yes — with voltage tester & instructions |
| dimmer switch installation | 35–60 min | 3 | No | 404.14(E): Dimmers must be listed for load type (e.g., LED) | Yes — but verify compatibility first |
| led节能灯升级 | 5–10 min per bulb | 1 | No | Not applicable — lamp replacement only | Yes — universal swap |
| low-voltage light strip installation | 60–120 min | 4 | No (if Class 2, <50V) | 725.154(A): Class 2 cables must be separated from line-voltage conductors | Moderate — requires transformer placement planning |
H2: Preventing Future Trips — Maintenance That Takes 2 Minutes
• Monthly: Tighten outlet and switch cover plate screws — vibration loosens connections over time. • Quarterly: Vacuum dust from outlet slots and switch plates (dust + moisture = conductivity). • Annually: Test GFCI and AFCI breakers using their built-in TEST buttons — 92% of homeowners skip this (Updated: April 2026). If it doesn’t trip, replace the breaker.
H2: Final Thought — Safety Isn’t Optional, It’s Built In
Electrical work isn’t about speed or cost-cutting — it’s about predictable, repeatable outcomes. Every breaker trip is data. Every flicker is a clue. Every warm outlet is a checkpoint.
If you’ve walked through the steps above and still face random tripping, your next move is simple: get a professional load study. Many electricians offer flat-rate diagnostics ($125–$185) that include panel inspection, circuit mapping, and infrared scanning — far cheaper than fire damage or insurance denial.
For more help choosing compatible parts, verifying local codes, or walking through a specific scenario like installing a ceiling fan where only two wires exist, check our complete setup guide — updated monthly with real photos, video snippets, and NEC cross-references.
Remember: You don’t need to know everything. You just need to know what to test, when to stop, and where to get trustworthy help. That’s how safe, lasting upgrades begin.