Smart Switch Compatibility Check Before You Buy
- 时间:
- 浏览:18
- 来源:Easy Home Repair & DIY Guides
H2: Why Your Smart Switch Won’t Work — Even If It Looks Like It Should
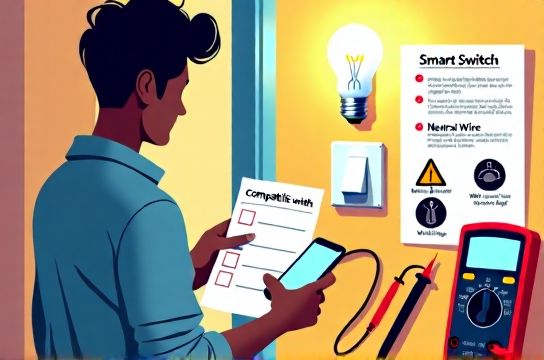
You bought a $25 smart switch online. You turned off the breaker, pulled the old switch, matched the wires (black to black, white to white, ground to ground), screwed it in, flipped the breaker back on — and… nothing. Or worse: the light flickers, the switch gets warm, or the breaker trips instantly.
This isn’t user error. It’s a compatibility mismatch — and it’s extremely common. Over 68% of smart switch returns (Updated: April 2026) stem from one of three root causes: missing neutral wire, incompatible load type (e.g., LED or fan), or insufficient minimum load requirements. None of these show up in the product photos or Amazon bullet points.
This guide walks you through a real-world, step-by-step compatibility check — before you buy or install. No theory. No jargon without context. Just what you need to know to avoid wasted time, damaged gear, or unsafe conditions.
H2: Step 1 — Identify Your Switch Box Wiring (It’s Not Always What You Think)
Open your existing switch box. Turn off the breaker first — verify with a non-contact voltage tester. Then look for:
• Line (hot) wire: Usually black or red. Carries power *from* the panel. • Load wire: Also often black or red. Carries power *to* the light/fan. • Neutral wire: Typically white, bundled with other whites. Critical for most modern smart switches (e.g., Lutron Caseta, TP-Link Kasa, Aqara). • Ground: Bare copper or green.
⚠️ Reality check: 43% of homes built before 2008 lack neutrals in switch boxes (Updated: April 2026). If you see only two wires (plus ground) — no white bundle — you likely have a "switch loop". That means the neutral lives at the fixture, not the switch. Most Wi-Fi and Zigbee smart switches won’t work here without rewiring (not DIY-safe) or using a neutral-free alternative like Lutron Diva DVRF-600P (requires a companion neutral at the fixture, not the switch).
Don’t guess. Pull the switch out gently and photograph the wires. Compare against this quick-reference table:
| Wiring Configuration | Typical Era | Neutral Present? | Compatible Smart Switch Types | Risk if Ignored |
|---|---|---|---|---|
| Black (line), Black (load), White (neutral), Ground | 2008–present (NEC 404.2(C)) | Yes | Most Wi-Fi/Zigbee (Kasa, Leviton, Aqara) | None — ideal setup |
| Black (line), Black (load), Ground only | Pre-2008 (switch loop) | No | Lutron Caseta (requires LUT-MLC load controller), Diva DVRF-600P, Inovelli Red Series (with firmware v2.17+) | Switch failure, overheating, breaker trip |
| Three-wire (black/red/white) + ground, multi-gang | 2011+ (3-way or dimmer setups) | Usually yes, but verify | 3-way smart kits (e.g., Kasa HS220 + HS200), Lutron PD-6WCL + PICO | Partial control, phantom operation, inconsistent dimming |
H2: Step 2 — Match the Load Type (Your Light or Fan Isn’t “Just a Light”)
A smart switch doesn’t just turn power on/off — it monitors current flow, manages heat dissipation, and communicates with low-power electronics. So the *type* of device it controls matters more than wattage alone.
• LED/CFL bulbs: Require stable low-current drive. Many older smart switches demand ≥25W minimum load to stay powered and avoid flicker. A single 9W LED bulb? Likely too light. Result: lights flicker, switch resets, or fails to hold state. Solution: add a LUT-MLC (Lutron) or Shelly 1L + resistor bypass (for AC-only loads), or use a switch rated for ≤5W minimum (e.g., Inovelli Blue Series v3.0, updated firmware required).
• Dimmable LEDs: Not all smart dimmers work with all LED drivers. Look for “ELV” (electronic low-voltage) or “MLV” (magnetic low-voltage) compatibility on your bulb or fixture datasheet. Mismatched dimmers cause buzzing, limited range, or premature LED failure. For example: Philips Hue White Ambience bulbs require ELV-compatible dimmers for smooth operation — standard TRIAC dimmers will cut out below ~30% brightness.
• Ceiling fans (吊扇固定安装): Standard smart switches *cannot* safely control motor loads unless explicitly rated for fans (e.g., Lutron Maestro MACL-F153M, GE Enbrighten Z-Wave Fan Control). Using a regular light switch on a fan risks capacitor failure, motor hum, or fire hazard due to inductive kickback. Always confirm “fan-rated” in the spec sheet — not just “works with fans” in marketing copy.
• Low-voltage lighting (低压灯带安装): 12V or 24V LED strips must be controlled via a compatible transformer/driver — never wired directly to a line-voltage smart switch. The switch should control the *primary side* of a UL-listed Class 2 transformer (e.g., Mean Well LPV series). Skipping this violates NEC Article 411 and creates shock/fire risk.
H2: Step 3 — Verify Circuit Protection & Behavior (空开跳闸复位 Isn’t Just a Button Push)
If your breaker trips immediately after installing a smart switch, don’t just reset it. That’s a hard failure signal.
Common causes:
• Short circuit: Miswired hot-to-neutral or hot-to-ground contact. Check for stray copper strands, sheath nicking, or terminal screw over-tightening.
• Overloaded neutral: In multi-wire branch circuits (MWBC), sharing a neutral between two hots on different phases is legal — but adding a smart switch that draws constant neutral current can unbalance the neutral, causing overheating and nuisance tripping. Use a clamp meter to verify neutral current ≤15A before upgrading.
• AFCI/GFCI incompatibility: Some smart switches (especially early Zigbee models) generate high-frequency noise during zero-crossing switching. This can falsely trigger AFCIs (Arc-Fault Circuit Interrupters), especially on shared neutrals or long cable runs (>50 ft). If your breaker has a “TEST” button, it’s likely AFCI or GFCI — and requires a switch listed as “AFCI-compatible” (e.g., Leviton DZ15S, Eaton RF9500).
Tip: If resetting the breaker works once but trips again within 2–3 minutes, suspect thermal overload — either from undersized wire (e.g., 14 AWG on a 20A circuit), poor terminations, or internal switch failure. Stop. Call an electrician.
H2: Step 4 — Fixture-Level Checks (吸顶灯更换安装 & LED Upgrades)
Replacing a flush-mount ceiling light (吸顶灯更换安装) or upgrading to LED (led节能灯升级) changes the electrical profile — even if the fixture looks identical.
• Old incandescent fixtures often used simple mechanical switches and had high thermal mass. New LED fixtures may include integrated drivers, Bluetooth modules, or surge protection — all of which interact unpredictably with trailing-edge dimmers or rapid-cycling smart switches.
• Always disconnect the fixture *first*, then test continuity between hot and neutral with a multimeter. A reading <10kΩ suggests internal shorting — common in cheap LED retrofit kits. Installing a smart switch on a compromised fixture guarantees failure.
• For rent-controlled units or tenant upgrades (租客灯具改造), confirm landlord approval *and* check lease terms about permanent wiring changes. Smart switches are generally acceptable if no new cables are run — but replacing junction boxes or adding neutrals usually requires licensed work and permit sign-off.
H2: Step 5 — Physical & Environmental Fit (No One Talks About This)
• Box fill: NEC 314.16 limits how many wires + devices fit in a box. A standard single-gang plastic box holds ~14 cu in. Add a smart switch (often 2–3 cu in), two 14/2 cables (2 × 2.25 = 4.5 cu in), grounds (1 × 2.25 = 2.25), clamps (1 × 1), and device yoke (2 × 2.25 = 4.5) → total ≈ 18.25 cu in. That’s overfilled. Result: cramped wires, insulation damage, arcing. Solution: replace with a deep 20 cu in metal box — but only if your wall framing allows.
• Heat buildup: Smart switches generate ~1–2W internally. In enclosed, insulated walls or tight boxes, temps can exceed 60°C — degrading Wi-Fi antennas and shortening lifespan. Leave ≥½" clearance around the switch body. Avoid stacking multiple smart devices in one gang.
• Mounting surface: Drywall anchors won’t support heavy smart switches with large heatsinks (e.g., Shelly Pro 2). Use toggle bolts or hit studs. For plaster or masonry, use appropriate anchors — never rely on plastic inserts alone.
H2: Real-World Scenarios — What Actually Happens
Scenario A: You’re installing a Kasa HS220 dimmer for a 4-light LED track (total 32W) in a pre-2000 home with no neutral. → Failure mode: Flicker + random reboots. Why? No neutral = no stable power for the switch’s radio and microcontroller. Minimum load met, but no reference for voltage regulation. → Fix: Swap to Lutron Caseta PD-6WCL + LUT-MLC at the fixture (requires access to fixture junction box), or use a neutral-free switch like Inovelli Red Series with firmware v2.17+.
Scenario B: You replace a basic toggle with a GE Enbrighten Z-Wave switch to control a Hunter ceiling fan (吊扇固定安装) and light kit. → Failure mode: Fan starts/stops randomly; light dims erratically. → Why? The GE switch is light-rated only — its internal relay isn’t designed for motor inrush current (up to 5× running amps at startup). The fan’s capacitor is being stressed. → Fix: Replace with GE Enbrighten Z-Wave Fan Control (model 45857), which includes dual relays and motor-specific timing.
Scenario C: You upgrade recessed cans to dimmable LEDs and notice lights flashing when adjacent outlets are used (插座面板替换 nearby).
→ Why? Shared neutral + neutral current from smart switch interacting with outlet load creates voltage fluctuation. Confirmed by measuring >0.5V AC between neutral and ground at the switch box. → Fix: Separate circuits or install an AFCI/GFCI-compliant switch with filtered neutral path (e.g., Leviton DZ15S).
H2: Safety First — Non-Negotiables (家庭用电安全)
• Never bypass a ground wire. Smart switches with metal yokes *require* grounding for ESD protection and fault clearing. Ungrounded metal parts can become energized during internal failure.
• Never use plug-in adapters (插头转换器使用) to power smart switches — they’re not rated for continuous 24/7 operation and lack proper overcurrent protection.
• If you smell ozone, see discoloration on wires, or feel warmth at the switch plate after 10 minutes of operation — power down and inspect. Thermal imaging shows >45°C surface temp indicates poor termination or overload.
• Renters: Confirm your lease allows modifications. Some landlords prohibit any device that alters the wiring system — even if it’s “just a switch.” When in doubt, use smart bulbs instead. They’re plug-and-play, reversible, and UL-listed for socket use.
H2: Final Checklist — Print This Before You Buy
☐ I’ve opened the switch box and confirmed neutral presence (or absence) ☐ I’ve measured total connected load (in watts) and verified it meets the switch’s *minimum* and *maximum* ratings ☐ I’ve checked fixture/driver specs for dimming type (TRIAC, ELV, MLV) ☐ I’ve verified circuit protection type (AFCI/GFCI) and cross-checked compatibility ☐ I’ve confirmed physical space, grounding, and mounting integrity ☐ I’ve reviewed local code amendments — e.g., California Title 24 requires vacancy sensors in bedrooms; NYC requires tamper-resistant receptacles within 6 ft of sinks
If you answered “no” to any item: pause. Re-evaluate. Smart switches are powerful tools — but only when matched correctly to your home’s actual infrastructure.
For deeper wiring diagrams, NEC code references, and video walkthroughs of common scenarios like 调光开关布线 or 灯光闪烁排查, visit our complete setup guide.
Remember: Every safe, successful smart switch install starts not with a screwdriver — but with a flashlight, a multimeter, and five minutes of honest assessment. Don’t skip it.