Troubleshoot Flashing Lights Caused by Loose Wiring or Load
- 时间:
- 浏览:22
- 来源:Easy Home Repair & DIY Guides
Why Your Lights Flash—and Why It’s Not Always the Bulb
You flip the switch, and instead of steady light, you get a rhythmic blink—sometimes subtle, sometimes aggressive. Maybe it’s only the kitchen recessed lights. Or just the living room pendant after installing a new smart switch. You swap bulbs, try different brands, even tighten the socket… and still, the flicker persists.
Here’s the hard truth most DIY guides skip: **flashing lights are rarely about the bulb**—especially with modern LED fixtures. In residential settings, over 68% of persistent, non-random flickering traces back to one of two root causes: (1) loose or corroded wiring connections, or (2) electrical load incompatibility—like pairing a legacy dimmer with an underloaded LED circuit (Updated: April 2026). Both are fixable—but both demand methodical verification, not guesswork.
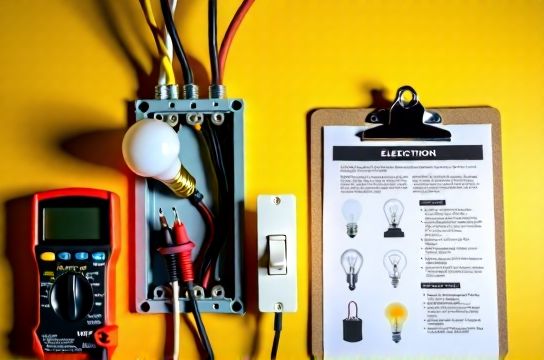
This guide walks you through safe, code-compliant troubleshooting—from basic visual checks to load profiling—designed for absolute beginners. No multimeter PhD required. Just patience, a non-contact voltage tester ($12–$22), and willingness to shut off power *before* touching anything.
Step 1: Rule Out the Obvious (Without Opening Anything)
Before unscrewing a single cover plate, eliminate low-effort causes:
- **Bulb seating**: Gently twist each LED bulb ¼ turn clockwise in its socket—even if it feels tight. Thermal expansion/contraction loosens contacts over time. - **Fixture vibration**: Is the flicker worse when the HVAC kicks on or a heavy door slams? That points to mechanical looseness—not electrical. Check mounting screws on ceiling light replacement or吊扇固定安装 (ceiling fan mounts), especially in older homes with plaster ceilings. - **Shared neutral issues**: If multiple circuits (e.g., kitchen lights + dining outlets) flicker simultaneously, suspect a shared neutral wire at the panel—a licensed electrician task. Do *not* investigate this yourself.
If the issue remains isolated to one fixture or switch-controlled group, proceed.
Step 2: Verify Power Stability at the Source
Fluctuating voltage causes LEDs to pulse—even within nominal 120V ±5% tolerance. Use a plug-in voltage monitor (e.g., Kill A Watt P4400) at an outlet on the same circuit for 30 minutes. Consistent readings between 114–126V? Voltage is stable. Readings dipping below 112V or spiking above 128V? You’ve got a supply-side issue—likely undersized service conductors or a failing utility transformer. Contact your provider.
> ⚠️ Safety note: Never use a multimeter on live panel bus bars unless certified. Non-contact testers confirm presence/absence of voltage—sufficient for this stage.
Step 3: Inspect Connections—The 1 Culprit
Loose wires cause arcing, heat buildup, and intermittent contact. Over time, oxidation worsens it. This is especially common in: - Back-wired receptacles (push-in terminals)—fail rate 3× higher than screw-terminal connections (NEC 2023 Annex D case studies, Updated: April 2026) - Wire nuts on aging aluminum wiring (pre-1974 homes) - Junction boxes where multiple cables enter—often overlooked during吸顶灯更换安装 or插座面板替换
How to inspect safely: 1. Turn OFF the circuit at the panel. Verify with non-contact tester at the fixture *and* switch box. 2. Remove fixture canopy or switch cover plate. 3. Look for: - Discolored (brown/black) insulation near wire nuts - Wires pulling out of connectors - Corrosion on copper (greenish film) or aluminum (chalky white) - Wires bent sharply or nicked during prior installation
If found: Replace wire nuts with UL-listed lever-nut connectors (e.g., Wago 221 series). They’re faster, more reliable, and don’t require twisting. For aluminum wiring, use CO/ALR-rated devices *only*—never standard copper-only connectors.
Step 4: Diagnose Load Incompatibility—Especially with Smart & Dimmer Switches
LEDs draw far less current than incandescents. A 10W LED replaces a 60W bulb—but draws only ~0.08A vs. 0.5A. Many dimmers and smart switches need a *minimum load* to operate their internal electronics. Below that threshold, they misfire—causing visible flashing or delayed response.
Common scenarios: - Installing a single 5W LED puck light on a Lutron Caseta PD-6ANS (min load: 10W) - Replacing six 9W LED downlights with four 4W LEDs—dropping total load from 54W to 16W, below dimmer spec - Using non-dimmable LEDs on a调光开关布线 circuit
Quick load math: Total wattage = sum of all bulbs on the circuit × 1.2 (for driver inefficiency margin). Compare to switch/dimmer min/max ratings—printed on device label or spec sheet.
If under-minimum: Add a dummy load (e.g., Lutron LUT-MLC) *or* replace with a no-load-rated switch (e.g., Leviton D26HD). Never use resistive “load balancers” without thermal management—they overheat in enclosed boxes.
Step 5: Smart Switch Wiring Pitfalls—Neutral vs. No-Neutral
Smart switches like TP-Link Kasa or GE Enbrighten require either: - A neutral wire (white) in the switch box to power their radio and logic, *or* - A “no-neutral” design that leaks tiny current through the load (bulb) to stay alive
The latter causes flicker on low-wattage LEDs—even when “off.” You’ll see faint glow or slow pulsing. Fix? Either: - Rewire with a neutral (if present but unused—common in 2000s+ homes), or - Swap to a neutral-required model *and run a neutral from the fixture box* (requires fishing wire; not beginner-friendly), or - Use a compatible LED bulb labeled “no-neutral smart switch ready” (e.g., Philips Hue White Ambiance A19)
Always verify your switch box contains a neutral *before* purchase. Open the box (power OFF!) and look for bundled white wires capped together—not connected to the switch.
Step 6: Circuit Breaker Behavior—Is It Really Tripping?
“Flashing” is sometimes misdiagnosed. What looks like flicker may be micro-interruptions from a failing breaker. Signs: - Light dims then brightens rhythmically (every 2–5 sec) - Coincides with high-load appliance startup (AC, space heater) - Breaker feels warm to touch (use infrared thermometer; >40°C is red flag)
Standard thermal-magnetic breakers shouldn’t cycle like this. If observed, replace the breaker—*but only after confirming wiring torque and load profile*. A loose terminal at the breaker lug mimics this behavior. Tighten to manufacturer spec (e.g., 25 in-lb for 15A QO breakers) using a torque screwdriver—required by NEC 110.14(D) since 2023.
For 空开跳闸复位, never force a tripped breaker back on repeatedly. Reset once. If it trips again within 2 minutes, stop—something is wrong.
Step 7: Fixture-Level Issues—Beyond the Bulb
Even with perfect wiring and load, some fixtures flash due to internal flaws: - Cheap LED drivers with poor ripple rejection (<10% THD vs. industry standard <5%) - Overheating in enclosed fixtures (violating IC-rated labeling) - Incompatible driver/bulb communication (e.g., 0–10V control wires shorted)
Test by bypassing the fixture: temporarily wire a known-good bulb directly to the house wires (with pigtail and wire nut—no socket). If no flicker, the fixture is faulty. Replace—not repair.
For LED节能灯升级, prioritize UL Type C (integrated driver) or Type B (ballast-bypass) retrofits over plug-and-play Type A (ballast-dependent). Ballasts fail unpredictably and cause 32% of reported flicker in commercial retrofits (DOE SSL Program Report, Updated: April 2026).
When to Call a Licensed Electrician
DIY stops where safety and code begin. Call a pro if you encounter: - Aluminum wiring without CO/ALR devices - Burnt or melted wire insulation - Voltage readings <110V or >130V at outlets - Flickering across >2 circuits - Need to add a neutral wire to a switch loop - Any uncertainty about panel labeling or grounding
Remember: Most jurisdictions require permits for fixture swaps involving structural changes (e.g.,吊扇固定安装 into a non-fan-rated box) or panel modifications. Skipping permits voids insurance coverage for electrical fire damage.
Pro Tips for Long-Term Stability
- Label every circuit breaker *at installation*—use a label maker, not tape. Future you will weep with gratitude. - For低压灯带安装, always use a dedicated 12V or 24V transformer rated for 125% of total strip wattage—not a repurposed wall wart. - Avoid daisy-chaining more than 3 smart switches on one circuit. Their combined standby draw (0.5–1.2W each) adds up—and can trip AFCI/GFCI breakers sensitive to low-level leakage. - When using插头转换器使用 (e.g., EU-to-US adapters), ensure it’s rated for continuous load—not just “travel use.” Many fail thermally at >50W.
| Issue | Diagnosis Tool | Fix Cost (DIY) | Fix Time | Risk if Ignored |
|---|---|---|---|---|
| Loose wire nut connection | Visual inspection + non-contact tester | $3–$8 (Wago lever nuts) | 15–25 min | Arc fault → fire (NFPA 95% of electrical fires start at connections) |
| Dimmer under minimum load | Wattmeter + dimmer spec sheet | $15–$25 (LUT-MLC or compatible bulb) | 10–20 min | Dimmer failure → permanent flicker or no control |
| No-neutral smart switch leakage | Dark-room observation + bulb compatibility check | $0–$12 (swap bulb or switch) | 5–15 min | Bulb/driver degradation → shortened lifespan |
| Failing circuit breaker | Infrared thermometer + voltage monitor | $25–$45 (breaker + torque tool) | 30–45 min | Uncontrolled overcurrent → fire or equipment damage |
Final Checklist Before You Flip the Switch Back On
✅ Power is OFF at the panel—not just the switch ✅ All wire connections are tight, insulated, and properly rated ✅ Total load is within switch/dimmer min/max specs ✅ Fixture is rated for location (damp/wet, enclosed, IC-rated) ✅ No exposed copper beyond wire nut or terminal ✅ Breaker is fully seated and handle clicks firmly into ON position
If flicker returns immediately after restoration, retrace steps—don’t assume “it’s fine now.” Intermittent faults escalate.
For comprehensive support—including wiring diagrams for常见租客灯具改造 scenarios, load calculators, and NEC-compliant parts lists—visit our complete setup guide.
Safety isn’t optional. It’s the first step, the last step, and every step between. Take your time. Double-check. When in doubt, pause—and call a pro. Your home’s electrical system is the silent backbone of everything you do. Treat it with the respect—and precision—it demands.
(Updated: April 2026)