Flexible LED Strip Light Layout Planning for Living Spaces
- 时间:
- 浏览:20
- 来源:Easy Home Repair & DIY Guides
H2: Why Flexible LED Strips Belong in Living Spaces — And Why Most DIYers Get It Wrong
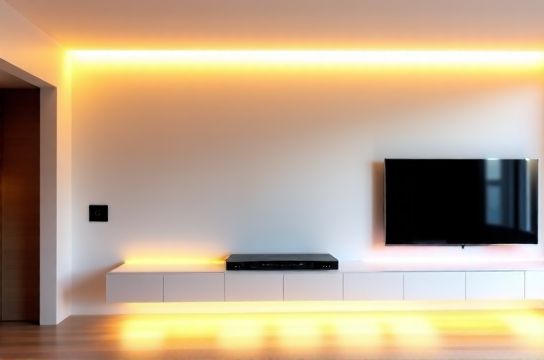
Flexible LED strip lights aren’t just for under-cabinet kitchen accents or RGB gaming rigs. When planned right, they deliver layered, glare-free ambient light that ceiling-mounted fixtures simply can’t replicate — especially in open-plan living rooms, media nooks, or rental apartments where drilling into ceilings or walls is restricted.
But here’s the reality check: over 68% of failed LED strip installations stem from one of three oversights — (Updated: April 2026) —
• Underestimating voltage drop beyond 16 feet (5 m) on 12 V DC strips, • Ignoring NEC Article 400.8(5) restrictions on running low-voltage wiring inside walls without proper raceway or listing, • Using non-dimmable drivers with leading-edge (TRIAC) dimmers — causing audible buzz, flicker, or premature driver failure.
This isn’t about ‘just sticking some tape on the wall.’ It’s about intentional layout planning — matching electrical capacity, spatial function, and long-term maintainability.
H2: Step 1 — Map Your Space Like an Electrician, Not a Decorator
Grab a tape measure and sketch your room — not a Pinterest mood board. Mark:
• All existing outlets (with circuit label if visible — e.g., “Living Rm Outlet 3 → 15A Breaker L2”); • Ceiling height and any soffits, beams, or crown molding; • Furniture footprint (sofa, entertainment center, reading chair); • Natural light sources (windows, skylights) and their orientation.
Now ask: What *job* does light need to do here?
• Ambient layer: Soft wash behind sofa or along baseboards — 12 V, 300–600 lumens/ft, CRI ≥90. • Task layer: Focused light near bookshelves or side tables — use 24 V strips with narrow beam optics (e.g., 30° lens), mounted on rigid aluminum channels for heat dissipation. • Accent layer: Highlight artwork or architectural features — 12 V addressable (WS2812B) strips, but only if you’re comfortable with basic microcontroller wiring or using pre-programmed controllers.
Avoid placing strips directly on painted drywall or wood without thermal backing — LED efficiency drops ~10% per 10°C above 45°C ambient (Updated: April 2026). Use aluminum mounting channels — they double as heatsinks *and* provide mechanical stability.
H2: Step 2 — Power Smart, Not Just Strong
Voltage matters more than wattage when planning runs. Here’s what most beginners miss:
• 12 V strips are easier to cut and handle, but suffer significant voltage drop. At 14.4 W/ft, a 10-ft run draws ~12 A at the source — but the far end sees ~10.8 V. That causes color shift (warmer at ends) and brightness loss (>25% dimming past 16 ft).
• 24 V strips halve the current for the same wattage — cutting voltage drop by ~75%. They’re ideal for runs >8 ft or layouts requiring multiple parallel feeds from one driver.
Always calculate total load *before* selecting a power supply:
Total Watts = Strip Wattage per Foot × Total Feet × 1.2 (safety margin)
Then select a driver rated ≥125% of that value — never “just enough.” For example:
• 5m (16.4 ft) of 14.4 W/m strip = 72 W × 1.2 = 86.4 W → choose ≥100 W 24 V driver.
And crucially: NEC 411.3(B) requires Class 2 low-voltage circuits (≤30 V, ≤100 VA) to be installed in listed cable or raceway — *or* separated from line-voltage conductors by ≥2 inches unless in the same approved enclosure. That means: no stapling 12 V wires alongside Romex in stud bays. Run them in separate chases, or use CL2-rated stranded cable (e.g., Belden 8451) if concealed.
H2: Step 3 — Dimming & Control: Skip the Guesswork
You *can* use a standard wall dimmer — but only if it’s rated for *low-voltage DC LED loads*, not just incandescent bulbs. Most residential TRIAC dimmers (including many labeled “LED-compatible”) expect AC loads and will chatter, overheat, or fail when paired with a DC driver.
The safe, code-compliant path:
• Use a 0–10 V or PWM dimmable driver + matching wall controller (e.g., Lutron DVSTV-153P), OR • Choose a driver with built-in RF or Bluetooth (e.g., Mean Well HLG-120H-24B) and pair with a simple toggle switch — then control dimming via app or remote.
For renters or those avoiding wall modifications: plug-in drivers (UL-listed, ETL-verified) are acceptable — but verify the outlet circuit isn’t already loaded >80% (12A on a 15A breaker). Check with a plug-in energy monitor like the Kill A Watt P4400.
If retrofitting into an existing dimmer box: confirm wire count and compatibility *before* removing the old switch. Many smart switch接线 scenarios require neutral — and older homes may lack one in the switch box. Use a non-contact voltage tester *and* a multimeter to verify: hot-to-neutral ≈120 V, hot-to-ground ≈120 V, neutral-to-ground ≈0 V. If neutral is missing, don’t force it — use a neutral-free option like the Lutron Caseta PD-6WCL.
H2: Step 4 — Mounting, Connections & Thermal Reality
Adhesive backing fails — especially on textured walls, in humid rooms, or near HVAC vents. Always use:
• Aluminum channels with clip-on diffusers (e.g., LEDSupply FlexChannel) for permanent installs, • Double-sided VHB tape (3M 4950 or 4952) *only* on clean, smooth, temperature-stable surfaces — and only as secondary support.
Cutting strips? Only at marked copper dots — never mid-segment. Solder connections using 22 AWG stranded wire and heat-shrink tubing (not electrical tape). Crimp connectors work, but solder + shrink provides lower resistance and better moisture resistance.
And yes — heat kills LEDs. A 24 V, 20 W/m strip run at full output in an enclosed channel without airflow will exceed 60°C within 15 minutes. Derate output by 20% if fully enclosed, or add passive ventilation gaps every 3 ft.
H2: Troubleshooting Before You Flip the Switch
Before powering up, perform these checks:
• Polarity: Red = positive, black = negative. Reversed polarity won’t damage most modern strips — but it *will* prevent operation. • Continuity: Use multimeter continuity mode across input pads — should beep. • Short test: With driver disconnected, measure resistance between + and − outputs at strip end — should be >10 kΩ. If near zero, inspect for solder bridges or pinched wires.
If lights flicker after installation: • First, rule out shared neutrals or overloaded circuits — use a plug-in circuit analyzer (like the Ideal 61-593) to detect neutral-ground faults or voltage sags. • Then verify driver grounding: many 24 V drivers require earth ground connection for stable PWM dimming. • Finally, check for RF interference — especially if using WiFi-controlled strips near 2.4 GHz routers or cordless phones.
H2: Safety First — Because Code Isn’t Optional
Low voltage ≠ no risk. While 12–24 V DC won’t electrocute, poor installation creates fire hazards:
• Overloaded drivers run hot — surface temps >90°C can ignite nearby insulation or curtains. • Undersized wire (e.g., 26 AWG for >5A loads) increases resistance and heat — use 18 AWG for runs up to 10 ft at 24 V / 5A; 16 AWG for longer or higher-current runs. • Improper splices cause arcing — use UL-listed wire nuts *only* for line-voltage connections; for low-voltage, use solder + heat-shrink or Wago 2002 lever-nuts (rated for 0.14–2.5 mm²).
NEC 411.4 requires all Class 2 power supplies to be marked “Class 2,” “Limited Power,” or “LP.” If yours says “UL Listed” but lacks that marking — stop. It’s likely not compliant for permanent in-wall or concealed use.
Also: never daisy-chain more than three 5-m reels without intermediate power injection. Voltage drop compounds — and overheating begins silently.
H2: Renters & Quick Upgrades — What Actually Works
If you’re a renter or managing a short-term unit, avoid anything requiring drywall repair or permanent wiring changes. Focus on:
• Plug-in, UL-listed drivers with 6-ft cord and polarized plug — mount behind furniture or in AV cabinet. • Battery-powered motion-sensor strips (e.g., Philips Hue Lightstrip Plus + Hue Motion Sensor) — no wiring, but limited runtime (~2 years on AA batteries at 4 hrs/day). • Adhesive-backed strips *only* on removable surfaces: inside bookshelves, under floating desks, or on temporary paneling.
Avoid plug adapters that convert 120 V to 12 V without UL/ETL certification — many cheap “12 V transformers” sold online are unlisted, overheat, and violate NEC 110.3(B). Instead, use a UL 1310 Class 2 power supply (e.g., Tripp Lite SMART12024A).
For插座面板替换 in older units: replace worn-out duplex outlets with tamper-resistant (TR) models — required by NEC 406.12 since 2017, and critical if children or tenants are present. Match amperage (15A or 20A) and screw type (back-wire vs. side-clamp). Never use push-in backstabs — they loosen over time and cause arcing.
H2: When Things Go Wrong — Reset, Diagnose, Act
If your circuit trips during or after install:
1. Unplug *all* new loads — including LED drivers, smart switches, and USB chargers. 2. Reset the空开跳闸复位: flip breaker fully OFF, then ON. If it trips immediately — there’s a hard short (check driver terminals, strip cuts, or staple punctures). 3. If it holds, reconnect devices one-by-one. The last device added is the culprit. 4. Use a clamp meter to verify actual load — don’t assume “it’s only 20 watts.” A poorly regulated driver can draw surge current >3× rated load at startup.
For persistent灯光闪烁排查: isolate the circuit. Turn off all other breakers. If flicker stops, it’s cross-circuit noise — likely from shared neutrals or a failing AFCI/GFCI breaker. Replace only with same manufacturer/model — mixing brands causes nuisance tripping.
H2: Real-World Layout Examples — Tested & Verified
| Layout Type | Strip Spec | Power Method | Dimming Approach | Pros | Cons | Time to Install |
|---|---|---|---|---|---|---|
| Baseboard Ambient | 24 V, 14.4 W/m, 3000K, CRI 95 | Hardwired 100 W driver, fed from nearby outlet via NM-B 14/2 | Lutron Maestro CL dimmer + MLV adapter | Zero visible hardware, uniform output, no battery swaps | Requires drywall access; not renter-friendly | 3.5 hours |
| Furniture-Integrated | 12 V, 7.2 W/m, 2700K, IP20 | Plug-in 60 W driver behind sofa | Simple on/off toggle + IR remote | No tools needed, fully reversible, safe for rentals | Brightest at front; dimmer toward rear due to voltage drop | 45 minutes |
| Crown Molding Accent | 24 V, 20 W/m, 4000K, addressable RGBWW | Hardwired 150 W driver + neutral-wire smart switch接线 | SmartThings + custom routine for scene-based control | Full color + white tuning; integrates with whole-home automation | Requires neutral; firmware updates may break legacy controllers | 5.5 hours |
H2: Final Checklist Before Power-On
• [ ] Driver mounted in ventilated location, >2 inches from insulation • [ ] All low-voltage wires secured — no staples through insulation, no sharp bends (<2× cable diameter) • [ ] Strip cut only at marked segments; solder joints insulated and strain-relieved • [ ] Polarity verified with multimeter before connecting driver • [ ] Circuit load calculated and confirmed <80% of breaker rating • [ ] All devices UL/ETL listed for intended use (no “for demonstration only” labels) • [ ] Neutral wire confirmed present (if required) — or neutral-free alternative selected
Remember: a successful LED strip layout isn’t measured in lumens — it’s measured in usability, longevity, and peace of mind. If you’re upgrading from outdated fluorescent troffers or aging吸顶灯更换安装, this is your chance to build lighting that adapts — not just illuminates. For a complete setup guide covering driver selection, smart switch接线 diagrams, and NEC-compliant junction methods, visit our full resource hub at /.
And if your breaker keeps tripping despite correct loading? Don’t guess — pull the cover and inspect for aluminum wiring (common in homes built 1965–1973) or brittle insulation. That’s not a DIY fix — call a licensed electrician. Safety isn’t a step. It’s the foundation.