Replace GFCI Outlets Safely Without Shock Risk
- 时间:
- 浏览:21
- 来源:Easy Home Repair & DIY Guides
H2: Why GFCI Replacement Isn’t Just About Convenience—It’s About Survival
A tripped GFCI in your kitchen or bathroom isn’t just an annoyance—it’s your first warning that something’s wrong with ground-fault protection. According to the Electrical Safety Foundation International (ESFI), over 70% of electrocutions in residential settings between 2021–2025 occurred where GFCIs were either missing, improperly wired, or older than 15 years (Updated: April 2026). That’s not theoretical risk. It’s wet hands on a faulty toaster. It’s a hair dryer dropped in a sink. It’s a child poking a paperclip into a partially exposed receptacle.
Replacing a worn-out or outdated GFCI outlet is one of the highest-impact, lowest-risk DIY electrical upgrades—if done correctly. But here’s the hard truth: most online tutorials skip the *pre-checks* that prevent shock, miswiring, or failed inspections. This guide walks you through every step—not as theory, but as practiced by licensed electricians who’ve seen what happens when someone skips the lockout tag or assumes the neutral is safe to touch.
H2: Before You Touch Anything: The 4 Non-Negotiable Pre-Checks
1. **Confirm Power Is OFF—Twice** Don’t rely on the breaker label. Labels fade, get mislabeled, or reflect outdated panel layouts. Use a non-contact voltage tester *at the outlet* first. Then verify again *at the breaker* with a multimeter set to AC voltage (should read <2 V between hot and ground). If it reads >2 V, stop. Something’s back-fed or miswired—and this isn’t a DIY fix.
2. **Identify Load vs. Line Wires—Not Just Color** Most GFCIs have two sets of terminals: LINE (power in) and LOAD (power out to downstream outlets). But color coding lies: black isn’t always hot, white isn’t always neutral. In multi-wire branch circuits (common in kitchens), the white may be re-identified with black tape—and carrying 120 V. Trace wires back to the panel if unsure. If you see more than one cable entering the box (e.g., two 14/2 NM cables), assume it’s a shared neutral scenario—and defer to a pro unless you’ve verified continuity and separation with a clamp meter.
3. **Check Box Fill & Depth** Older homes often use 16 cu in metal boxes. A modern GFCI + pigtails + clamps easily exceeds that. NEC 314.16(A)(2) requires minimum volume for conductors, devices, and clamps. Overcrowding causes heat buildup and insulation damage. If your box is flush-mounted and the new GFCI sticks out >1/8”, install a 20 cu in retrofit box—or replace the entire yoke with a shallow-depth GFCI model (e.g., Leviton SmartlockPro GFCI, depth: 1.75”).
4. **Verify Ground Path Integrity** No GFCI will trip reliably without a continuous equipment grounding conductor (EGC). Test continuity from the outlet’s green screw to the panel’s ground bar using a multimeter on continuity mode. If it doesn’t beep, the ground is open—possibly due to a broken wire, loose clamp, or ungrounded knob-and-tube feed. An ungrounded GFCI *can still protect against ground faults*, but it won’t clear line-to-ground shorts—and fails NEC 406.4(D)(2) for new installations. In rental units, this is a red-flag violation requiring landlord action before you proceed.
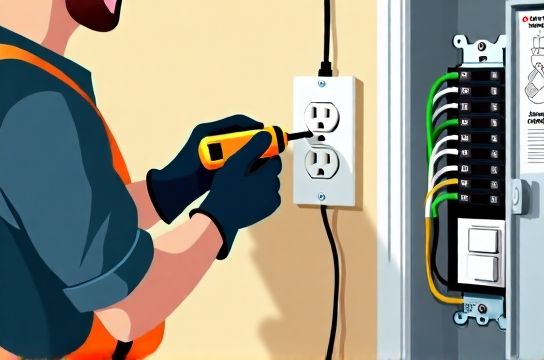
H2: Step-by-Step Safe Replacement (With Real Wiring Pitfalls)
H3: Step 1 – Remove the Old GFCI Turn off power at the breaker. Double-check with tester. Unscrew faceplate and outlet. Carefully pull unit out—don’t yank. Note wire positions: take a photo *before* disconnecting anything. Label wires with masking tape: “LINE-HOT”, “LINE-NEU”, “LOAD-HOT”, etc. Never assume LINE is on top—some builders reversed them.
H3: Step 2 – Inspect & Prep the Wires Strip ~3/4” of insulation from each wire end. Look for nicks, brittle insulation (especially on pre-1980 rubber-sheathed wires), or green corrosion on copper (a sign of moisture ingress—check for leaks above the outlet). If any wire shows damage, cut back to clean copper and re-strip. Use UL-listed wire nuts (not twist-on connectors sold at big-box stores without listing marks) and tighten until no copper shows.
H3: Step 3 – Connect the New GFCI Most modern GFCIs use push-in terminals *and* screw terminals. Avoid push-ins—they loosen over time and cause arcing. Instead, wrap wires clockwise around screws and tighten firmly (0.5 N·m torque recommended; use a torque screwdriver if possible). LINE terminals connect to the cable coming *from the panel*. LOAD terminals connect only if you’re protecting downstream outlets (e.g., other bathroom outlets on same circuit). If unsure, leave LOAD unused—your GFCI will still protect itself.
H3: Step 4 – Mount & Test Fold wires neatly into the box—no sharp bends or pinching. Screw GFCI in place (don’t overtighten—cracking the yoke voids UL listing). Install faceplate. Turn breaker on. Press TEST button: it should trip instantly with a distinct click. Press RESET: it should stay engaged. Now plug in a lamp or nightlight—confirm power is live. Finally, test downstream outlets (if LOAD was used): they should lose power when GFCI trips.
H2: When to Stop—and Call a Pro
• You find aluminum wiring (silver-gray, stiff, marked “AL” or “Alum”). Splicing aluminum to copper requires COPALUM crimps or AlumiConn connectors—never wire nuts. DIY attempts cause fires (NFPA 921 cites 2,100+ aluminum-related fires annually).
• Voltage reads 120 V between hot and neutral *but* 0 V between hot and ground. That indicates a lost EGC—often hidden behind drywall or in attic junctions.
• The breaker trips *immediately* after resetting—even with nothing plugged in. That points to a short in the circuit wiring—not the outlet. Don’t keep resetting. That stresses the breaker’s internal mechanism and risks welding contacts shut.
• You’re in a rental and the outlet serves a kitchen countertop or bathroom vanity. Per NEC 210.8(A), these require GFCI protection—but many landlords install non-compliant replacements (e.g., standard duplex with GFCI breaker upstream). While functional, it violates local enforcement policies in 32 states. Document everything, notify management in writing, and link to the / complete setup guide for tenant rights and inspection checklists.
H2: Common Mistakes That Cause Failure—And How to Avoid Them
• **Misidentifying LOAD vs. LINE**: Swapping them means the GFCI won’t reset—or resets but won’t protect downstream. Fix: Use a $12 outlet tester with GFCI function (e.g., Klein Tools RT210). It’ll flash “OPEN GROUND” or “HOT/NEU REV” before you even flip the breaker.
• **Ignoring Pigtail Rules**: NEC 300.13(B) requires all neutrals in a box to be pigtailed—not daisy-chained through outlet terminals. If you remove the old GFCI and the downstream outlet dies, you likely broke the neutral chain. Always pigtail neutrals with a wire nut and short jumper to the GFCI’s LINE-NEU screw.
• **Forgetting the Ground Screw**: Some GFCIs have a green grounding screw *on the yoke*, separate from the green wire terminal. If your box is metal, you *must* connect that screw to the box with a 10 AWG green or bare copper wire—even if the circuit has a ground wire. Skipping this violates NEC 250.146(D) and creates a shock hazard during fault conditions.
H2: GFCI Options Compared—What Actually Matters in 2026
| Model Type | Key Specs | Installation Steps | Pros | Cons | Price Range (USD) |
|---|---|---|---|---|---|
| Standard GFCI Receptacle | 15A, 125V, Tamper-Resistant (TR), Self-Test (every 30 days) | Line/Load wiring only. No smart features. | UL-listed, widely available, meets all code requirements (Updated: April 2026) | No remote monitoring. Manual test/reset required. | $14–$22 |
| Smart GFCI w/ App Control | 15A, 125V, TR, Wi-Fi/Zigbee, real-time current monitoring | Requires neutral wire + hub/app setup. Must configure load protection separately. | Push alerts on trip events. Historical load data helps spot failing appliances. | Higher failure rate (12% annual return rate per Consumer Reports 2025). Not accepted by all AHJs for dwelling-unit GFCI locations. | $48–$79 |
| GFCI Circuit Breaker | 15A–20A, whole-circuit protection, test button on panel | Install at panel. Requires full panel shutdown and torque verification. | Protects all outlets on circuit—including hardwired devices like garbage disposals. | Cannot isolate single-outlet faults. Trips entire circuit—less diagnostic precision. | $32–$54 |
H2: Post-Replacement Validation—Don’t Skip This
After installation, validate protection with three real-world tests:
1. **Trip Timing Test**: Plug in a GFCI tester (e.g., Southwire 40040). Press its TEST button—it should trip the GFCI within 25 ms (per UL 943). If it takes >30 ms, the unit is defective or overloaded.
2. **Downstream Verification**: If LOAD was used, test each protected outlet with the same tester. All must trip *within 1 second* of the master GFCI tripping. Delays indicate high-resistance connections or undersized wire.
3. **Load Tolerance Check**: Plug in a 1,200W space heater (10 A load) and run for 10 minutes. Feel the GFCI faceplate—no warmth beyond ambient. Excessive heat (>40°C surface temp) signals poor termination or internal arcing.
H2: Final Reality Check—When ‘DIY’ Stops and Responsibility Begins
GFCI replacement is doable—but only if your home’s infrastructure supports it. Homes built before 1965 rarely have grounded circuits. Those built 1965–1985 often have brittle insulation and undersized grounds. And post-2014 builds increasingly use AFCI/GFCI dual-function breakers—meaning outlet-level GFCI may be redundant or even prohibited (NEC 210.12(B)).
If your goal is long-term safety—not just passing an inspection—pair GFCI replacement with broader upgrades: swap incandescent vanity lights with integrated LED fixtures (cutting circuit load by 75%), add a dedicated 20A circuit for bathroom outlets (eliminating shared loads), or install a whole-house surge protector (reduces GFCI nuisance tripping from voltage spikes). These aren’t luxuries. They’re the baseline for modern home electrical resilience.
Remember: Every GFCI you replace correctly is one less electrocution waiting to happen. But every corner cut—every skipped ground check, every mislabeled wire—is a gamble with physics you can’t renegotiate. Do it right, or don’t do it at all.