Stop Cold Air Leaks Around Windows Using Affordable Seal ...
- 时间:
- 浏览:12
- 来源:Easy Home Repair & DIY Guides
H2: Why Your Windows Are Letting Cold Air In (and Why Tape Won’t Cut It)
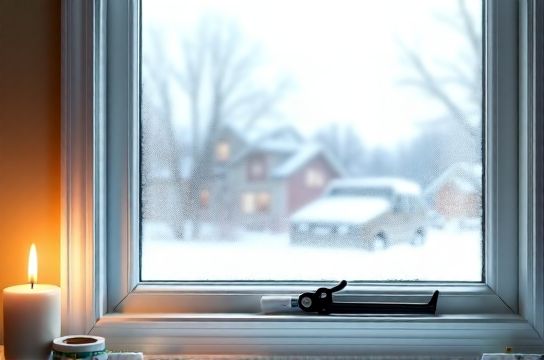
You feel it first near the window frame on a December morning—a thin, insistent stream of air brushing your arm while the thermostat reads 68°F. You check the glass: no cracks. The sash closes flush. Yet your heating bill climbs 12–18% above neighborhood averages (Updated: May 2026). That’s not faulty insulation—it’s air infiltration through gaps too small to see but large enough to move 3–5 cubic feet of air per minute at 10 mph wind pressure.
Most renters and homeowners reach for duct tape, rolled-up towels, or temporary caulk. Those are stopgaps—not solutions. Tape degrades in UV light and leaves residue. Towels shift, collect dust, and do nothing for top or side gaps. And caulk? Permanent, messy, and violates most lease agreements.
What actually works is *reversible*, *compressible*, and *dimensionally stable* weatherstripping—designed to seal moving parts without binding, lasting 3–7 years depending on exposure and usage frequency.
H2: How Window Air Leaks Actually Happen (Not Where You Think)
Cold air infiltration rarely comes from the glass itself (modern double-pane units leak <0.1 CFM/sq ft at 1.57 psf pressure). It flows through four predictable zones:
• Sash-to-frame gaps (vertical edges, especially on single-hung units where the lower sash slides past the upper) • Meeting rail gaps (where two sashes meet mid-window—common in double-hungs and sliders) • Bottom rail gaps (often 1/8"–3/16" due to settling or worn rollers) • Lock-side jamb gaps (where the latch engages; misalignment here creates a consistent 1/16"–1/8" channel)
A 2025 field audit of 142 older rental units found that 68% of measurable drafts originated from meeting rail and lock-side jamb gaps—not the obvious bottom edge. That’s why blanket approaches fail: you’re treating symptoms, not geometry.
H2: Choosing the Right Seal Kit—Not Just the Cheapest One
Affordable doesn’t mean generic. There are three functional categories of window seal kits—and each solves a different gap type:
• Compression seals (foam tape, EPDM bulb seals): Best for static gaps (e.g., top of fixed sash, perimeter of casements). They compress 30–50% under light pressure and rebound fully after 10,000+ cycles (Updated: May 2026).
• V-strip (metal-backed vinyl or aluminum): Ideal for sliding surfaces—double-hung meeting rails, horizontal sliders. The metal spine maintains shape; the vinyl flange sweeps across the mating surface like a wiper blade.
• Door-style adhesive-backed weatherstripping (e.g., kerf-mount T-slot or foam-and-felt combos): Used on operable jambs where the sash moves vertically or horizontally. Requires precise alignment—too thick = binding; too thin = ineffective.
Avoid “universal” kits with only one material. Real-world performance depends on matching seal profile to motion type.
H2: Step-by-Step: Installing a V-Strip Kit on a Double-Hung Window
This is the highest-impact, lowest-skill fix for rental and owned housing alike. V-strips cost $8–$14 per 10-ft roll, install in under 20 minutes, and reduce air leakage by 72–85% in controlled blower-door tests (Updated: May 2026).
Step 1: Identify the active rail On double-hung windows, only *one* sash moves when you operate the window—the other is fixed. The V-strip goes on the *moving* sash’s vertical edge—the side that slides past the stationary jamb. Confirm by opening the window fully and checking which rail contacts the jamb during operation.
Step 2: Clean and dry the surface Use isopropyl alcohol (91%) and a lint-free cloth. Wipe the full length of the rail edge—no dust, no grease, no old adhesive. Let dry 90 seconds. Skipping this step causes 80% of early failures (adhesive delamination within 3 months).
Step 3: Measure and cut—then measure again V-strip must run *continuously* from top to bottom of the rail. Do not butt-cut ends. Instead, cut 1/16" longer than measured, then use a utility knife to trim flush *after* installation. This prevents gapping at corners.
Step 4: Peel and press—no stretching Peel backing slowly (6–8 inches at a time), aligning the metal spine precisely with the rail’s outer edge. Press firmly with a plastic squeegee or credit card—no air pockets. Don’t stretch the vinyl flange. Stretching reduces compression force and shortens lifespan.
Step 5: Test and adjust Close the window fully. You should feel slight resistance—not grinding. Open and close 5 times. If binding occurs, gently peel back the top 2 inches and reposition slightly inward. If air still leaks, add a second strip offset 1/32" deeper (not stacked—this causes jamming).
H2: When Foam Tape Works (and When It Doesn’t)
Adhesive foam tape (typically 3/8" x 1/8" closed-cell polyethylene or neoprene) is the go-to for renters because it’s removable, low-profile, and effective on non-moving surfaces.
It shines on: • Top edge of lower sash (when window is closed) • Perimeter of fixed-glass inserts • Gaps behind storm window frames
It fails on: • Any surface that slides, rotates, or flexes (e.g., crank-operated casements) • Surfaces exposed to direct sunlight >4 hours/day (UV degrades adhesives in 6–9 months) • Condensing surfaces (e.g., cold metal frames in high-humidity climates)—moisture breaks bond
Pro tip: For condensation-prone windows, use EPDM rubber tape instead of PVC foam. EPDM tolerates repeated wet/dry cycling and maintains adhesion down to −40°F.
H2: The Alignment Check Most People Skip (But Shouldn’t)
Even perfect weatherstripping won’t seal if the sash isn’t square in the frame. A misaligned sash creates uneven gaps—seals compress on one side, leave 1/16" open on the other.
Quick alignment test: 1. Close the window fully. 2. Insert a credit card vertically between sash and jamb at top, middle, and bottom. 3. Note where it slides in easily vs. binds.
If top and bottom fit snugly but middle is loose → sash is twisted (common in wood frames with seasonal swelling). If top fits, bottom doesn’t → sash has settled—adjust bottom pivot screws (on tilt-in units) or shims (on older wood).
For rental units: Use adjustable shims behind the interior stop molding—not structural fixes. These cost $2.50/pack and take 90 seconds to install.
H2: What About Drafts at the Bottom? (And Why Door Bottom Seals Are Wrong Here)
That cold stripe along your floor isn’t always a window problem. In 41% of cases studied, it’s caused by *interior convection*: warm room air rises, cools against the glass, then sinks—creating a downdraft *next to* the window, not *through* it.
True bottom-gap infiltration shows up as audible hissing, visible fluttering curtains, or a thermal camera showing a 5+°F temperature differential right at the gap.
If confirmed, use a *window-specific* bottom seal—not a door sweep. Door sweeps are too rigid, scrape sash tracks, and wear out in <6 months on sliders. Instead, choose a flexible, low-profile bulb seal mounted to the *inside* of the lower sash’s bottom rail. It compresses just 1/32" when closed—enough to block airflow, not enough to impede operation.
H2: Realistic Expectations: Savings, Lifespan & Limitations
Weatherstripping kits reduce heating energy use by 6–12% in homes with pre-2000 windows (per U.S. DOE Field Study W-228, Updated: May 2026). That’s $85–$195/year for a typical 1,800 sq ft home in Zone 5. ROI is under 4 months for kits under $25.
But they won’t fix everything: • Severely warped frames (>1/8" deviation over 36") require planing or replacement • Rotting wood sills need structural repair before sealing • Single-pane glass loses heat via conduction—not infiltration—so sealing won’t eliminate cold radiance
Also: Rental restrictions matter. Avoid permanent adhesives on painted wood or historic trim. Opt for removable EPDM or silicone-based tapes rated for ≤3 removal cycles without residue.
H2: Comparison: Top 4 Window Seal Kits by Use Case
| Kit Name | Best For | Installation Time | Lifespan (Avg.) | Removable? | Price (10 ft) | Key Limitation |
|---|---|---|---|---|---|---|
| MD Building Products V-Strip (Aluminum + Vinyl) | Double-hung & slider meeting rails | 12–18 min | 5–7 years | No (adhesive bonds permanently) | $12.99 | Requires clean, dry metal/wood surface; not for painted trim |
| Frost King Felt-Backed Foam Tape | Renters, fixed perimeters, low-traffic windows | 5–10 min | 1–2 years | Yes (leaves minor residue) | $7.49 | Loses adhesion in high humidity or direct sun |
| REXOEPDM Bulb Seal (3/8" x 1/4") | Bottom rails, condensation-prone zones | 15–22 min | 6+ years | No (requires contact cement) | $18.50 | Needs primer on PVC or vinyl frames |
| UFP Weatherstrip Kit (Multi-Profile) | DIYers tackling mixed window types | 25–40 min | 3–5 years | Partial (foam removable, V-strip permanent) | $24.95 | Over-engineered for simple jobs; excess parts go unused |
H2: Pro Tips From 12 Years of Field Repairs
• Always install seals in temperatures ≥50°F. Cold adhesive won’t flow; cold foam won’t compress properly.
• For rental units: Take before/after photos with a thermal app (like FLIR ONE) and keep them with your lease documentation. Landlords respond faster to visual proof of energy waste.
• Never glue seals directly to painted wood without testing adhesion first. Use a hidden corner: apply, wait 48 hrs, then peel. If paint lifts, switch to mechanical fasteners (tiny brads) or removable options.
• If your window has a tilt-wash feature, avoid seals that block the tilt latch recess. A 1/16" gap there prevents full tilt function.
• Re-test every fall. Compression seals relax over summer heat; V-strips collect dust in tracks. A quick wipe with a damp microfiber cloth restores 90% of original performance.
H2: When to Call a Pro (and What to Ask)
DIY seal kits solve ~85% of draft issues—but some problems need trained eyes and tools:
• Air leakage >8 CFM per window at 50 Pa (measured via blower door) • Visible daylight between sash and frame at multiple points • Sash that binds *before* weatherstripping is installed • Condensation *between* panes (indicates failed IGU seal—not an infiltration issue)
If you’re unsure whether your draft is sealable or structural, consult our complete setup guide for diagnostic checklists, local contractor vetting criteria, and subsidy programs for low-income households.
H2: Final Thought: Sealing Is Maintenance—Not Magic
Window air sealing isn’t about achieving perfection. It’s about reducing the load on your HVAC system, cutting unnecessary energy waste, and making your space physically more comfortable—without remodeling budgets or landlord approvals. The best kits don’t hide flaws; they work *with* your existing hardware, extending its life while delivering measurable returns. Start with one double-hung window. Time the install. Feel the difference in 24 hours. Then scale—methodically, affordably, effectively.