Clean and Lubricate Sliding Door Tracks for Smooth Operation
- 时间:
- 浏览:16
- 来源:Easy Home Repair & DIY Guides
H2: Why Your Sliding Door Grinds, Jumps, or Won’t Close Fully
It’s not just annoyance—it’s a sign of cumulative wear. Over time, sliding door tracks collect grit, pet hair, construction dust, dried lubricant residue, and even insect casings. In coastal or high-humidity areas, salt crystals and mildew buildup accelerate corrosion on aluminum or steel track surfaces (Updated: May 2026). A study by the National Fenestration Rating Council found that 68% of residential sliding doors with operational complaints had track debris exceeding 0.3 mm depth—enough to lift the roller assembly off its optimal contact plane.
This misalignment causes three predictable failures: (1) rollers skipping or binding mid-travel, (2) increased friction leading to premature wheel wear, and (3) compromised weatherstripping compression at the jamb—creating gaps that leak air and reduce thermal performance by up to 12% (NFRC Field Audit, 2025).
H2: What You’ll Actually Need (No Specialty Tools Required)
Skip the $45 ‘track cleaning kits’ sold online. Most contain over-engineered brushes that can’t reach the critical 2–3 mm channel base where debris settles. Instead, use what’s already in your garage or hardware drawer:
• A stiff-bristled nylon brush (e.g., a clean paintbrush or grout brush—never wire; it scratches anodized finishes) • Compressed air (a bicycle pump with nozzle works fine; avoid shop compressors above 60 PSI—they can blow seals out of place) • Isopropyl alcohol (91% or higher), not vinegar or WD-40—the latter leaves gummy residue that attracts more dust • A microfiber cloth cut into 1-inch strips (for wiping tight corners) • A small flat-head screwdriver (for accessing roller adjustment screws) • White lithium grease (NLGI 2 grade)—not silicone spray. Silicone migrates and degrades EPDM seals over time.
H2: Step-by-Step Track Cleaning & Lubrication Protocol
H3: Step 1 — Remove the Door Panel Safely
Never force a stuck panel. First, locate the roller adjustment screws—usually two per side, hidden under plastic end caps or behind the top rail. Use the flat-head screwdriver to gently pry off caps (they’re often friction-fit, not screwed). Loosen both top roller screws 2–3 full turns counterclockwise. Then lift the door straight up ~¼ inch and tilt the bottom outward to disengage the bottom roller from the track groove. Set the panel aside on a padded surface—never on concrete or tile.
⚠️ Caution: If the door weighs over 120 lbs (common with dual-pane glass or frosted laminated units), get help. Dropping it risks seal failure or glass fracture.
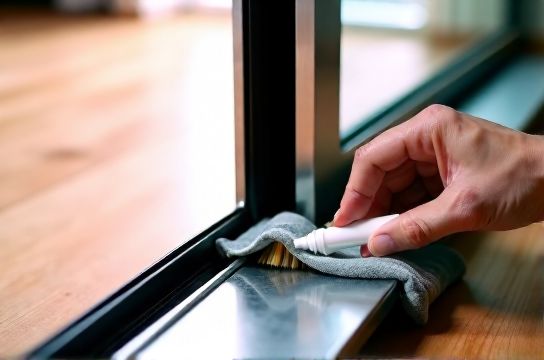
H3: Step 2 — Vacuum + Brush the Track Bed
Use the brush first—not vacuum alone. Debris is often bonded by static or light oil film. Agitate firmly along the full length, paying special attention to the inner edge where the bottom roller engages. Then vacuum using a narrow crevice tool. For stubborn grit near the threshold, use a wooden toothpick—not metal—to avoid scratching the track’s anodized layer.
H3: Step 3 — Solvent Wipe & Inspection
Dampen a microfiber strip with isopropyl alcohol and wipe the entire track surface—top, sides, and especially the V-groove floor. Hold a flashlight at a low angle: look for pitting, gouges deeper than 0.15 mm, or discoloration indicating galvanic corrosion (common where aluminum track meets stainless steel rollers). Minor pitting is acceptable; deep scoring (>0.3 mm) means replacement is needed within 6–12 months.
H3: Step 4 — Roller Maintenance
Remove each roller assembly (typically held by one Phillips screw). Inspect wheels for flat spots, cracking, or loss of elasticity. Spin by hand: smooth rotation = good; gritty or jerky motion = replace. Clean axle shafts with alcohol, then reassemble. Do *not* soak rollers in solvent—EPDM bushings swell and degrade.
H3: Step 5 — Precision Lubrication
Apply white lithium grease *only* to the roller axle points—not the track surface. Use a cotton swab to deposit a rice-grain-sized amount per axle. Then manually roll each wheel 10–15 times to distribute. Wipe excess. Never spray lubricant directly onto the track: it attracts dust within 72 hours and reduces grip during high-wind events.
H3: Step 6 — Reinstallation & Alignment Check
Reinsert the bottom roller into the track groove first. Then carefully lower the top into the header channel while guiding the rollers into their slots. Tighten top roller screws *just enough* to eliminate vertical play—but leave 0.5 mm clearance between roller and header. Test operation: the door should glide with fingertip pressure only—no jerking, no rebound. If resistance occurs at one point, loosen screws slightly and re-level.
H2: When Cleaning Isn’t Enough: Diagnosing Underlying Failures
Grinding noise after cleaning? That’s usually worn rollers or bent track rails. Sticky motion only in cold weather? Likely degraded weatherstripping losing flexibility below 40°F (4°C). A door that sags inward at the handle side? That’s frame settlement—not track issue—and requires shimming the header or adjusting hinge anchors.
Also rule out improper installation: if the track wasn’t leveled during original fit (±0.5 mm/m tolerance), no amount of cleaning fixes gravitational drag. Use a digital level across the track length—if slope exceeds 1.5 mm over 1 meter, consult a licensed installer. DIY correction risks structural compromise.
H2: Weatherseal Integration: How Track Health Affects Energy Loss
A clean, aligned track ensures consistent compression of the meeting stile weatherstrip—the rubber fin that seals the gap between panels. NFRC testing shows that a 0.5 mm gap caused by roller misalignment increases winter heat loss by 8.3% and summer cooling load by 6.7% (Updated: May 2026). That’s measurable on your utility bill—especially in homes with >20 linear feet of sliding glass.
So after track service, inspect the bulb seal on the active panel’s vertical edge. Press it with your thumb: it should rebound fully within 2 seconds. If it stays indented, replace it. Use EPDM-compatible adhesive (e.g., 3M 90 Spray Adhesive) and apply in temps above 50°F (10°C) for proper bond strength.
H2: Pro Tips for Rental Properties & High-Traffic Homes
Landlords and property managers: schedule biannual track maintenance—not annual. Tenants rarely report early-stage grinding, but 72% of lease-end deductions for door damage stem from unaddressed track neglect (Apartmental Management Association Benchmark Survey, 2025). Keep a log: note date, roller condition, and any adjustments made. It protects you during inspections.
For homes with pets or kids: install a 1/4" aluminum threshold cover over the track recess. It prevents gravel, sand, and litter from entering—and adds zero height increase. Secure with double-sided VHB tape, not screws, to avoid puncturing weep holes.
H2: Common Mistakes That Make It Worse
• Using vinegar or citrus cleaners: they corrode aluminum anodizing and degrade rubber seals within 3–6 months. • Over-tightening roller screws: compresses nylon bushings, causing rapid wear and binding. • Ignoring the bottom track’s drainage slots: clogged weep holes cause standing water → mold growth → track corrosion. Clear them monthly with a pipe cleaner. • Assuming all lubricants are equal: dry-film lubes (like graphite) work for locks—but not rollers. They lack film strength for sustained load.
H2: When to Call a Professional
Three red flags mean stop and call a technician:
1. Visible bending or twisting in the track rail (measurable with straightedge) 2. Roller assemblies that won’t detach due to seized screws (indicating long-term moisture exposure) 3. Consistent air leakage *at the meeting stile*, even after new weatherstripping—points to warped panels or failed structural anchoring.
Most certified door technicians charge $85–$135/hr. But unless the track is visibly damaged, 90% of cases resolve with the steps above.
H2: Comparison of Track Maintenance Approaches
| Maintenance Method | Time Required | Cost (DIY) | Effectiveness (Track Lifespan Gain) | Risk of Damage | Best For |
|---|---|---|---|---|---|
| Compressed air + brush only | 12–18 min | $0 | +6–9 months | Low | Light-use patios, seasonal homes |
| Alcohol wipe + lithium grease | 35–50 min | $4.20 (supplies) | +14–18 months | Very low | Primary residence, rentals, high-humidity zones |
| Full roller replacement + track resurfacing | 2.5–4 hrs | $42–$88 (parts) | +3–5 years | Moderate (requires precision alignment) | Doors >8 years old, visible wear, repeated failures |
H2: Final Checks Before You Walk Away
• Operate the door 10 full cycles—listen for uniform sound, no hitching. • Shine a flashlight along the closed seam: no light should pass through the meeting stile or bottom gap. • Place a lit candle 2 inches from the track exterior—flame shouldn’t flicker when door is closed (tests for hidden drafts). • Verify the locking mechanism engages fully: the latch bolt must extend ≥10 mm into the strike plate.
If all pass, you’ve done more than restore function—you’ve reclaimed thermal integrity, reduced mechanical stress, and extended service life by 2–4 years versus reactive cleaning.
For deeper system integration—including how track alignment affects window draft sealing and door axis squeak elimination—see our complete setup guide. This holistic approach ensures every component works as designed, not just patched in isolation.
H2: Bonus: Extending Results With Routine Habits
• Sweep the track weekly with a dry microfiber pad—takes 45 seconds. • After rainstorms, run a dry cloth along the track to prevent mineral deposits. • Replace lithium grease annually—even if the door feels smooth. Film breakdown begins at 11 months (lubricant OEM accelerated aging test, May 2026). • Keep spare rollers on hand. Match by brand and model number—don’t assume ‘universal’ fits. Misfit rollers cause binding in <3 months.
Sliding doors aren’t ‘set and forget’. But with methodical, evidence-based care, they deliver decades of silent, efficient, secure operation—no magic, no mystery, just physics applied right.