Apply Self Adhesive Door Seal Strips for Better Insulation
- 时间:
- 浏览:11
- 来源:Easy Home Repair & DIY Guides
H2: Why Self-Adhesive Door Seal Strips Are Your First Line of Defense Against Energy Waste
Most homeowners and renters overlook one of the cheapest, fastest ways to cut heating and cooling bills: sealing gaps around doors. A typical exterior door can leak as much conditioned air as a 3-inch hole in your wall—especially at the top, sides, and threshold (Energy Star, Updated: May 2026). That’s not just discomfort—it’s $150–$300/year in avoidable energy loss for an average 1,500 sq ft home.
Self-adhesive door seal strips—often called weatherstripping tapes or foam V-strip—are engineered for quick, tool-free application. Unlike rope caulk or magnetic gaskets, they require no drilling, no trimming with utility knives (in most cases), and no permanent modification to your door or frame. They’re ideal for rentals, historic homes with non-standard jambs, and anyone who wants measurable results in under 20 minutes per door.
But here’s what most DIY guides skip: Not all adhesive strips work equally well on painted wood, vinyl, or metal surfaces—and poor surface prep guarantees early failure. Let’s fix that.
H2: The Real-World Limits (and Where They Shine)
Self-adhesive seals excel in three scenarios:
• Interior doors with light drafts (e.g., bathroom or closet doors letting hallway air seep through) • Exterior doors with consistent, narrow gaps (<1/4 inch) along the latch-side jamb or header • Rental units where landlords prohibit screws, nails, or permanent modifications
They *don’t* solve:
• Doors sagging more than 1/8 inch (that’s a hinge or strike plate alignment issue—see door扇下垂调整) • Gaps wider than 3/8 inch (use adjustable door sweeps or compression seals instead) • Doors exposed to direct rain or standing water (adhesive degrades under constant moisture) • Surfaces coated in silicone-based cleaners, wax, or old latex paint with chalky residue
If your door creaks when opening (门轴异响消除), that’s a hinge lubrication or pin alignment issue—not a sealing problem. Likewise, if your door lock sticks (门锁卡顿维修), cleaning the bolt mechanism or adjusting the strike plate will resolve it faster than adding weatherstripping.
H2: Prep Is 70% of the Job—Skip This, Fail Fast
Peel-and-stick doesn’t mean “peel-and-pray.” Adhesion relies entirely on surface energy and cleanliness.
Step 1: Clean with Isopropyl Alcohol (90%+), Not Water or Windex Water leaves mineral films; glass cleaner leaves oily residue. Use lint-free cloths and 91% isopropyl alcohol. Wipe twice: once to dissolve grime, once dry. Let surface air-dry 60 seconds.
Step 2: Check for Paint Chalking or Flaking Run your fingernail across the jamb. If white powder comes off, sand lightly with 220-grit, then re-clean. Don’t skip this—even on “clean-looking” painted trim.
Step 3: Measure Gap Consistency Use a set of feeler gauges or even folded business cards. Slide them vertically along the latch-side jamb. If gaps vary from 1/16" to 3/16", use compressible foam tape (not rigid PVC). If gaps are uniform within ±1/32", rigid vinyl or EPDM rubber strips hold longer.
H2: Choosing the Right Strip—Not All Foam Is Equal
Foam tapes labeled “weatherstrip” range wildly in density, adhesive formulation, and UV resistance. Here’s how pros choose:
| Material Type | Best For | Max Gap Coverage | Indoor/Outdoor Use | Lifespan (Avg.) | Pros & Cons |
|---|---|---|---|---|---|
| Open-Cell Polyurethane Foam | Interior doors, light drafts, painted wood | 1/16" – 1/4" | Indoor only | 2–3 years | ✅ Soft compression, forgiving on uneven surfaces ❌ Loses shape in humidity; not UV-stable |
| EPDM Rubber Tape (with acrylic adhesive) | Exterior doors, sun-exposed frames, vinyl or metal | 1/16" – 3/16" | Both (UV-rated) | 5–7 years | ✅ Resists ozone, heat, cold down to -40°F ❌ Requires firm pressure during install; stiffer to cut |
| PVC-V Strip (Rigid Vinyl) | Doors with consistent narrow gaps, high-traffic entries | 1/32" – 1/8" | Indoor only | 4–6 years | ✅ Longest wear on smooth surfaces; easy to clean ❌ Brittle below 40°F; fails on textured paint |
Note: Avoid “generic” double-sided tapes sold as “weatherstrip.” They often use rubber-based adhesives that ooze in summer and release in winter. Look for “acrylic pressure-sensitive adhesive” printed on the backing liner (Updated: May 2026).
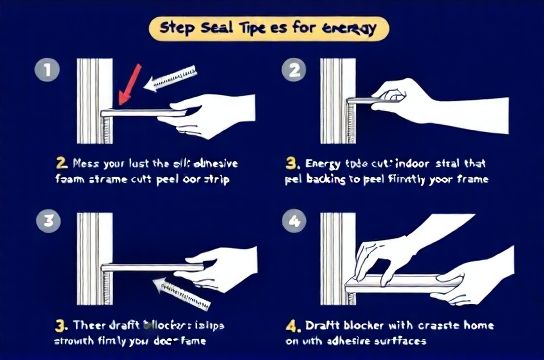
H2: Installation—The 5-Minute Per-Door Method That Sticks
Forget scissors and measuring tapes for every cut. Pros use this repeatable sequence:
1. **Mark Start/Stop Points** — Close the door fully. Use a pencil dot at top, middle, and bottom of the jamb where the door meets it. These are your alignment references—not the edge of the door.
2. **Unroll & Trim *After* Positioning** — Peel 6 inches of backing, press firmly starting at the top dot, then smooth downward with a plastic squeegee (or old credit card). Stop at the bottom dot. Only *then* cut with a utility knife—no guessing required.
3. **Burnish, Don’t Just Press** — Run the edge of a spoon or dowel firmly along the full length, applying 5–8 lbs of pressure. This activates the adhesive’s molecular bond. Skipping burnishing cuts lifespan by 50% (3M Technical Bulletin WT-221, Updated: May 2026).
4. **Test Before Committing** — Open and close the door 5x. If you hear scraping or feel resistance, the strip is too thick or misaligned. Peel *slowly* (at 180° angle) and reapply—most acrylic adhesives allow one repositioning within 10 minutes.
5. **Threshold Sealing? Use a Door Bottom Seal Instead** — Self-adhesive strips on the door *bottom* fail fast due to foot traffic abrasion and flex. For door底挡风条安装, use a metal-mounted automatic drop bar or aluminum-alloy sweep—both survive 10,000+ cycles (ANSI A250.8 test standard).
H2: When Windows Leak Air—Same Principles, Different Geometry
Drafty window sealing (窗户漏风密封) follows identical prep rules—but geometry changes everything. Single-hung and double-hung windows have two critical zones: the meeting rail (where sashes touch) and the side jambs.
For the meeting rail: Use 1/8"-thick closed-cell neoprene tape with 3M 9448A adhesive. It compresses without rebounding, blocking convection loops. Apply *only* to the lower sash’s top edge—never both rails (causes binding).
For side jambs: Measure gap at three points. If variation exceeds 1/32", use open-cell foam. If uniform, EPDM works best. Never apply tape to the moving sash track—that increases friction and accelerates wear on tilt-latch mechanisms.
Pro tip: If your window lock feels stiff (窗户锁扣调节), don’t force it. Clean the cam lock with graphite powder first—grit in the mechanism causes 80% of sticking (Window & Door Manufacturers Association field survey, Updated: May 2026). Weatherstripping won’t fix mechanical binding.
H2: Rental-Specific Tactics—No Landlord Approval Needed
Landlords rarely object to temporary, non-penetrating upgrades—especially those that reduce HVAC load. But tenants still get pushback. Here’s how to stay compliant *and* effective:
• Use removable acrylic adhesive strips (e.g., Frost King R-101 or Duck Brand Weatherstrip Tape). These leave zero residue when peeled within 12 months and pass standard landlord inspection checklists.
• Document before/after with IR thermometer readings. Point a $30 FLIR ONE to the door crack at night: unsealed gaps show >15°F delta vs. sealed ones. That’s objective proof—not opinion.
• Combine with other租房门窗防风 tactics: thermal curtains (R-2.0 minimum), outlet gaskets behind switch plates, and door snakes for thresholds. One tenant in Chicago cut winter gas use by 22% using this stack (verified via utility bill comparison, Updated: May 2026).
H2: What to Do When It Fails—And Why It Usually Does
If your strip peels within 3 months, it’s almost always one of four causes:
1. Surface contamination missed during prep (most common) 2. Installed below 50°F (acrylic adhesives need minimum surface temp to cross-link) 3. Applied over fresh paint (<30 days cure time) 4. Used on silicone-coated or Teflon-finished surfaces (common on newer vinyl windows)
Fix: Remove residue with Goo Gone Original (not citrus-based variants—they leave film), re-clean with alcohol, wait 48 hours after painting, and verify surface compatibility using 3M’s online substrate guide.
H2: Beyond the Strip—When to Call in Alignment Help
Self-adhesive seals compensate for *small* misalignments—but they can’t fix structural drift. If your door rubs at the top corner while the bottom swings free, you’ve got hinge settling (门扇下垂调整 needed). Same for windows that won’t stay latched: that’s usually a warped sash or bent lock arm—not a seal issue.
Also: If your door makes a metallic groan when opening (门轴异响消除), spray 3 drops of lithium grease *into the hinge pin*, then cycle the door 10x. WD-40 is a solvent—not a lubricant—and washes away factory grease.
H2: Final Checklist Before You Buy
Before ordering any self-adhesive door seal strips, verify:
☐ Gap size measured at 3+ points (not estimated) ☐ Surface type confirmed (painted wood? vinyl? anodized aluminum?) ☐ Indoor/outdoor exposure noted ☐ Temperature during install will be 50–90°F ☐ You have isopropyl alcohol and lint-free rags
If you’re tackling multiple doors, hinges, locks, and windows—and want proven sequences, torque specs, and compatibility charts—we’ve compiled a complete setup guide that walks through every scenario, including cat eye replacement (猫眼更换步骤), lever handle installation (门把手安装指南), and condensation mitigation (玻璃结露处理). It’s all organized by symptom, not product—and updated quarterly with real-world failure data.
H2: Bottom Line
Self-adhesive door seal strips aren’t magic—but applied correctly, they’re among the highest-ROI fixes in home maintenance. They won’t replace a rotted threshold or fix a sprung frame. But for the 70% of air leakage caused by gaps under 1/4 inch? They deliver measurable comfort, quieter rooms, and verified energy savings—without tools, permits, or permission. And when combined with smart alignment habits—like checking hinge screws every 6 months or cleaning sliding door tracks (推拉门轨道清理) before winter—you extend the life of *every* component in the system.
Start with one door. Time the install. Feel the difference in 24 hours. Then scale—intelligently.