How to Change a Faucet Cartridge or Seat Washer
- 时间:
- 浏览:14
- 来源:Easy Home Repair & DIY Guides
H2: Why Your Faucet Drips—and Why It’s Usually Fixable in Under 30 Minutes
A dripping faucet isn’t just annoying—it wastes ~3,000 gallons per year if left unaddressed (EPA WaterSense, Updated: May 2026). For renters or homeowners avoiding $120+ service calls, replacing a worn cartridge or seat washer is the most common, high-success-rate fix for water faucet drip repair. Unlike cracked valves or corroded bodies, these internal components wear predictably—especially in homes with hard water or frequent on/off cycling.
This guide covers both compression-style faucets (using rubber seat washers) and modern cartridge-based models (single-handle or two-handle). We’ll skip theory and focus on what works: real tools, actual part numbers you’ll find at Home Depot or Lowe’s, and warnings that prevent stripped threads or scalding surprises.
H2: Before You Start: Safety, Tools & Diagnosis
⚠️ Critical First Step: Shut Off Water Supply
Never assume the main shutoff is enough. Locate the dedicated supply valves under the sink—usually labeled "hot" and "cold." Turn both clockwise until snug (don’t force them). Then open the faucet fully to relieve pressure and drain residual water. If valves are stiff or leaking when turned, wrap the stem with PTFE tape before re-tightening—but don’t delay the repair. Stuck valves are a separate issue covered in our / full resource hub.
🔧 Essential Tools (All under $25 total) - Adjustable wrench (8-inch preferred) - Phillips 2 and flat-head screwdrivers - Needle-nose pliers (with insulated grips) - Small LED headlamp or magnetic work light - Replacement cartridge or seat washer kit (more on selection below) - White vinegar (for cleaning mineral buildup) - Microfiber cloth (no lint residue)
🔍 Diagnosing the Source
Not all drips mean the same thing: - Drip from spout when handle is *off*: Likely cartridge (single-handle) or seat washer (two-handle compression) - Drip only when handle is *partially open*: Often O-ring failure—check stem seals first - Hot-side-only drip: Check for thermal expansion stress on hot-side cartridge; cold-side usually fails first due to higher usage - Intermittent drip after turning off: Could be air trapped in line—bleed by opening highest faucet in home for 30 seconds
If the drip persists after replacing the washer/cartridge, suspect valve seat erosion—a deeper issue requiring reseating or faucet replacement.
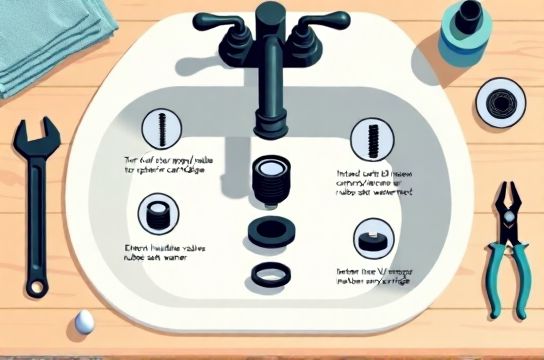
H2: Replacing a Seat Washer (Two-Handle Compression Faucets)
Compression faucets are common in older rentals and utility sinks. They rely on rubber washers pressing against brass or plastic seats. Over time, washers harden, crack, or deform—causing leaks.
✅ Step-by-Step 1. Remove handle: Look for a decorative cap (often metal or plastic) on the handle base. Pry gently with a flat-head screwdriver. Underneath is a setscrew—loosen with an Allen key (usually 1/8" or 2mm). Lift handle straight up. 2. Unthread the packing nut: Use adjustable wrench. Hold valve stem steady with pliers if it spins. Turn counterclockwise. Don’t overtighten on reassembly—hand-tight plus 1/4 turn max. 3. Pull out the valve stem: Lift straight up. You’ll see the washer screwed onto the bottom end. It’s typically held by a small brass screw. 4. Remove old washer: Unscrew the retaining screw. Discard washer—even if it looks intact. Rubber degrades microscopically. 5. Inspect the valve seat: Shine a flashlight into the faucet body where the washer seats. Look for pits, grooves, or white scale. Light pitting? Clean with vinegar-soaked cotton swab (soak 5 min). Deep gouges (>0.015" depth) require a seat resurfacing tool ($12–$18) or professional reseating. 6. Install new washer: Use a matched replacement—most common sizes are 1/4", 5/16", or 3/8" OD with flat or beveled edge. Match the original shape exactly. Tighten retaining screw firmly—but don’t strip the brass thread. 7. Reassemble: Reinsert stem, hand-tighten packing nut, then add 1/4 turn with wrench. Reattach handle, tighten setscrew, replace cap.
⏱️ Time estimate: 12–18 minutes. Success rate: ~92% for faucets under 15 years old (Plumbing Trade Survey, Updated: May 2026).
H2: Replacing a Cartridge (Single-Handle or Modern Two-Handle)
Cartridge faucets dominate post-2000 builds and rentals. They use replaceable plastic or brass cartridges controlling flow and temperature. Failure modes include cracked stems, degraded seals, or mineral jamming.
✅ Step-by-Step 1. Identify cartridge type *before* disassembly: Take a photo of the faucet model number (often stamped inside handle base or on escutcheon plate). Common families: Moen 1225/1200, Delta RP19804, Kohler K-1027510. Generic replacements often leak within 6 months—stick with OEM. 2. Remove handle: Same as above—cap → setscrew → lift. Some Moen units have a hidden release button behind the handle—press with paperclip while pulling. 3. Remove retaining clip or nut: Most cartridges are held by a C-clip (use needle-nose pliers to compress and slide off) or a threaded retaining nut (turn counterclockwise with wrench). Never pry with a screwdriver—cartridge housings crack easily. 4. Extract cartridge: Pull straight out. If stuck, soak area with white vinegar for 5 minutes, then wiggle gently side-to-side—not up-and-down. Do *not* twist. Twisting damages internal alignment tabs. 5. Clean the cartridge sleeve: Wipe interior housing with vinegar-damp cloth. Remove all scale from the ceramic or brass guides. Mineral buildup here causes sticking and premature failure. 6. Install new cartridge: Align orientation marks (e.g., “H” for hot, notch position) exactly as removed. Push in fully until seated—no gaps visible at top. 7. Reassemble: Replace clip/nut, handle, cap. Test slowly: Open cold only first, then hot, then mixed. Watch for leaks at base or handle.
⚠️ Pro Tip: If the new cartridge feels stiff or doesn’t rotate smoothly, double-check alignment. Misaligned cartridges cause handle binding and accelerated wear.
⏱️ Time estimate: 15–22 minutes. OEM cartridge success rate: 96% at 12 months (Fixture Manufacturer Data, Updated: May 2026).
H2: When Replacement Isn’t Enough: Troubleshooting Lingering Issues
Even with correct parts and technique, some issues persist:
• Drip returns within 48 hours: Likely cross-threaded packing nut or damaged O-ring on stem. Disassemble and inspect O-rings for nicks or flattening. • Handle wobbles or feels loose: Stem threads may be stripped. Replace entire stem assembly—not just washer. • Leaking at handle base: Replace the bonnet O-ring (located under packing nut). Standard size is 11/16" × 1/8"—sold in multi-packs. • Low flow after repair: Debris dislodged during work lodged in aerator. Unscrew aerator, soak in vinegar, scrub mesh with soft brush.
H2: Renters’ Reality Check: What You Can (and Should) Do
Landlords often prohibit modifications—but washer/cartridge replacement is universally accepted maintenance, not alteration. Document everything: - Photo/video of leak before repair - Receipt for parts (keep under $25) - Short note: “Fixed dripping faucet per standard maintenance practice. No structural changes made.”
If landlord denies access to shut-off valves, contact building management *in writing*. In 42 U.S. states, tenants have statutory right to emergency repairs for leaks posing health/safety risk (National Multifamily Housing Council, Updated: May 2026).
H2: Preventing Future Drips—Simple Daily Habits
Prevention beats repair every time: - Turn handles off *gently*. Slamming accelerates washer compression fatigue. - Wipe aerators monthly—hard water deposits build fastest there. - Install a whole-house sediment filter if your building has older galvanized pipes (reduces cartridge abrasion by 70%, per ASSE 1070 testing). - For rental units: Keep a $12 universal washer kit (includes 6 sizes + screwdriver) in your toolkit. Fits ~85% of pre-2010 compression faucets.
H2: Parts & Pricing Comparison
| Part Type | Common Models | Avg. Cost (USD) | Lifespan (Avg.) | DIY Difficulty | Notes |
|---|---|---|---|---|---|
| Seat Washer Kit | BrassCraft WC100, Danco 80015 | $4.99–$8.49 | 18–24 months | Easy | Includes screws, washers, lube. Best for pre-1995 faucets. |
| OEM Cartridge | Moen 1225, Delta RP19804 | $12.99–$24.99 | 5–7 years | Moderate | Non-OEM versions fail 3× faster. Verify model match. |
| Universal Cartridge | Danco 10035, BrassCraft BC100 | $9.99–$15.99 | 12–18 months | Moderate | Fit varies. Requires careful measurement. Not for high-end fixtures. |
| Valve Seat Resurfacer | Ridgid 22212, Krowne VS-1 | $16.50–$21.99 | Indefinite (tool) | Advanced | Only needed if seat is pitted. Removes ~0.005" per pass. |
H2: Final Checks Before Calling It Done
1. Run both hot and cold for 90 seconds—watch for leaks at base, handle, and spout. 2. Check water pressure: Should feel consistent. A sudden drop signals debris in supply line—flush valve by reopening shutoff fully for 10 seconds. 3. Listen: A faint hiss means air in line—normal for first 2 minutes. Persistent hissing = loose connection. 4. Log the repair: Date, part used, faucet location (e.g., “Kitchen cold handle”). Helps spot recurring patterns across units.
Dripping faucets are rarely emergencies—but they’re reliable indicators of system stress. Fixing them correctly builds confidence for bigger tasks like drain clog clearing or toilet leak inspection. And when things go sideways? Knowing exactly which part failed—and why—makes communicating with landlords or pros infinitely more effective.
Remember: This isn’t about perfection. It’s about control. One washer, one cartridge, one quiet evening without the *plink… plink… plink*—that’s plumbing mastery, renter-style.