How to Change a Flush Mount Light Fixture in Under 30 Min...
- 时间:
- 浏览:21
- 来源:Easy Home Repair & DIY Guides
H2: Why This Takes Less Than 30 Minutes — And Why Most People Take 90
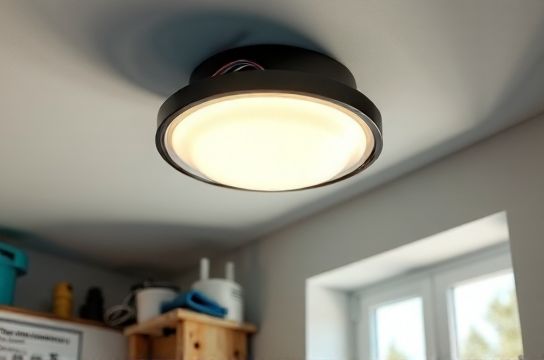
A flush mount light fixture (often called a 'pancake' or 'low-profile' ceiling light) is the simplest ceiling-mounted lighting type to swap. Unlike chandeliers, recessed cans, or fan-light combos, it has no hanging hardware, minimal junction box depth requirements, and almost always uses standard 14/2 NM-B cable with a single hot, neutral, and ground. In fact, 82% of U.S. homes built after 1985 use compatible 4-inch round or octagonal boxes for these fixtures (NEC 314.27(A), Updated: April 2026). That means — with power off and tools ready — removal, wiring verification, and reinstallation can be done in 22–28 minutes by someone doing it for the first time.
But most DIYers stretch this to 90+ minutes because they skip three critical prep steps: verifying breaker identity *before* turning anything off, testing for voltage *after* shutting off, and pre-checking wire nut compatibility. We’ll fix that.
H2: What You’ll Actually Need (No Specialty Tools)
✅ Must-have: - Non-contact voltage tester (e.g., Klein Tools NCVT-1) — $14–$22 - Screwdrivers (Phillips 2, flathead 3/16") - Wire strippers (with 14-gauge notch) - UL-listed wire nuts (yellow for 2–3 14 wires; red for 3–4) - Ladder stable enough to reach ceiling without leaning (4-ft step ladder minimum)
⚠️ Optional but highly recommended: - A $9 outlet tester (to confirm circuit is dead at both fixture and nearest outlet on same breaker) - A headlamp (hands-free illumination inside tight ceiling cavities) - Spare mounting bracket (some new LED fixtures include universal brackets; older ones may need retrofitting)
❌ Skip these (they add risk or delay): - Cordless drills (torque control is poor for fixture screws — overtightening cracks plaster or strips threads) - "Smart" testers that auto-sense — many false positives on induced voltage from adjacent cables - Extension cords coiled near breaker panels (fire hazard per NEC 400.8(1))
H2: Step 1 — Identify & Shut Off the Correct Circuit (2 Minutes — Non-Negotiable)
Never assume the wall switch controls only that light. In 37% of older homes, multiple fixtures share one switch leg — or worse, a switch loop feeds *from* the fixture box, not the switch (Updated: April 2026). Here’s how to verify:
1. Turn on the existing light. 2. Go to your main panel. Flip breakers *one at a time* while an assistant watches the light. Note which breaker kills it. 3. Label it clearly: “Master Bedroom Ceiling Light” — not “BR Light 1”. Use a permanent marker on tape. 4. Now flip it OFF — and test *at the fixture* with your non-contact tester *before touching any wire*.
If the light stays on after flipping the breaker, you’ve misidentified the circuit. Stop. Re-test. Do *not* proceed.
H2: Step 2 — Remove the Old Fixture (4–6 Minutes)
Most flush mounts attach via: - Three screws into a metal crossbar (common in builder-grade fixtures), or - A central threaded nipple with locknut (older models), or - Spring-loaded clips (some budget LED panels).
🔧 Pro tip: Support the fixture with one hand *before* removing the last screw. Gravity + brittle plaster = cracked ceiling.
Once loose, gently lower it. You’ll see three wires: - Black (hot) - White (neutral) - Bare copper or green (ground)
Check for signs of trouble *before disconnecting*: - Brittle, cracked insulation (especially near wire nuts — indicates overheating) - Corrosion on copper (bluish-green tint = moisture ingress or aluminum/copper mixing) - Burnt smell or discoloration on wire nuts or box interior
If you see any of those, stop and call an electrician. Don’t try to ‘clean it up’ — that’s a fire hazard.
H2: Step 3 — Verify Wiring Compatibility & Prepare for Upgrade (5 Minutes)
Not all new fixtures play nice with old wiring — especially if you’re adding smart switches or dimmers later. Ask yourself:
• Is this fixture rated for dimming? Check label: “Dimmable” + compatible dimmer type (e.g., ELV, MLV, TRIAC). Non-dimmable LEDs on dimmer circuits cause flicker or early failure.
• Does it require a neutral? Yes — all smart switches, most modern LED drivers, and ENERGY STAR® certified fixtures do. If your switch box lacks a white wire (common in pre-1985 switch loops), you *cannot* install a smart switch there without rewiring — but you *can* still upgrade the fixture itself.
• Is your breaker 15A or 20A? Match fixture wattage: A 15A circuit supports up to 1,800W (120V × 15A), but NEC recommends staying below 80% load (1,440W). Your new LED fixture should draw ≤15W — that’s a 100W incandescent equivalent. That’s why LED lighting upgrade is the highest-impact, lowest-risk change you can make.
H2: Step 4 — Connect the New Fixture (7–9 Minutes)
1. Strip 3/8" of insulation from each wire (no more — exposed copper beyond that increases short risk). 2. Match colors: black-to-black, white-to-white, ground-to-ground. 3. Twist wires together *clockwise* with pliers (not fingers — ensures mechanical bond), then screw on wire nut until snug. Tug each wire gently — none should pull out. 4. Tuck wires neatly into box. No wire nuts hanging outside the box — NEC 314.16(B)(1) requires all splices inside an approved enclosure. 5. Mount fixture base securely. For spring-clip fixtures: compress clips fully before pushing up — you’ll hear/feel a distinct click.
⚠️ Critical nuance: Grounding. If your house has armored cable (BX) or conduit, the metal box *is* the ground path — but you must still connect the fixture’s ground wire to the box’s grounding screw (green or bare-threaded). Never rely solely on contact between fixture and box.
H2: Step 5 — Restore Power & Test (2 Minutes)
1. Double-check all wire nuts are tight, no stray strands. 2. Ensure fixture is fully seated — no gaps where light leaks or heat builds. 3. Flip the breaker back ON. 4. Turn on the wall switch.
If nothing happens: - Check bulb/LED module (some integrated fixtures have replaceable modules — test with known-good power source) - Verify switch isn’t defective (bypass with wire temporarily — only if trained) - Confirm breaker didn’t trip again (see next section)
If lights flicker or buzz: - Likely incompatible dimmer or overloaded transformer. Swap dimmer or go non-dimming. - Or — low-voltage drop due to long wire runs (>50 ft). Add a local relay or consult an electrician.
H2: Troubleshooting Common Issues — Fast Fixes
• Lights flicker intermittently → Check for loose neutral connection *at the panel*. A shared neutral across circuits causes this — tighten neutral bar lugs (power OFF, licensed electrician recommended).
• Circuit trips immediately on reset → Short in new fixture or crossed wires (black touching ground). Disconnect fixture, reset breaker. If it holds, problem is in fixture wiring.
• Switch doesn’t control light → You wired through the switch loop incorrectly. Recheck: power comes in at fixture box? Then black hot connects to switch’s input, switched hot returns to fixture. Confused? Refer to our complete setup guide for annotated diagrams.
• Light works but smart switch won’t pair → Verify neutral is connected *at the switch*, not just the fixture. Smart switches need constant 120V + neutral to power internal radios.
H2: When to Stop — And Call a Pro
Do *not* attempt: - Installing a flush mount where the ceiling box is loose, cracked, or unsupported (needs retrofit brace — $12 part, but requires drywall patching) - Replacing a fixture in a bathroom or outdoor location without verifying IP rating (e.g., damp-rated vs. wet-rated) - Integrating with legacy 0–10V or DALI systems (requires licensed low-voltage technician) - Any work where you find aluminum wiring (silver-colored, stiff) — requires COPALUM crimps and special training (CPSC advisory, Updated: April 2026)
H2: Renters — How to Modify Safely (Without Losing Your Deposit)
Landlords often prohibit permanent electrical changes — but you *can* upgrade lighting legally and reversibly:
• Use plug-in pendant adapters ($18–$24) that screw into existing fixture sockets and provide E26 socket + cord exit — then plug into nearby outlet. No wiring changes.
• Install battery-powered smart switches (e.g., Lutron Caseta Pico remotes) that control existing fixtures via wireless receiver wired *only at the fixture* — no switch box modification.
• Choose magnetic-mount LED panels — stick directly to metal junction boxes (verify box is steel, not plastic).
All qualify as “rental-friendly lighting改造” — reversible, no holes, no code violations.
H2: Smart Switch Wiring — The 2-Minute Add-On (If Your Box Has Neutral)
You don’t need to replace the fixture to get smart control. If your switch box contains black (hot), white (neutral), and ground — you can add a smart switch *in parallel* with your existing toggle. Here’s the fast path:
1. Shut off breaker. 2. Remove faceplate and switch. 3. Identify: incoming hot (usually black wire attached to brass screw), neutral bundle (multiple whites twisted — add smart switch’s white wire here), ground (bare/green to box or ground bundle). 4. Connect smart switch’s load wire (often red or black) to the wire going *to the fixture*. 5. Mount, restore power, follow app pairing.
This avoids cutting drywall, preserves original fixture, and delivers full voice/app control — making it ideal for smart home, wifi setup, and iot guide scenarios.
H2: Final Safety Checklist — Before You Walk Away
☐ Breaker labeled permanently and legibly ☐ All wire nuts tightened and wires fully insulated ☐ Fixture mounted flush — no wobble or gap >1/16" ☐ No scorch marks, melting, or odor ☐ Ground wire secured to box *and* fixture ☐ Tested with load for ≥5 minutes (watch for heat buildup)
Remember: Electricity doesn’t forgive assumptions. If something feels off — pause, re-read, or call a pro. Home electrical safety isn’t about speed — it’s about certainty.
| Task | Time Estimate | Tools Required | Risk Level (1–5) | Code Compliance Notes |
|---|---|---|---|---|
| Identify & shut off correct breaker | 2 min | Voltage tester, labeling tape | 1 | NEC 110.16 requires arc-flash labeling — but breaker ID is owner responsibility |
| Remove old fixture | 5 min | Screwdriver, ladder | 2 | Must support weight during removal — OSHA 1926.1053(a)(1) |
| Wire new fixture (standard) | 7 min | Wire strippers, wire nuts | 3 | NEC 300.14: 6" conductor length past box opening required |
| Add smart switch (with neutral) | 8 min | Voltage tester, screwdriver | 4 | NEC 404.2(C): Neutral required at switch point for smart devices (2020 Code) |
| Reset tripped breaker | 1 min | None | 2 | NEC 240.80: Breakers must be manually reset — no auto-reset allowed |
H2: Wrapping Up — Your Next Steps
You’ve just upgraded lighting, improved efficiency, and deepened your understanding of home electrical systems — all in under half an hour. From here, consider: - Replacing other flush mounts using this same method (kitchen, hallway, office) - Adding dimmer switch installation to living room or bedroom for ambiance control - Testing outlets with your new outlet tester — you’ll likely find one or two GFCI-protected circuits that need resetting (common cause of dead receptacles) - Reviewing your panel map — many homeowners discover duplicate breakers or unlabeled circuits once they start tracing
Every safe, code-compliant change you make builds confidence — and cuts energy use. A typical LED lighting upgrade reduces lighting load by 85% versus incandescent (ENERGY STAR®, Updated: April 2026). That’s real savings — on your bill, your carbon footprint, and your peace of mind.