Circuit Breaker Panel Basics for Renters and New Homeowners
- 时间:
- 浏览:18
- 来源:Easy Home Repair & DIY Guides
H2: Why Your Breaker Panel Matters More Than You Think
You walk into your new apartment or first home. The lights flicker when the AC kicks on. The kitchen outlet stops working after you plug in the toaster and microwave at once. Or worse—you flip a switch and nothing happens. No drama. No sparks. Just silence. That silence? It’s your circuit breaker panel doing its job.
The breaker panel isn’t just a metal box in the basement or utility closet. It’s the central nervous system of your home’s electricity—and understanding its basics is the single most practical electrical skill a renter or new homeowner can learn. Not because you’ll rewire the house, but because you *will* need to reset a tripped breaker, replace a buzzing ceiling light, or upgrade an outdated switch—safely and without calling an electrician every time.
This guide focuses only on what’s realistically DIY-legal, code-compliant (NEC 2023 compliant), and physically safe for non-licensed individuals. We skip theory and focus on action: how to identify breakers, reset them correctly, swap common fixtures like recessed lights or flush-mount ceiling fixtures (吸顶灯更换安装), install smart switches (智能开关接线), and troubleshoot flickering or dead circuits (灯光闪烁排查). Everything here assumes you’re working with standard 120V residential systems in North America—no subpanels, no 240V appliances, no aluminum wiring.
H2: What a Circuit Breaker Panel Actually Does
A circuit breaker panel distributes power from your utility meter to individual branch circuits. Each breaker protects one circuit by cutting off current if it exceeds the wire’s safe capacity. For example:
• A 15-amp breaker feeds lighting circuits using 14-gauge wire (rated for up to 1,800W at 120V). • A 20-amp breaker feeds outlets in kitchens or laundry rooms using 12-gauge wire (up to 2,400W).
Breakers trip for three main reasons: overload (too many devices), short circuit (hot-to-neutral contact), or ground fault (hot-to-ground contact). Overloads are the most common cause among renters and new homeowners—and the easiest to fix.
Important: If a breaker trips repeatedly *after* you’ve unplugged everything on that circuit, do not keep resetting it. That’s a red flag for damaged wiring, failing devices, or faulty connections—and requires a licensed electrician.
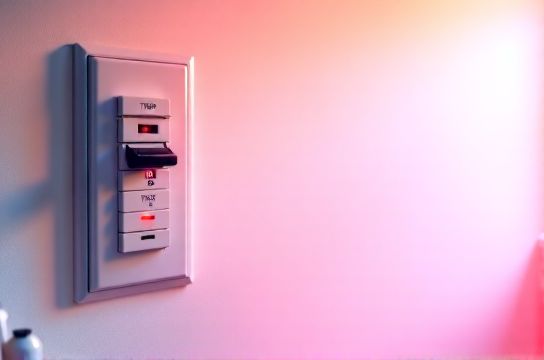
H2: How to Safely Reset a Tripped Breaker (空开跳闸复位)
Step 1: Locate your panel. In apartments, it’s often in a hallway closet, laundry room, or near the front door. In houses, it’s commonly in the garage, basement, or utility room. Panels are usually labeled—but labels fade, get covered in paint, or are outright wrong.
Step 2: Turn off all devices and unplug everything on the affected circuit. This includes lamps, chargers, smart speakers—even LED strips plugged into that outlet.
Step 3: Open the panel cover. Use a non-conductive screwdriver (e.g., fiberglass-handled) if screws are present. Never use metal tools near live bus bars.
Step 4: Look for the tripped breaker. It won’t be fully “on” or “off.” It will be in a middle position—often with a visible orange or red indicator stripe, or a handle slightly offset from neighbors. Some breakers click audibly when tripped; others don’t.
Step 5: Firmly push the handle all the way to the “OFF” position first—this resets the internal latch—then move it decisively to “ON.” If it trips again immediately, stop. Do not force it. Something is wrong.
Note: Breakers wear out. After ~10,000 operations (Updated: April 2026), mechanical fatigue increases failure risk. Most residential breakers last 30–40 years—but if yours is pre-1990, consider professional evaluation before repeated resets.
H2: Swapping Light Fixtures — Ceiling Lights & Flush Mounts (吸顶灯更换安装)
Replacing a ceiling fixture is one of the safest, highest-impact DIY upgrades—especially upgrading to LED (led节能灯升级). But safety depends entirely on correct shutdown and verification.
✅ What’s allowed: Replacing existing hardwired fixtures with same-mount-type replacements (e.g., flush-mount to flush-mount, pendant to pendant). Adding junction boxes is *not* DIY—requires permit and inspection in most jurisdictions.
❌ What’s prohibited: Running new cable from panel to ceiling, splicing into unboxed wires, or modifying existing circuits beyond the fixture box.
Procedure: 1. Turn OFF the correct breaker—not just the wall switch. Verify with a non-contact voltage tester (NCVT) *at the fixture wires*, not just the switch plate. 2. Remove old fixture. Support its weight while loosening mounting screws. Note wire grouping: black (hot), white (neutral), bare/green (ground). Older homes may have cloth-wrapped NM cable or knob-and-tube—do *not* proceed without consulting an electrician. 3. Connect new fixture: Match colors, use UL-listed wire nuts (not tape or twist-ons alone), and ensure no bare copper is exposed beyond ¼ inch. Tighten mounting bracket securely—especially critical for heavier fixtures (吊扇固定安装 requires additional structural support; see below). 4. Restore power and test.
Pro tip: If your ceiling box is plastic and lacks a grounding screw, and your new fixture has a ground wire, attach the ground to the metal mounting strap *only if* the strap is bonded to grounded metal framing. Otherwise, consult an electrician—ungrounded circuits increase shock risk.
H2: Installing Smart Switches & Dimmers (智能开关接线, 调光开关布线)
Smart switches (e.g., Lutron Caseta, TP-Link Kasa, Leviton Decora) let you control lights remotely, set schedules, and integrate with voice assistants. But unlike dumb switches, most require a neutral wire in the switch box to power their internal electronics.
Before buying: Remove your existing switch plate and verify presence of white (neutral) wires bundled together in the back of the box. If you see *only* black, red, and ground—or two blacks and a ground—your box likely lacks neutral. In that case, choose neutral-free options like Lutron PD-6ANS or universal dimmers rated for ELV/MLV loads (for low-voltage LED drivers).
Wiring steps (standard 3-way or single-pole): 1. Shut off breaker. Confirm with NCVT. 2. Label wires before disconnecting: Line (incoming hot), Load (to light), Neutral, Ground. 3. Connect smart switch per manufacturer diagram. Most use screw terminals or push-in connectors—never both on same wire. 4. Tuck wires neatly. Overcrowded boxes cause heat buildup and premature failure. 5. Mount switch, restore power, pair via app.
⚠️ Critical note: Smart dimmers must match your load type. Incandescent-rated dimmers overheat with LEDs unless specifically listed for LED (e.g., “LED-compatible, min 5W load”). Using mismatched dimmers causes buzzing, flickering, or early driver failure—common root cause of 灯光闪烁排查 cases.
H2: When to Call a Pro — and When You Can DIY
DIY-legal tasks (per NEC Article 404.8 & 410.62): • Replacing receptacles and switches with identical ratings (e.g., 15A duplex → 15A GFCI). • Swapping luminaires (fixtures) where wiring method and box rating remain unchanged. • Installing listed smart devices designed for retrofit.
Pro-required tasks: • Adding new circuits or outlets. • Replacing a panel or main breaker. • Working inside meter bases or service entrances. • Installing ceiling fans where joists aren’t rated for dynamic load (吊扇固定安装 requires fan-rated brace or retrofit hanger—most standard boxes support ≤35 lbs; fans weigh 25–50 lbs *plus* motion stress).
Also: Landlords typically prohibit permanent modifications—including changing switches or fixtures—unless approved in writing. Renters should always check lease terms before any work (租客灯具改造 falls under “alterations” in 90% of standard leases). Temporary solutions like plug-in smart bulbs or clamp-on LED fixtures avoid violations entirely.
H2: Common Pitfalls — And How to Avoid Them
1. Assuming “off at switch = safe”: Wall switches only interrupt the hot leg. The neutral and ground remain energized at the fixture unless the breaker is off. Always kill at the panel.
2. Ignoring AFCI/GFCI requirements: Since 2014, NEC requires Arc-Fault Circuit Interrupters (AFCI) on all bedroom, living room, and dining room circuits—and GFCI on bathrooms, kitchens, garages, and outdoors. These breakers *must* be tested monthly. Press the “TEST” button: it should trip with a click. Then press “RESET.” If it doesn’t reset, or trips without load, replace the breaker (Updated: April 2026).
3. Overloading outlets with plug adapters: Using multiple daisy-chained power strips or插头转换器使用 on one 15A circuit risks overheating. A single 15A circuit supports ~1,800W continuous. A space heater (1,500W) + laptop (65W) + lamp (12W) = 1,577W—leaving <223W margin. Add a vacuum (1,200W) and you’re guaranteed a trip.
4. Skipping box fill calculations: Every wire, clamp, device, and yoke takes space. NEC Table 314.16(B) sets max conductor counts per box size. Example: A standard 18 cu in plastic box holds 9 x 14 AWG wires. Exceeding this causes overheating and fire risk—especially in retrofit LED installations where drivers generate more heat in confined spaces.
H2: Fixture & Switch Upgrade Comparison
| Task | Time Required | Tools Needed | Code Compliance Notes | Common Failure Causes | DIY Risk Level |
|---|---|---|---|---|---|
| 吸顶灯更换安装 | 25–45 min | Voltage tester, screwdriver, wire nuts | Fixture must match box rating (e.g., 20-lb max for standard box); no splices outside box | Loose neutral connection, undersized box, missing ground | Low |
| 智能开关接线 | 30–60 min | Voltage tester, screwdriver, needle-nose pliers | Neutral required for most models; AFCI/GFCI compatibility mandatory | Wrong load type, shared neutrals, misidentified line/load | Moderate |
| 空开跳闸复位 | 2–5 min | None (but flashlight helps) | No code violation—but repeated trips indicate underlying hazard | Overloaded circuit, failing appliance, moisture in outdoor outlet | Low (if done correctly) |
| 调光开关布线 | 40–75 min | Voltage tester, dimmer-rated wire nuts, multimeter (optional) | Must match load type (LED/CFL/incandescent); ELV dimmers need compatible drivers | Flicker due to incompatible LED driver, undersized neutral, shared circuit noise | Moderate-High |
| led节能灯升级 | 10–20 min per fixture | Ladder, bulb remover (for pin-base), gloves | No rewiring needed; verify ballast bypass if retrofitting fluorescent troffers | Using non-dimmable LEDs on dimmer circuits, thermal overload in enclosed fixtures | Low |
H2: Final Checks Before You Flip the Switch
Before restoring power: • Double-check all wire nuts are tight—give each a gentle tug. • Ensure no insulation is nicked or pinched under screws. • Confirm ground wires are connected to green screws or grounding bar—not wrapped around conduit or left dangling. • Verify smart switch firmware is updated (many require initial cloud sync before local control works).
And remember: Electricity doesn’t forgive assumptions. If something feels off—odd smells, warmth at the switch, inconsistent dimming—stop. Your safety isn’t worth saving $120 on an electrician call-out fee.
For full step-by-step walkthroughs, wiring diagrams, and NEC-compliant checklists—including how to document landlord approvals and verify box ratings—visit our complete setup guide. Updated monthly with real-world field reports from licensed inspectors and rental compliance officers (Updated: April 2026).