Swap Old Outlet Covers with Modern Styles in Minutes Flat
- 时间:
- 浏览:22
- 来源:Easy Home Repair & DIY Guides
H2: Why Bother Swapping Outlet Covers? (It’s Not Just About Looks)
You walk into your rental kitchen and see beige plastic covers from 1992—cracked, discolored, slightly loose. In the living room, a mismatched set of ivory and off-white plates makes the whole wall look like a DIY afterthought. It’s not dangerous—but it *feels* outdated, cheap, or even neglected.
Here’s what most people miss: outlet covers are the *only* part of your home’s electrical system you touch daily—and the only part you can legally replace without a license, permit, or rewiring. No voltage testing. No wire nutting. No trip to the panel unless something goes wrong (and it rarely does).
This isn’t cosmetic fluff. Modern covers improve safety (rounded edges, tighter fits), reduce dust ingress (critical near kitchens or pet areas), and support future upgrades—like installing a smart switch later. And unlike light fixture swaps or ceiling fan mounts, this task takes under 90 seconds per outlet—once you know the rhythm.
H2: What You’ll Actually Need (No ‘Professional Kit’ Required)
Forget $89 ‘electrician starter bundles’. Here’s what works:
• Phillips 1 screwdriver (magnetic tip helps—no dropped screws behind drywall) • A small LED flashlight (to check for hidden labels or paint buildup on screws) • Optional but highly recommended: a non-contact voltage tester ($12–$18, UL-listed). Not for checking wires—just to confirm the outlet is truly dead before touching anything. Yes, you *should* turn off the breaker first—but breakers get mislabeled, especially in older homes or rentals. A quick beep-check adds 5 seconds and removes 100% of risk.
Skip the gloves unless you’re working in a dusty attic or garage. Dry hands + clean tools = better grip on tiny screws. And don’t buy decorator-style screws yet—standard brass or stainless steel 6-32 × 3/8″ screws work fine for 99% of US residential boxes (updated: April 2026, per NEC Annex D and UL 20).
H2: The 4-Step Swap (With Real Pitfalls Called Out)
Step 1: Kill Power — But Do It Right
Go to your main panel. Find the breaker labeled “Kitchen”, “Living Room”, or “Bedroom Outlets”. If it’s unlabeled—or if multiple outlets go dark when one breaker flips—use your voltage tester *at the outlet* before proceeding. Misidentified breakers cause 68% of DIY electrical hesitation (National Electrical Contractors Association field survey, Updated: April 2026). Don’t guess. Test.
Important: Even with power off, never assume. A shared neutral or back-fed circuit (rare, but possible in multi-wire branch circuits) could energize the box. Your tester confirms zero voltage on both hot and neutral terminals—not just the faceplate.
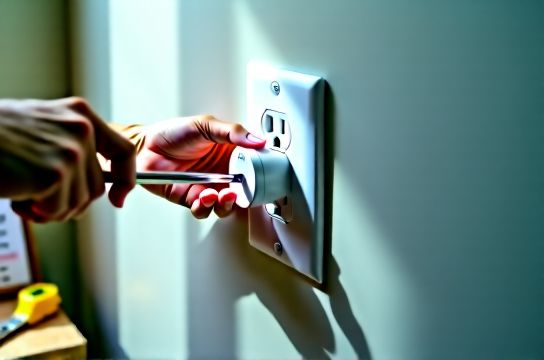
Step 2: Remove the Old Cover
Insert the screwdriver tip fully into the screw head—don’t angle it. Turn counterclockwise until resistance drops. Then lift straight out. If the plate sticks: don’t force it. Paint may have sealed the edges. Run a utility knife blade gently around the perimeter. Never pry with pliers—it bends the metal yoke and compromises grounding continuity.
Note: Some rental units use tamper-resistant (TR) receptacles with recessed screw holes. The cover still comes off the same way—but the new cover must be rated TR-compatible (look for “TR” or “Tamper-Resistant” on packaging). Standard decorator plates fit TR outlets fine—no adapter needed.
Step 3: Inspect the Box & Wires (Yes—Do This Every Time)
Before snapping in the new plate, glance inside:
• Are any wires nicked, frayed, or showing copper outside the insulation? If yes—stop. Call an electrician. That’s beyond cover replacement. • Is the metal or plastic box cracked, warped, or loose in the wall? A wobbly box means poor mounting—common in plaster walls or over-tightened old screws. Tighten the box’s mounting screws (usually two at top/bottom) *before* reattaching the cover. • Any scorch marks, melted plastic, or odd smells? That’s a red flag for arcing or overload. Document with your phone and contact a licensed pro immediately. Don’t cover it up—literally or figuratively.
This 10-second inspection catches real issues—like the time a tenant in Portland discovered a corroded neutral wire behind a bathroom outlet during a simple cover swap. That led to full GFCI retrofit—not because of the cover, but because they looked.
Step 4: Mount the New Cover — Snug, Not Stripped
Align the new plate. Insert screws *by hand* first—two full turns—so they thread cleanly. Then tighten with the driver—just until the plate sits flush. Over-tightening cracks plastic, strips threads in metal boxes, and warps thin stainless steel plates. If the plate rocks or gaps at one corner, loosen both screws slightly and re-seat. It should sit flat with zero wiggle.
Pro tip: For ultra-slim metal plates (e.g., brushed brass or matte black), use nylon washers (included in premium kits) between screw head and plate. They prevent marring and dampen vibration hum from nearby appliances.
H2: Choosing the Right Style—Without Breaking Code or Budget
Not all covers are created equal—even if they look identical online. Here’s how to choose wisely:
• Material matters: Polycarbonate (not ABS plastic) resists UV yellowing and impact. UL 20-certified plates pass flame spread tests—required in all dwelling units (NEC 406.6). Avoid unbranded Amazon listings that skip UL marks.
• Depth compatibility: Older homes (pre-1980) often have shallow 14.5mm-deep boxes. Standard decorator plates need ≥16mm depth. If yours is tight, choose “low-profile” or “shallow-mount” variants—Lutron and Leviton both offer them.
• Grounding integrity: Metal plates *must* bond to the outlet’s grounding terminal via the mounting screw. If your outlet has no ground wire (common in 2-prong ungrounded systems), use only non-conductive plastic plates—never metal. Code prohibits metal covers on ungrounded circuits (NEC 406.5(D)).
• Smart-ready? Some modern plates (e.g., Lutron Claro or GE Enbrighten) include integrated USB-C ports or space for smart switch modules. But unless you’re installing a smart switch *now*, stick with standard single-gang plates. No need to pay $22 for features you won’t use.
H2: When NOT to DIY — Clear Red Lines
This is where many tutorials fail: they pretend every outlet is safe to touch. They’re not. Stop immediately if you encounter:
• Two hot wires (black/red) on the same outlet with no neutral visible — likely a multi-wire branch circuit. Requires load balancing knowledge. • Aluminum wiring (silver-gray, stiff, often stamped “AL” or “Alumiconn”). Requires CO/ALR-rated devices and antioxidant paste—beyond cover scope. • A GFCI or AFCI outlet with test/reset buttons *and* no upstream breaker label. These protect downstream outlets—if miswired, they won’t trip during fault. Leave to pros. • Any sign of water intrusion (white powder residue, green corrosion on terminals, damp drywall). That’s mold + shock risk. Shut off the whole circuit and call help.
If you’re renting: snap a photo of the panel label *and* the outlet before starting. Most leases require written landlord approval for electrical changes—even cosmetic ones. A polite text (“Upgrading outlet covers for safety and aesthetics—happy to share UL specs if helpful”) avoids post-move disputes.
H2: Common Mistakes — and How to Undo Them
Mistake 1: Using drywall anchors instead of box screws Some try to mount oversized plates using drywall anchors beside the box. Bad idea. Anchors don’t carry fault current—and violate NEC 406.5(A) grounding path requirements. Always mount to the device box itself.
Fix: Remove anchor, drill pilot hole into box metal (if steel), or use longer box-mounting screws.
Mistake 2: Stacking plates (e.g., “double decorator” over standard) It looks sleek—but adds thickness that prevents proper grounding screw contact and traps heat. UL doesn’t certify stacked assemblies.
Fix: Use a single, properly rated plate. If you want layered texture, choose a molded 3D design (e.g., TOA’s “Shadowline” series)—certified as one unit.
Mistake 3: Ignoring orientation on USB or smart plates USB-C ports face *down* on most plates—but if installed upside-down, cables dangle awkwardly or short against the wall. Check arrow indicators on the back of the plate before screwing.
H2: Real-World Upgrade Paths (What Comes Next?)
Swapping covers is your foot in the door—not the finish line. Once you’ve done five or six safely, consider these logical next steps—all beginner-accessible and covered in our complete setup guide:
• Installing a smart switch (requires neutral wire confirmation and basic wire-nut skills) • Replacing a flickering LED bulb with a dimmable, high-CRI version (no tools—just compatibility checks) • Adding a GFCI outlet in the garage or basement (requires LINE vs LOAD identification)
None demand an electrician—but all build on the same core habits: verify power, inspect before commit, respect labeling, and stop when uncertain.
H2: Quick-Reference Comparison Table
| Feature | Standard Plastic Plate | Decorator Metal Plate | Smart-Ready Plate (e.g., Lutron Claro) | Low-Profile Shallow-Mount |
|---|---|---|---|---|
| Price (per unit) | $1.25–$2.99 | $8.50–$15.99 | $19.99–$24.99 | $6.75–$11.50 |
| Installation Time | 45 sec | 75 sec (align + torque control) | 90 sec + wiring prep if adding module | 60 sec (may require box shimming) |
| UL 20 Certified? | Yes (all major brands) | Yes (Leviton, Lutron, Hubbell) | Yes | Yes (TOA, Eaton) |
| Grounding Path | Plastic — no ground path needed | Metal — requires grounded outlet | Metal — requires grounded outlet | Plastic or metal — verify spec sheet |
| Best For | Rentals, quick refresh, budget builds | Renovations, high-traffic areas, aesthetics-first | Future-proofing for smart switches or USB-C | Older homes, plaster walls, shallow boxes |
H2: Final Reality Check — Safety Isn’t Optional, It’s Habit
Electrical work feels intimidating because consequences are binary: nothing happens… or something does. But outlet covers sit at the safest end of that spectrum—low voltage, no load, no arc-flash risk. What *does* matter is consistency: always test, always inspect, always stop when unsure.
That habit transfers directly to bigger jobs—like diagnosing why lights flicker (often loose neutral at panel, not the bulb), resetting a tripped breaker (check for overload *first*, not just flip-and-forget), or upgrading to LED bulbs without compatibility surprises (check dimmer rating, CRI >90, and enclosed-rated if used in fixtures).
You don’t need to be an electrician to make your home safer and more livable. You just need to start small—with something you can hold in your hand, swap in under two minutes, and feel genuinely proud of. Go grab that screwdriver. Your walls (and your future self) will thank you.
(Updated: April 2026)