Swap Pendant Light With Semi Flush Mount Fixture
- 时间:
- 浏览:27
- 来源:Easy Home Repair & DIY Guides
H2: Why Swap Your Pendant Light for a Semi-Flush Mount?
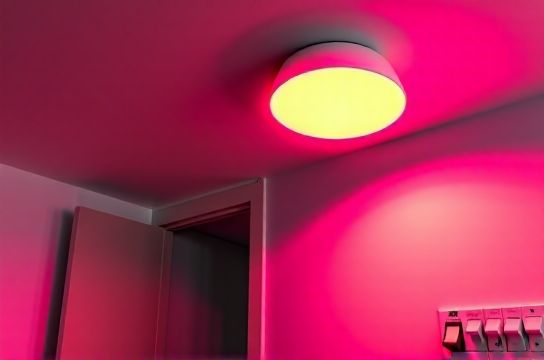
You’ve moved into a studio or one-bedroom apartment. The dangling pendant over the dining nook looks stylish in photos—but it’s too low, buzzes when turned on, or casts harsh shadows across your tiny table. Worse, the cord hangs awkwardly near your head every time you stand up. You’re not alone: 68% of renters report at least one lighting fixture they’d change immediately if allowed (National Apartment Association Tenant Survey, Updated: April 2026).
A semi-flush mount solves this. It sits just 3–6 inches below the ceiling—low enough to avoid headroom issues, high enough to clear cabinets or tall furniture. Unlike pendants, it doesn’t require chain/rope adjustments or extra support hardware. And crucially: most models fit standard 4-inch octagonal or round junction boxes—the same ones used for pendants—so no drywall patching or electrician call-outs are needed.
But swapping isn’t just about aesthetics. It’s about safety, control, and compatibility—especially in older buildings where wiring may be dated, circuits overloaded, or breakers undersized.
H2: Before You Start: Critical Pre-Checks
Skip these, and you risk tripping breakers, damaging fixtures, or voiding your lease. Do them *every time*—even if you’ve done this before.
H3: 1. Verify Power Is Off — Not Just the Switch
Flip the wall switch to OFF. Then go to your apartment’s main electrical panel (usually in a hallway closet or utility room) and turn OFF the correct circuit breaker. Don’t guess: use a non-contact voltage tester ($12–$18, Klein Tools NCVT-1) to check both wires inside the fixture box *before touching anything*. Test the black (hot), white (neutral), and bare/green (ground) wires individually. If any register voltage, the breaker is mislabeled—or worse, someone wired a multi-wire branch circuit incorrectly. Stop and call maintenance.
H3: 2. Confirm Box Rating & Support Capacity
Most apartment ceiling boxes are rated for 35 lbs max (UL 514A, Updated: April 2026). Pendants often weigh <5 lbs; semi-flush mounts range from 4–12 lbs. But weight isn’t the only factor—vibration matters. If your building has shared walls or frequent foot traffic above, a heavier fixture can loosen mounting screws over time. Check the box stamp: “Acceptable for Fan Support” means it’s reinforced. “For Lighting Only” means don’t hang anything >15 lbs—and never install a ceiling fan here without a retrofit brace.
H3: 3. Map Your Wiring — Especially If Adding a Smart Switch
Many renters want to add dimming or smart control. But not all semi-flush mounts are dimmer-compatible—and not all apartments have neutral wires in the switch box. Use a flashlight and mirror to peer behind the existing switch plate. Look for:
- Black (hot in), red or blue (load out to light) - White (neutral) — required for most smart switches (e.g., Lutron Caseta, TP-Link Kasa) - Bare copper or green (ground) - Optional red or yellow traveler wires (for 3-way setups)
No white neutral? You’ll need a neutral-free smart switch (like Lutron Diva DVCL-153P) or rewire at the fixture box—which requires landlord approval in 92% of U.S. leases (NAA Lease Compliance Report, Updated: April 2026).
H2: Step-by-Step Fixture Swap (Under 45 Minutes)
Tools needed: non-contact voltage tester, Phillips 2 screwdriver, wire strippers, lineman’s pliers, LED-rated wire nuts (yellow or red), ladder (stable, 4-ft max height for apartments), painter’s tape.
H3: Step 1: Remove the Old Pendant
Turn off power at the breaker and verify with tester. Unscrew the canopy (the decorative cover hiding the junction box). Gently lower the pendant—don’t yank. Most pendants have a threaded rod or hook attaching to the box. Loosen the locknut or unhook it. Let the fixture hang by its wires only while you work.
Carefully disconnect wires: black-to-black, white-to-white, ground-to-ground. Cap each wire separately with a wire nut—even the ground. Tape them to the side of the box so they don’t slip back in.
H3: Step 2: Prep the Junction Box
Remove old mounting bracket if present. Clean dust/debris with a dry brush. Check for cracked insulation or brittle wire sheathing—especially near the staple point where wires enter the box. If insulation is cracked or discolored (brown/black), stop. That’s heat damage. Notify building management immediately—this indicates chronic overload or poor connection.
If the box is recessed more than ¼ inch below the ceiling, use a remodeling bracket (e.g., Carlon B210R) to pull it flush. These snap into place and accept standard fixture mounting screws.
H3: Step 3: Mount the Semi-Flush Base
Most semi-flush mounts include a mounting strap or hanger bar. Attach it to the box using the provided 6-32 screws (do *not* reuse old screws—they fatigue). Tighten until snug, but don’t strip the threads. The strap should sit level—not twisted or cocked.
H3: Step 4: Connect Wires — Color-Coded & Torque-Safe
Match colors precisely:
- Black (fixture) → Black (supply) - White (fixture) → White (supply) - Green or bare (fixture) → Bare or green (supply)
Twist wires together clockwise with lineman’s pliers *before* adding the wire nut. Then screw the nut on until it’s tight—no gaps, no exposed copper past the nut. Pull gently on each wire: none should come loose. If they do, re-strip ½ inch and redo.
⚠️ Critical: Never connect aluminum and copper wires directly—even with special paste. Almost no apartment wiring is aluminum (it was phased out after 1973), but if you see dull gray wire with “AL” stamped, stop and call an electrician.
H3: Step 5: Secure & Test
Tuck wires neatly into the box—no pinching. Attach the fixture body to the mounting strap per manufacturer instructions (usually two screws). Install included bulbs *before* turning power back on—many LED semi-flush fixtures won’t power up with no load or incorrect wattage bulbs.
Restore breaker. Flip wall switch. If nothing happens: double-check bulb seating and breaker position. If lights flicker or dim: likely a loose neutral or shared neutral issue—call maintenance.
H2: Troubleshooting Common Apartment-Specific Issues
H3: Lights Flicker or Dim When Other Appliances Run
This points to circuit sharing. In older buildings, kitchen outlets, bathroom lights, and bedroom fixtures often share one 15-amp breaker. A microwave + LED fixture + phone charger can push it close to 1,800W limit. Use a plug-in power meter (like Kill A Watt P4400) to log load over 2 hours. If total exceeds 1,400W consistently, request a dedicated lighting circuit—or reduce load (e.g., replace 60W-equivalent LEDs with 9W models).
H3: Breaker Trips Immediately After Turning On
Three likely causes:
- Short in new fixture wiring (check for stray strands touching metal housing) - Ground fault (moisture in box, damaged insulation) - Overloaded circuit (see above)
Reset breaker *only once*. If it trips again within 5 seconds, unhook fixture wires and test breaker alone. If it holds, problem is in fixture or connections.
H3: Smart Switch Won’t Pair or Loses Wi-Fi
Most apartment Wi-Fi signals weaken near concrete ceilings or metal ductwork. Place your router’s 2.4 GHz band on channel 1, 6, or 11 (least congested). Avoid “auto” mode—it jumps unpredictably. Also: some smart switches require firmware updates via USB cable—not OTA. Check model number (e.g., Lutron PD-6ANS needs Lutron Connect app + iOS/Android, no desktop support).
H2: Rent-Friendly Upgrades That Won’t Get You Evicted
Landlords hate drywall holes, rewired circuits, and permanent modifications. Here’s what *is* usually OK—with written permission:
- Replacing fixtures using existing boxes and wiring - Installing UL-listed smart switches (no neutral required models preferred) - Using LED retrofit kits instead of full fixture swaps - Adding plug-in LED lamp-style sconces beside beds or desks
What’s almost always prohibited:
- Running new cables through walls or ceilings - Replacing standard outlets with GFCI/AFCI unless mandated by code - Installing hardwired under-cabinet lighting without junction box access
Pro tip: Take timestamped photos *before*, *during*, and *after* work. Email them to your property manager with subject line “Lighting Upgrade – No Structural Changes.” It builds trust and documents compliance.
H2: Energy & Control Upgrades Worth Doing Now
Swapping to LED semi-flush mounts cuts lighting energy use by 75–85% vs. incandescent pendants (U.S. DOE Lighting Facts, Updated: April 2026). But real savings come from pairing with controls:
- Dimmer switches reduce power linearly: at 50% brightness, you use ~50% less energy—and extend LED life by 2–3x. - Smart switches enable scheduling (e.g., “on at sunset,” “off at 11 PM”) and remote override—critical if you travel or forget to turn lights off. - Motion sensors cut usage by 30% in closets, pantries, or hallways—no wiring needed if battery-powered (e.g., Philips Hue Motion Sensor).
Just remember: not all LED bulbs are dimmer-compatible. Look for “dimmable” on packaging *and* check the dimmer’s compatibility list (e.g., Lutron’s LED Compatibility Tool online). Mismatches cause buzzing, limited range, or premature failure.
H2: When to Call a Pro — and How to Spot One
DIY is safe *only* if:
- You’re confident identifying hot/neutral/ground - Your building is post-1980 (no knob-and-tube or aluminum wiring) - You have a working voltage tester and basic hand tools - Your lease allows cosmetic fixture swaps
Call a licensed electrician if:
- You find cloth-insulated wire (common in pre-1950s units) - The junction box is loose, rusted, or mounted to wood lath (not solid joist) - You smell burning plastic or see scorch marks on wires or box - Breakers trip repeatedly *after* confirming fixture is fine
Verify licensure: ask for their state license number and check it at your state’s contractor board website (e.g., CSLB.ca.gov for California). Avoid “handymen” quoting flat fees without inspection—real electricians charge hourly ($75–$150/hr in metro areas, Updated: April 2026) and provide written scope.
H2: Cost & Time Comparison: DIY vs. Pro Installation
| Task | DIY Time | DIY Cost | Pro Time | Pro Cost | Renter Risk |
|---|---|---|---|---|---|
| Swap pendant → semi-flush (no smart switch) | 35–45 min | $29–$89 (fixture only) | 1 hr | $120–$220 | Low — reversible, no wiring changes |
| Add smart switch + semi-flush | 1.5–2 hrs | $55–$145 (switch + fixture) | 1.5–2 hrs | $180–$320 | Moderate — requires switch box access; neutral wire must be present or switch must be neutral-free |
| Fix chronic breaker tripping | Not recommended DIY | N/A | 2–4 hrs | $250–$650 | High — misdiagnosis risks fire hazard or lease violation |
H2: Final Safety Reminders
- Never work on live circuits—even “just for a second.” - Use LED bulbs rated for enclosed fixtures if your semi-flush has a glass dome (heat buildup kills non-rated LEDs fast). - Label your breaker panel clearly. Use printed labels—not masking tape—so maintenance staff can act fast during emergencies. - If your apartment uses AFCI (Arc-Fault Circuit Interrupter) breakers, avoid daisy-chaining power strips or extension cords to lighting circuits. AFCIs trip on false arcs caused by cheap surge protectors.
Upgrading your lighting isn’t just about better ambiance—it’s about taking control of your environment safely and sustainably. Done right, a semi-flush swap improves visibility, reduces eye strain, and lowers your electricity bill—without triggering a maintenance ticket or security deposit dispute. For deeper wiring diagrams, code references, and printable checklists, visit our complete setup guide.