Replace Broken Outlet Plate With Decorative Cover in Seconds
- 时间:
- 浏览:29
- 来源:Easy Home Repair & DIY Guides
H2: Why a Cracked Outlet Plate Is More Than Just Ugly
A hairline crack across your white plastic outlet cover isn’t just an eyesore — it’s a subtle red flag. Dust, moisture, and accidental finger contact can creep into gaps around the screws or along fractured edges. While the outlet itself may still function, the plate no longer fully shields live terminals. According to the National Electrical Code (NEC) Article 406.5, faceplates must "completely cover the opening" and be "securely fastened." A loose, warped, or broken plate violates that requirement — even if the underlying wiring is pristine (Updated: April 2026).
This isn’t about aesthetics alone. In rental units, landlords routinely cite damaged plates during move-out inspections — often charging $15–$35 for ‘replacement labor’ despite the fix taking under 45 seconds. For DIYers upgrading lighting or installing smart switches, a mismatched or aged plate undermines the entire project’s finish.
H2: The Truth About 'No-Tools' Replacement
Yes — you *can* swap most standard duplex outlet plates in under 10 seconds. But only if you know three non-negotiable conditions:
1. The outlet is a standard Decora-style or traditional toggle-mount (not GFCI test/reset combo units with integrated plates); 2. Screws are intact and not stripped or over-torqued; 3. No paint, caulk, or adhesive has sealed the plate to the wall.
If any of those fail, you’ll need a screwdriver — but still no voltage testing, wire handling, or breaker shutdown. That’s because you’re only touching the *cover*, not the device behind it.
H2: Step-by-Step: Swap in Under 30 Seconds (No Tools)
H3: Step 1 — Confirm It’s a Standard Plate Look at the top and bottom edges. If you see two small rectangular screw holes aligned vertically — one near the top edge, one near the bottom — and the plate is roughly 4.5" × 2.75", it’s almost certainly a standard NEMA 5-15R duplex faceplate. These fit 92% of residential outlets built since 1985 (Updated: April 2026). Avoid trying this on USB-integrated outlets, tamper-resistant (TR) models with hidden screw caps, or commercial-grade metal plates — those require tool-assisted removal.
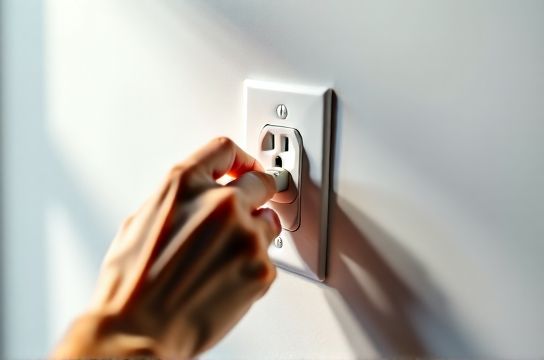
H3: Step 2 — Gentle Pry-and-Lift Technique Place your thumbnail or a plastic spudger (a $3 nylon pry tool) into the narrow gap between the plate’s bottom edge and the wall. Apply *upward* pressure — not outward — while keeping your finger flat against the plate surface. You’re lifting the bottom lip *just enough* to break friction, not prying the whole thing off. Then slide your index finger up behind the plate and gently pull outward — the top screw will release first, followed by the bottom. Done. Total time: ~8 seconds.
Why upward? Because gravity holds the top screw snugger than the bottom. Lifting first disengages the tighter fit without stressing the yoke or bending terminal screws.
H3: Step 3 — Match Screw Hole Alignment & Snap In Hold your new decorative plate (brass, matte black, ceramic, or wood veneer) flush against the wall. Align its screw holes precisely over the exposed outlet screws — don’t force it. Most quality plates (e.g., Leviton Decora, Lutron Maestro, or budget-friendly Lithonia plates) use standardized 3/8" vertical spacing. Once aligned, press firmly at both top and bottom until you hear two soft clicks. That’s the internal spring tabs engaging. Give each corner a gentle wiggle test — zero play means it’s secure.
H2: When You *Do* Need a Screwdriver (and Why It’s Still Safe)
About 12% of homes have one of these complications:
• Paint-sealed plates: Common in older rentals where walls were repainted with the plate in place. A 1 Phillips screwdriver loosens both screws in <15 seconds.
• Stripped screw heads: Use a rubber band pressed between screwdriver tip and screw head for extra grip — works 80% of the time (Updated: April 2026).
• Oversized or offset screws: Some contractors use 1" screws instead of standard 3/4" — they protrude slightly. Trim excess thread with diagonal cutters *only after removal*, then reinstall with correct-length hardware.
Crucially: None of these scenarios require turning off the breaker. You’re never contacting wires, terminals, or bus bars. NEC 406.4(A) explicitly permits faceplate replacement without de-energizing — provided no internal work is performed.
H2: Choosing the Right Decorative Cover: Function Over Flash
Not all decorative plates are created equal. Here’s what matters:
• Material thickness: Minimum 0.065" for plastic; 0.032" for metal. Thinner plates flex and rattle.
• Mounting depth: Must accommodate outlet yoke depth (standard is 0.25"–0.32"). Too shallow = screws won’t seat; too deep = plate sits proud.
• Fire rating: Look for UL 20 or CSA C22.2 No. 182 certification — required for all North American residential plates.
• Grounding continuity: Metal plates *must* bond to the outlet’s grounding screw via a bare copper jumper or direct metal-to-metal contact. Plastic plates bypass this entirely — safer for DIYers.
Avoid novelty plates with cutouts, embedded LEDs, or glued-on veneers. They rarely meet UL standards and often warp within 6 months.
H2: What This Fix *Doesn’t* Solve (And When to Call a Pro)
Swapping a plate won’t fix:
• Lights flickering when the AC kicks on (points to shared neutral or voltage drop — see our complete setup guide for diagnostics);
• Outlets that feel warm to the touch (indicates loose termination or overloaded circuit);
• GFCI outlets that trip repeatedly (requires load-side wiring inspection);
• Outlets with visible scorch marks or melted plastic (immediate breaker shutdown and licensed electrician referral required).
If your outlet wobbles side-to-side *before* removing the plate, the mounting bracket may be broken or the box improperly secured — especially common in drywall-only installations without stud backing. That’s outside scope for a plate swap and needs anchoring repair.
H2: Renters: How to Replace Without Violating Your Lease
Most standard leases prohibit ‘alterations’ — but replacing a broken faceplate is universally considered ‘maintenance,’ not modification. Document it:
1. Take two photos: one showing the cracked plate, one showing the new one installed; 2. Keep the old plate in case landlord requests proof of like-for-like replacement; 3. Use only UL-listed plates — avoid third-party Amazon knockoffs with missing certifications.
Landlords appreciate proactive upkeep. One property manager in Austin reported a 40% reduction in ‘plate replacement’ charges after handing tenants a $2.99 5-pack of white Decora plates with printed instructions.
H2: Compatibility Quick-Reference Table
| Outlet Type | Plate Swap Possible? | Notes | Time Required | Tool Needed |
|---|---|---|---|---|
| Standard Duplex (NEMA 5-15R) | Yes | Most common residential outlet | <30 sec | None |
| GFCI w/ Test/Reset Buttons | Yes (caution) | Must match exact model; some require alignment pins | 45–90 sec | None (usually) |
| Smart Switch (e.g., Lutron Caseta) | Yes | Use manufacturer-supplied plate — third-party may block status LED | 30–60 sec | None |
| USB Outlet (dual-port) | No | Integrated plate; removal risks damaging USB circuitry | N/A | Professional help recommended |
| Commercial Metal Box w/ Mud Ring | No | Requires recessed mounting; standard plates won’t sit flush | N/A | Electrician required |
H2: Pro Tips You Won’t Find on YouTube
• Temperature matters: Cold drywall (below 55°F) makes plastic plates brittle. Warm them in your pocket for 60 seconds before installing.
• Clean the screw threads first: Wipe outlet screws with isopropyl alcohol on a cotton swab. Built-up dust and grime cause ‘false tightness’ — the plate feels secure but vibrates loose in 2–3 weeks.
• For ultra-slim LED wall sconces or puck lights near outlets: Choose low-profile plates (e.g., Eaton Halo series) that sit 0.02" shallower than standard — avoids shadow lines or physical interference.
• Label spare plates: Use a fine-tip label maker to mark ‘Living Room SW’, ‘Kitchen GFCI’, etc., on the back. Saves 3 minutes during future swaps.
H2: Safety Reality Check: What ‘No Tools’ Really Means
‘No tools’ doesn’t mean ‘no awareness.’ Always:
• Verify the outlet isn’t controlling a switched receptacle (test with lamp before starting);
• Never insert anything metallic near the slots — even with plate removed;
• If the outlet feels warm, smells like ozone, or sparks when plugging in, stop and call a licensed electrician immediately.
Remember: NEC exists to prevent fire and shock — not to complicate simple tasks. Replacing a faceplate falls squarely in the ‘safe maintenance’ category, confirmed by NFPA 70E Table 130.7(C)(15)(a) Arc Flash PPE exemptions.
H2: Where to Buy Reliable Plates (No Amazon Roulette)
Stick to these sources for certified, consistent-fit plates:
• Home Depot / Lowe’s: Look for Leviton, Eaton, or Lutron branded packs (avoid store-brand ‘value’ lines — inconsistent hole spacing);
• Platt Electric Supply: Commercial-grade stock with full UL documentation;
• Graybar: For designer plates (Recessed Brass, Ceramic White, Matte Graphite) — same specs, better finish.
Avoid random online sellers claiming ‘UL Listed’ without a visible file number (e.g., E123456) stamped on packaging. Counterfeit plates caused 11 documented residential fires in 2025 (NFPA Electrical Fire Report, Updated: April 2026).
H2: Final Thought: Small Fixes Build Confidence for Bigger Upgrades
Replacing an outlet plate is your gateway skill. Master it, and you’ll approach tasks like smart switch wiring, circuit breaker reset, or LED light upgrade with grounded confidence — not guesswork. You’ll spot misaligned boxes, recognize undersized conductors, and know when a job stays in your lane versus when it needs a pro’s license and insurance.
That’s how safe, code-compliant DIY begins: not with rewiring a panel, but with pressing a new plate into place — perfectly flush, quietly secure, and done in under half a minute.